
Photographed and britten by
John M. Young
A volcano in Nebraska? Well the Lewis and Clark Expeditiondid come across a portion of a bluff along the Missouri River which had volcanic-like characteristics,
“On August 24, 1804, Clark explored a distinctive “180 or 190 feet high” bluff along the side of the Missouri River. He wrote, “Those Bluffs appear to have been laterly on fire, and at this time is too hot for a man to bear his hand in the earth at any debth, gret appearance of Coal. An emence quantity of Cabalt or a Cristolised Substance which answers its discription is on the face of the Bluff.” Ordway further elaborated that the bluff “had a Sulpheras Smell”.
Following Lewis and Clark, later fur traders and travelers frequently noticed dense smoke and fire in this region. In 1839, French explorer J. N. Nicollet attempted to prove that these phenomena were not of volcanic origin. He theorized that the decomposition of beds of iron pyrites in contact with water resulted in a heat capable of igniting other combustible materials. Still, by the late 1800s the bluff was known as the Ionia Volcano. It was named after the nearby town of Ionia, established in 1856. In 1878, a flooded Missouri River undermined the bluffs and a large section of the “volcano” fell into the river. The same flood heavily damaged the town of Ionia, which was later completely abandoned.” (https://www.nps.gov/places/ionia-volcano.htm)
This pipe also appears to have volcano-like characteristics and judging by its condition, it may be better tossed into a volcano as a sacrifice. But wait, I can make it usable. This pipe came as part of an estate lot from a ways south of here in Falls City, Nebraska.

The pipes were all in pretty rough condition and looked like they had spent considerable time in some barn of storage shed. Below are some photos of the Stone Age Volcano as it looked upon arrival.


The pipe stem was severely oxidized, to the point where I wondered if it could be salvaged. The stummel had a thick clear coating that was fading in places and would have to be removed. The briar itself, showed little grain or character and was a sickly yellow-tan. I thought, “well, it must have been a pretty good smoking pipe since it looked quite well used.”
Background
A search of both pipephil.eu and pipedia.org turned up nothing for Stone Age. I thought this strange because when you search for Stone Age on eBay there were five listed. Of the few that I looked at, a couple had stamps like this pipe, below is one.

(Stone Age, Walnut, #607, Free Hand w Natural Rim, Vintage Estate Pipe | eBay)
Heck there was even one with a box:

(New Stone Age Natural 614 Virgin Italy Briar Pipe Fancy Ebonite Rubber Stem Box | eBay)
All of them seemed to be Danish inspired freehands. This led me to believe that they were likely imported by the likes of a Mastercraft or Wally Frank. Importers that historically do not have good records. They were also likely to have been made during the heyday of pipe smoking and modeled after the Danish styling and produced for the 1970s American market. Given the above is all conjecture on my part and does not intend to speak ill of any carver or importer of these pipes.
The Restoration
This sun bleached oxidized volcano started with a clean denim piece to protect the work surface from the horrors sure to come.

I started with the stem as it looks like it would require a prolonged stay in the deox hotel, also known as Before and After Extra Strength Deoxidizer. In preparation of the deox, I first sanded and steel wooled the stem to remove the worst of the surface oxidation.

Next I cleaned the airway with bristle pipe cleaners dipped in 95% ethyl alcohol.

The stem then made its entrance into the Before and After Extra Strength Deoxidizer. A pipe cleaner was inserted into the tenon to act as a hanger, suspending the stem in the solution.

Back at the workbench the tobacco chamber was reamed to remove the accumulated cake.

The PipNet did most of the work removing the cake. The Smokingpipes Low Country Reamer and the General triangular scraper saw some and the chamber was sanded with 220 sandpaper wrapped around a wood dowel. The chamber appeared free of any damage.

The shank airway was fairly dirty and was cleaned out with a Kleen-Reem shank drill, dental scraper, folded bristle pipe cleaners and cotton swabs along with a good amount of 95% ethyl alcohol.

The stummel was taken to the sink for a scrubbing with undiluted Murphy Oil Soap and a nylon brush. The soap was rinsed with warm water and the stummel dried with a cotton hand towel.

At the workbench the stummel was wiped with a make-up pad dipped in 95% ethyl alcohol. The alcohol had little to no effect on the clear coat finish. I then tried acetone, this too met with little result but the finish was softened by the acetone. I submerged the stummel into a jar of acetone topping the jar off with fresh acetone and let the stummel sit in there for an hour.

After the hour, the stummel was removed and rubbed with acetone soaked make-up pads. Apologies for neglecting to photograph this part. The clear coat was very stubborn and difficult to remove even after the hour long acetone bath. I eventually resorted to a coarse sanding sponge/block.

The next day the stem was removed from deox and allowed to drip excess solution back into the jar.

It appeared much better than when it entered.

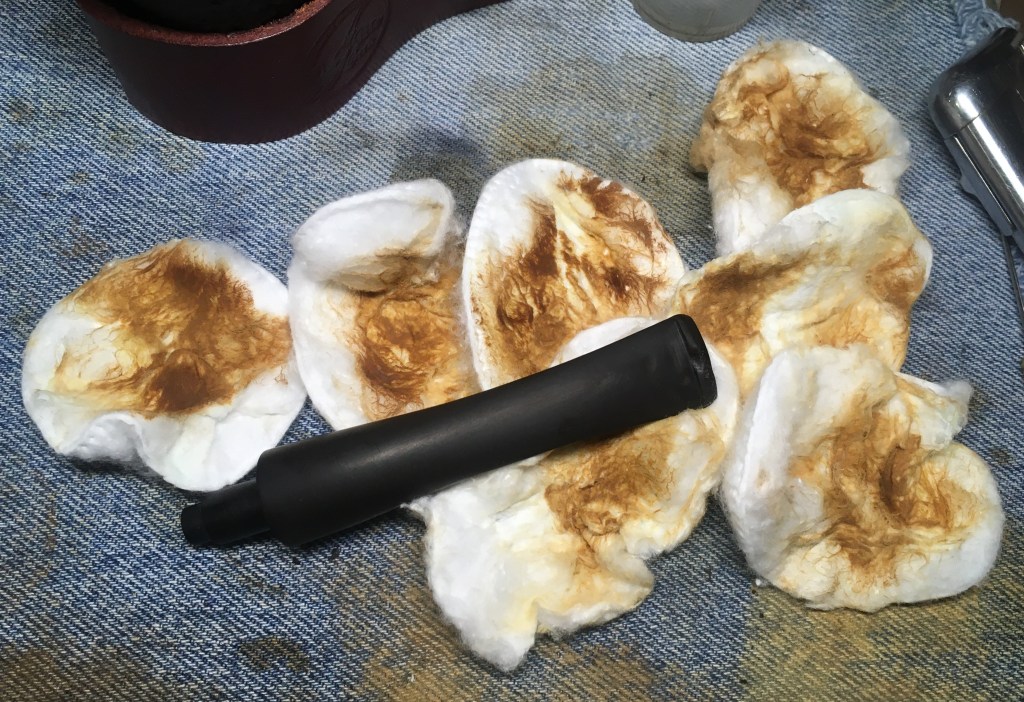
Vigorous rubbing with a cotton rag removed the remaining solution and some of the surface oxidation.

Back at the benchI sanded the stem with a series of sanding sponges in grits of 400-3500. Between each sponge I rubbed mineral oil onto the stem and wiped it with a paper towel. I then used several applications of Before and After Fine Polish on a soft cotton cloth. This seemed to have removed the last of the oxidation.

The stummel had been sanded with 220-400 grit sanding sponges, maily to remove the finish but also removing scratches. I didn’t want to sand any finer as dye is not absorbed as well with very fine sanding. I decided to try to use a contrast dye to bring out the briar grain better. I wanted to use a black dye as the base. I prepped the area by covering it with a paper towel. Fiebing’s black Leather Dye would be the dye. A cork was used to pluck the tobacco chamber. A folded pipe cleaner would be my applicator and a lighter would be used to flame the wet dye, burning off the alcohol solvent and setting the dye into the briar.

Below is a poorly focused photo of the stummel with its new black coating.

After it had dried for about 30 minutes I took the stummel to the buffer and used rouge compound to buff away the black dyed outer surface.

This left me with a stummel which was still too dark for the look I wanted. I returned to the workbench and sanded away the outer surface. The black dye penetrated the softer grain more deeply than the harder grain. By sanding the outer surface I accentuated the grain leaving the softer wood darker than the harder wood.

Next came a second round of dye, this time with a diluted Mahogany. The Mahogany dye was diluted by about ½ with 99% isopropyl alcohol. The dye was applied with a cotton swab and flamed as before with the black dye.

The resulting dye-ed stummel was allowed to dry for about an hour then sanded with a series of sanding sponges from 400-3500 grit. Between each sponge the stummel was wiped with an alcohol dampened make-up pad. After the sanding the stummel received a coating of Before and After Restoration Balm and allowed to sit for 20 minutes.

The stummel was wiped with an inside out athletic sock to remove any remaining Restoration Balm.

The pipe was then taken to the buffer where several coats of carnauba wax were applied to the stem and stummel. The final step was a hand buffing with a microfiber polishing cloth.
I have to admit that I am not a fan of the volcano shape nor do I like fancy stems. I do like a plateau top and shank end but I doubt these are actual plateau, merely carved versions. I can say that I was quite pleased with the results of the contrast dying. That brought out grain that I never thought would have been possible with this pipe. The stem did polish up nicely and does look good with this volcano. Overall it is a great improvement of how the pipe appeared before and I hope that it will bring someone hours of enjoyment in the future. The dimensions of the Stone Age Volcano are:
Length: 5.33 in./ 135.38 mm.
- Weight: 1.10 oz./ 31.19 g.
- Bowl Height: 1.43 in./ 36.32 mm.
- Chamber Depth: 1.08 in./ 27.43 mm.
- Chamber Diameter: 0.60 in./ 17.53 mm. (Conically bored diameter is at the top)
- Outside Diameter: 1.32 in./ 33.53 mm.
I do hope that you have found something here useful to your own pipe care, maintenance or restorations. If you like this sort of thing, please click the like and subscribe buttons. Thank you for reading the ramblings of an old pipe lover.
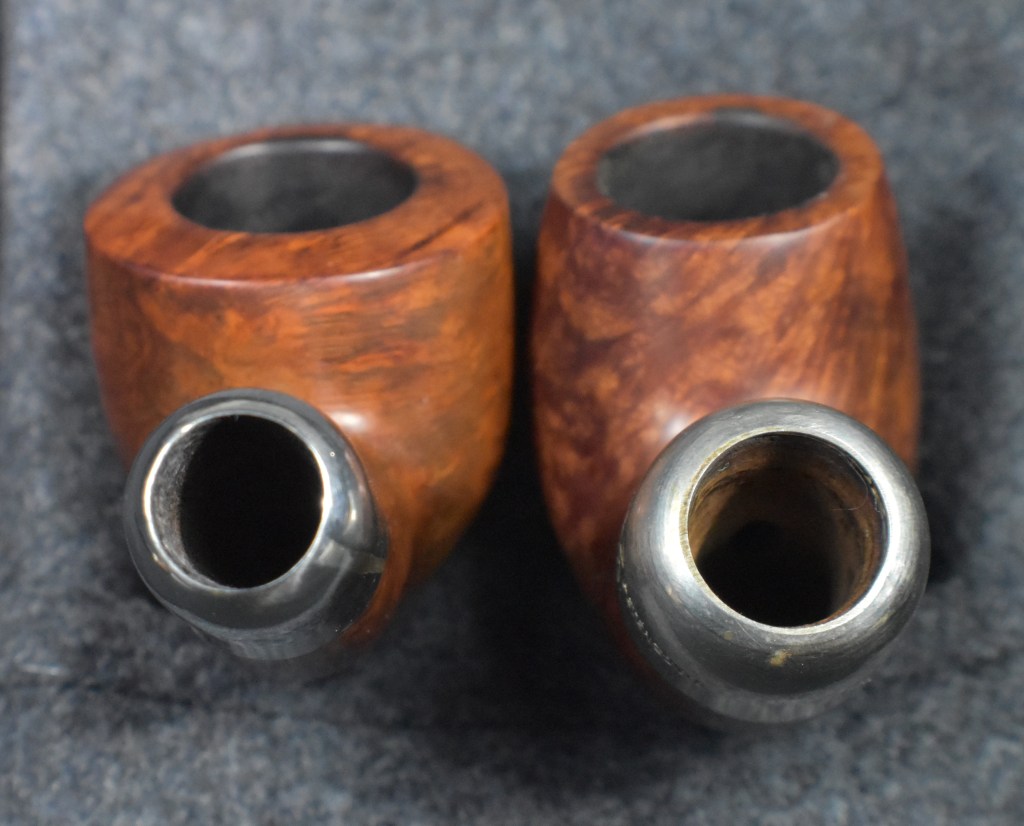
Below are some photos of the finished Stone Age Volcano pipe.


 well, it was not much to go on and it looked like a stretch but, follow it, I did. The link was to a French pipe maker LMB. The only text was the following and it appears roughly translated from French to English: “From Les Pipiers Français — Histoire et Tradition. Gilbert Guyot


 (
(


 (
(


Leave a comment