I remember an old advertisement for Camel cigarettes where the main actor walks a mile for a Camel cigarette. That commercial was made about thirty years after this pipe while the advertisement campaign by Camel was actually started in 1920. (https://tobacco-img.stanford.edu/wp-content/uploads/2020/03/06212512/camel_creativehistory.pdf) I still associate camels with tobacco. If you have followed my blog for any time you have seen me restore several Marxman pipes. I admit to being a Marxman fanboy. Having read about and seen images of Robert Marx’s figural pipes I knew I wanted to have one in hand. That is where this camel enters the story. I saw the photo from the eBay listing:
Background
As I said earlier, I have restored several Marxman pipes this year. I will link a couple which I think did a fair job at documenting the company history: Marxman Jumbo and Marxman Mel~O for those who are interested in reading about this amazing company.
Back to the pipe in hand, The eBay listing photo was not a great photo and the others were no better.
I could tell, kind of, that this was a similar camel from the 1950 Marxman catalog.
Image above is from pipedia.org circa 1950s catalog. Now, I know that the above image is not stellar quality but I think the camel in hand looks to be of better quality than the quality of the carved pipe in the catalog image. There seems to be a great difference in the carving quality of some of the Marxman carved figural pipes which I have seen photos of. I can’t help but wonder if the figurals from the early 1940s were of a higher quality than those of the 1950s. Allow me to show a couple of screen captures from Etsy and eBay of recent auctions to make this point.
The first two images below appear to be rather good quality carvings and I realize that image quality plays a major role in assessing the apparent quality of a piece.
While the next two images show carvings of a lower quality or lesser detail:
All of the pipes are listed as “Marxman” but stampings of the shank can only be verified on the Ubangy Male and the parrot pipes.
MasterCraft purchased Marxman in 1953 and started importing pipes from France and Italy. These foreign made Marxman pipes do not have the “magic” of the Marxmans made in New York. I cannot quantify the magic and I do have a French made Marxman spigot that is a truly wonderful smoking pipe but there is just something missing from the Marxmans after the sale to Mastercraft.
The Restoration
The Camel got itself a nice soft piece of denim to rest upon.
The first stem was the reaming of the tobacco chamber.
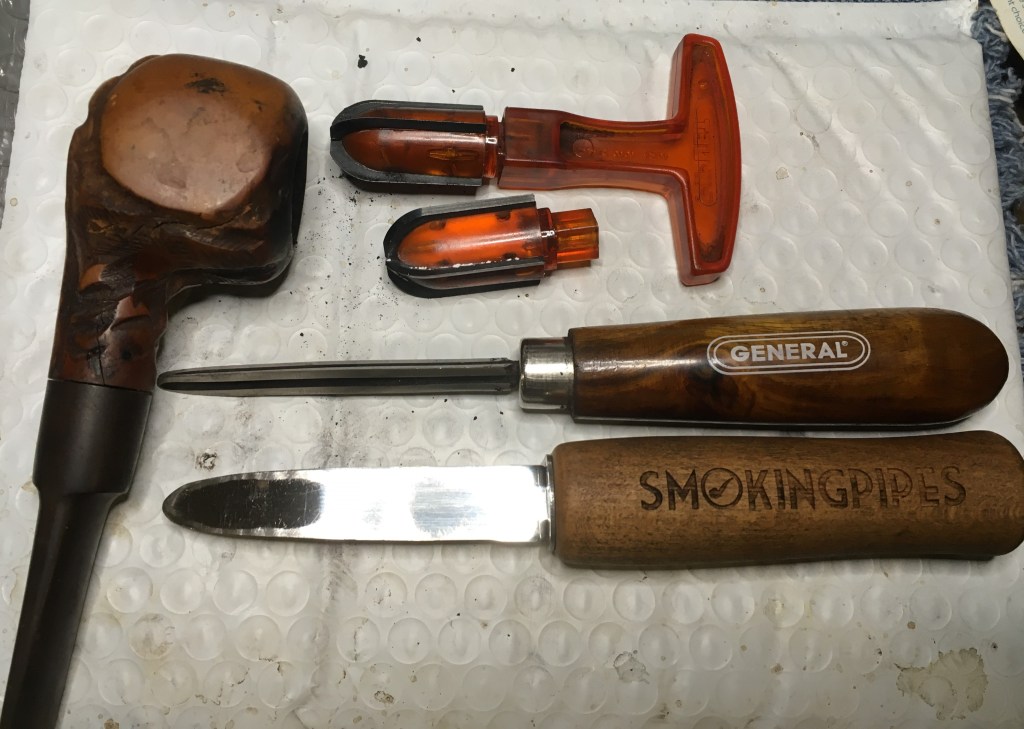
The very deep tobacco chamber. The Kleen-Reem was used for this due to its reach. The chamber was also scraped with the Smokingpipes Low Country reaming knife and sanded with 220 sandpaper wrapped around a wood dowel.
The stummel was then taken to the sink for a scrub with undiluted Murphy Oil Soap and a nylon scrub brush. The soap was rinsed with warm water and the stummel dried with a cotton hand towel.
Back at the workbench the briar was looking better without the years of accumulated dirt and grime. Fortunately it did not smell like a wet camel.
There was still some lava present in the carvings on the rim. I cleaned this with 95% ethyl alcohol and a brass brush.
I failed to photograph the cleaning of the shank. I guess I was so excited to be working on a Marxman figural that I lost myself in the task.
I did regain my composure while cleaning the stem. This was done with 95% ethyl alcohol and bristle pipe cleaners. You can see from the pipe cleaners, in the photo below, that the stem was in need of a cleaning. I assure you that the shank was also quite dirty and required many scrubbings with a nylon shank brush, alcohol dipped cotton swabs and folded pipe cleaners.
The stem exterior was in far better shape than the interior. It had slight tooth chatter but no deep dents.
I filed the tooth chatter with a small flat file on both the top and bottom of the stem.
I wrapped the shank in painters tape to protect it during the sanding. Oh, below you can see how the lava cleaned up from the rim too. Sorry for not photographing that cleaning.
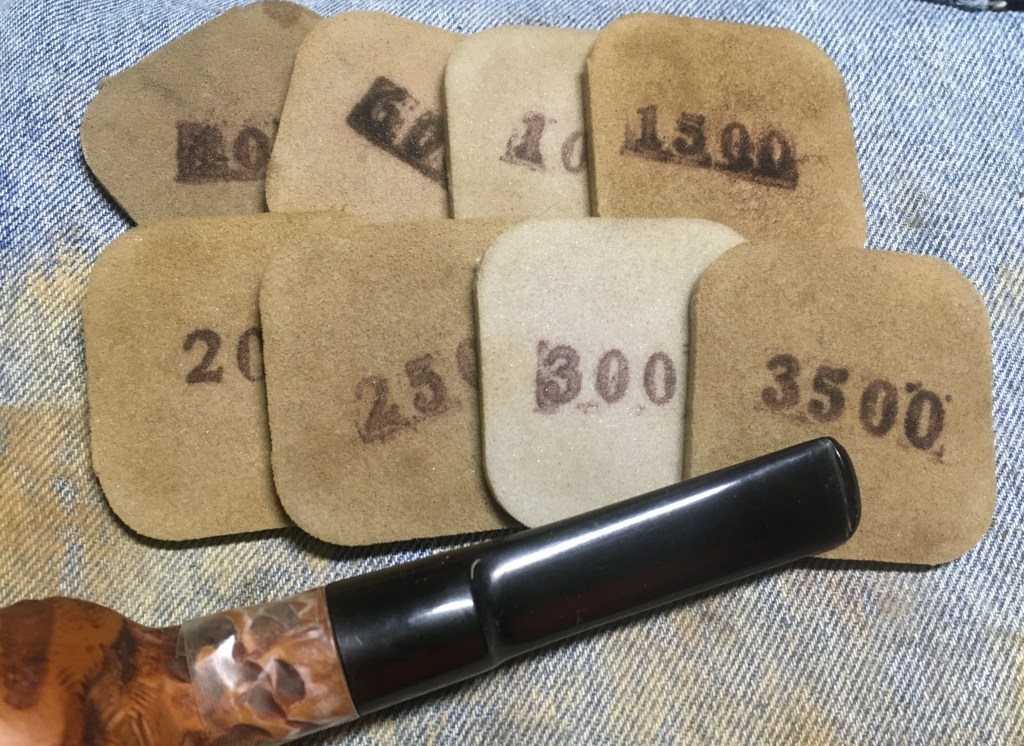
The stem was sanded with a series of sanding sponges from 400-3500 grit. Between each sponge I rubbed the stem with mineral oil and wiped it with a paper towel.
The stem was then worked with micro-mesh pads from 4000-12000. Between each pad the stem was rubbed with Obsidian Oil and wiped with a paper towel.
The stummel had a coating of Before and After Restoration Balm rubbed into the carvings by a baby toothbrush.
The Restoration Balm was allowed to work it’s magic for 20 minutes. It was then vigorously hand buffed with an inside out athletic sock to remove the excess balm.
I cleaned the baby toothbrush by dipping it into 95% ethyl alcohol and rubbing the brush on the denim piece. This was repeated several times to remove all of the Restoration Balm on the brush bristles. I then used the baby toothbrush to apply Renaissance Micro-Crystalline Wax to the stummel. I buffed the stummel with a shoeshine brush then with a fluffy microfiber polishing cloth.
The pipe was taken to the buffer where I applied several coats of carnauba wax to the stem and to the smooth heel where the briar was stamped. I did not apply carnauba to the carved surfaces of the stummel. The stem was hand buffed with the microfiber polishing cloth to further raise the level of shine.
There you have it, the 1940s Marxman Camel restoration. Although I am sure my oldest granddaughter will declare this is a llama not a camel. She has a thing for llamas and rearranging the pipes in my pipe racks. I am very pleased with how this restoration turned out. I’d always wanted to lay hands on a Marxman figural and this one was a beauty. The briar looks great, cleaned and conditioned. The stem polished-up wonderfully and together they are quite stunning. Filling the entire cavernous bowl would provide lengthy smoke. I am thinking at least a couple of hours. Certainly enough time to walk a mile.
The dimensions of this Marxman Jumbo C are:
Length: 6.08 in./ 154.65 mm.
Weight: 2.67 oz./ 75.60g.
Bowl Height: 3.5 in./ 80.00 mm.
Chamber Depth: 2.24 in./ 57.00 mm.
Chamber Diameter: 0.79 in./ 20.07 mm.
Outside Diameter: 1.57 in./ 39.88 mm.
I do hope that you have found something here useful to your own pipe care, maintenance or restorations. If you like this sort of thing, please click the like and subscribe buttons. Thank you for reading the ramblings of an old pipe lover.
Loading…
Below are some photos of the finished Marxman Camel.
This may just be the longest restoration yet. Trust me when I say this project has been ongoing since August 15 and today is September 10. For context a normal restoration takes me 2-4 hours not including drying or soaking time. Let me start in the beginning which normally is where stories begin. This pipe was purchased on August 6. I knew it had issues, which you will see shortly, and would allow me to practice several techniques that I wanted to become better at. The pipe was listed on eBay as a “Buy now” for $20 or best offer. I offered the seller $16 and they accepted. In a few minutes you will think I am losing my cognitive faculties or that I probably never had that large of a faculty to start with.
The pipe was sent from Hudson, New York to the wilds of southeast Nebrask and arrived after 6 days, August 12. Upon opening the package I was a bit surprised at the severity of the issues which I had willingly adopted. I’ll let the photos speak for themselves. Here is the pipe prior to any work done.
Remember, I said it had issues. I can hear folks saying, “What kind of masochistic idiot are you?” and probably some comments about wanting to sell me fine swamp land in Louisiana or perhaps a bridge in Brooklyn. I wanted to practice the cracked bowl pinning technique by Charles Lemon (you can see that here), repairing cracked shanks and I am continuously working on different ways to repair chewed up mouthpieces (this time with black epoxy resin). So, now you see I thought I could do all of those things with one pipe. There was madness to my madness. No wait, that’s supposed to be, there was a method to my madness.
Background
Over the past almost a year, I have restored 7 Marxman pipes. This will be the 8th. And you say, “I thought you went by the name Nebraska Pete Geek?” Well, I just counted and I have done 12 Petersons so, the name is well founded. I do love an old Marxman pipe though. The amazing history of Robert Marx was summarized by me in an earlier blog which I will include again here:
On January 11, 2024 I blogged about a Marxman Gold banded Dublin (linked if you are interested) and wrote the following about Robert Marxman and Marxman pipes:
“My recent fascination with the post-World War Two (WWII, to properly use an acronym) led me to further appreciation of the Marketing genius of Robert Marx, the founder of Marxman Pipes Inc. Allow me to illustrate:
Those are the back covers of Pipe Lovers Magazine for each month of 1946. That represents a substantial investment in building and maintaining one’s brand name.
Here is a quick review of Marxman pipes from pipedia.org:
“Marxman (Marxman Pipe Company) was created by Robert (Bob) L. Marx in 1934, when he was 29, and after he had worked for the William Demuth Company. His pipes were not outstanding because of the quality of their wood (probably Algerian), but Bob started making unique sculpted pieces, which brought the brand fame in the World of Hollywood cinema. Actors like Zachery Scott, Dennis Morgan, Jack Carson, Alan Hale, Joel McRae, and Ronald Reagan were some of the faces that appeared on the bowls.
Bob knew how to innovate and took full advantage of marketing and press advertising in order to sell the brand–one of his slogans being “Relax with a Marxman”.
In a recent forum post on Pipesmagazine.com, contributor jguss posted the following from the February 2, 1935 issue of the UnitedStatesTobaccoJournal:
A remarkable article showing the business acumen as well as a photo of the man himself. Thank you, jguss.
This is one of my favorite quotes about Rober Marx:
“Ted also said: Several years before UST bought Mastercraft, M/C had aquired Marxman Pipes. A wonderful kind man, Bob Marx was still working as a salesman in NYC, and I was fortunate to make a few sales calls with him. You all remember Charles Atlas? Bob Marx was about 76 and had just been awarded the (I think) Atlas Award for being the finest speciman of manhood over 70 years old in NYC, or maybe the state.
M/C had some inventory of Marxman stuff, but not a lot. I know very little about Marxman. Did they make, import, or both?” (Mastercraft – Pipedia)
The “Ted”, who is being quoted above, was the nickname of Tom Douglas. Here is an announcement of Mr. Douglas’ passing from Pipesmagazine forum November 26, 2018:
“Tom Douglas passed away at 71 years of age, this past Saturday, in Florida. It seems he had an infection in his stomach, but I don’t know much more than that, regarding what actually contributed to his death. He did have a history of heart and other health complications. I just spoke very briefly with his wife Joyce; you can imagine how she’s doing.
The impact Tom had on the pipe community is huge…beginning with an immense library of pipe knowledge through the pages of the Dr. Grabow Collectors Forum….his 25 years of service at the Grabow / Sparta pipe factory (where he retired in 1991)….his executive leadership over Mastercraft distribution for many years…”
So, at 76 years old Robert Marx was still involved in the business that he must have loved. This would have been around 1980.”
Then last winter, Mark Irwin, of Peterson Pipe Notes and author of The Peterson Pipe book, sent me a c. 1945 Marxman Brochure. I photographed the pages of the brochure and included them below.
One of the easiest things to date is a Marxman pipe. The company was formed in 1939 and sold in 1953 to MasterCraft. Though the Marxman name continued after 1953 the pipes were made in France or Italy and stamped as such with Country of Manufacture (COM) stamps. This means that a non COM stamped Marxman pipe was made in New York City between 1939-1953.
This pipe is undoubtedly a Marxman Jumbo as seen on page six of the above brochure. As a “C” size this pipe would have commanded a price of $10 in 1945. According to the Consumer Price Index inflation calculator that would equate to $173.78 today (July 1945 to July 2024). (https://data.bls.gov/cgi-bin/cpicalc.pl?cost1=10&year1=194507&year2=202407)
The Restoration
Oh no, the poor battered beauty can’t even get an unstained denim piece to rest upon. The bright side is that it will look significantly worse shortly.
I started with the reaming of the tobacco chamber using a PipNet with the size 3 and 4 blades. The #4 rarely gets to come out and play.
Typical of Marxman pipe the reaming was very easy with the cake coming easily off the briar. The chamber was sanded with 320 sandpaper wrapped around a wood dowel and taken to bare wood. No heat damage was observed.
The shank was a dirty mess. For as easily as the tobacco chamber gave up it’s accumulated cake the airway clung to it’s smoking residues tenaciously. Several scrubs with 95% ethyl alcohol and a shank brush followed by alcohol dipped cotton swabs were used. I was getting frustrated and my thoughts turned to the next steps.
It was during the repetitions of scrubbing that my mind started to process ways to repair the cracked shank. The first thought was merely a brass band. I did this with a Marxman Mel-O and that restoration turned out very well as the below photo illustrates:
My thoughts shifted to considering an internal band. I had seen a video on how to make a pipe with a military mount by J. Alan of jalanpipes.com a few years ago. Here is that video. In the video he used a piece of brass and filed teeth into the brass tube. He then used the tube to cut a circular slot or hole just outside of the mortise on the shank. A piece of brass tube was inserted into this circular slot and the shank had a reinforcement that could take significant abuse. I filed that away in the back of my mind. For whatever reason the thought of a brass reinforcing band inside the shank of this pipe seemed like a good idea. The shank was thick and could easily accommodate a band and what the heck, it was already cracked. How badly could I screw this pipe up? In hindsight, I should have watched the video again or researched this technique more but I was in “problem solving” mode.
I looked through the stock of brass tubing that I had and found a piece which looked to be the perfect diameter. It was 5/8th inch outside diameter tubing. Next I started filing teeth on the edge of the tube. I couldn’t remember how many teeth were used in the video and couldn’t be bothered to rewatch it. As you may have guessed by my complete lack of video that I really do not like videos. I think it comes from being a teacher for 32 years. Rather than read, research and learn things like I did as a student, all students ever wanted to do was “watch a video”. This is fine and dandy for seeing how to replace the gas cap door on a 2004 Ford F150 (yeah, I just did that) but there isn’t a video on the life of Robert Marx. Videos are a great tool for some things but they are not the sole source of learning. Anyway, I filed some teeth.
They looked like they would cut briar. They also looked like they would have to be brought out of the hole and have the saw dust blown off of them frequently. I was in uncharted territory and expected some learning by trial and error.
In my imagination the brass tube/cutter would be clamped into a chuck of some type and spun at some speed, probably slow and lowered or slid into the shank which would be clamped somehow. Yeah, there was a lot of “some” in my thought process at this time. I do not have a drill press nor a lathe. The thought of using hand tools for this operation seemed ridiculous. I then contacted my son-in-law’s brother who is a machinist extraordinaire. The date was August 15, 2024. He replied the next day and was worried about brass being able to cut the briar. I then realized that he spent his days cutting far tougher material like steel, stainless steel, titanium and cobalt-chromium alloys. Yeah, he works in a prosthetics lab. He had the experience, tools and know-how needed to help with this endeavor. More on this later.
I had a rim to clean up and a stummel to scrub and a whole bunch of clean cotton swabs which were demanding to be filthy..
So that is what I did. The stummel was taken to the sink and scrubbed with Murphy Oil Soap, undiluted , and a nylon scrub brush. The years of dirt and the lava came off quickly. The soap was rinsed with warm water and the stummel dried with a cotton hand towel.
Back at the bench things were looking good both in the reality of the drying stummel and in the realm of my imagination of how the shank repair would proceed.
I certainly was back in reality, with a really dirty shank.
That brought me to the next new idea I wanted to try. In one of the Facebook groups that I am in, someone mentioned using two part epoxy to repair and reconstruct buttons. I wish I could remember what group or who the person was who had sown this seed in my brain. I thought that I needed to try it out and this stem was a perfect subject. The stem was cleaned using 95% ethyl alcohol and bristle pipe cleaners then lightly sanded to remove some of the surface oxidation and allow the Before and After Extra Strength Deoxidizer access to the vulcanite.
A pipe cleaner was inserted into the remaining button, to act as a hanger suspending the stem in the deoxidizer, and it was lowered into the deox ( my term for the liquid).
According to the time stamp on the photos the stem was in deox for 7.5 hours.
That gave me plenty of time to soil another stack of cotton swabs in an attempt to exorcize the tar demons from the airwair. Finally, I was victorious and the airway was clean.
The seemingly unending airway scrub did allow me time to ponder the next step and the next technique that I wanted practice with. That is the repair of a cracked bowl using strategically placed brass pins. I first saw this technique in a post by Charles Lemon of Dads Pipes. Charles is a real restorer, unlike me, and actually does this for a living bringing back family heirlooms and working magic with his impressive skills. You can find Charles’ pinning tutorial blog here. I had used pins to repair a cracked shank as a first time practice ordeal and again with a cracked bowl, both blogs are linked if you care to make fun of my attempts. This cracked bowl was more of a cosmetic crack in the briar. It did not extend through the wall of the tobacco chamber and looked more like it was from an improperly cured piece of briar rather than a case of excessive cake. Either way, I was going to repair it with brass pins. I first filled the crack with brown cyanoacrylate (CA, super glue) pushed into the crack with a fly tying bodkin. The CA was allowed to cure in it’s own time and was not accelerated by a CA drying accelerator.
Once cured the surface of the CA was roughened up a little bit to better blend it with the carving on the stummel. I used a round rat tail file and a diamond needle rat tail file for the roughening.
My jumping around from task to task with this restoration shows my desire to plan and think through each of the multi-step procedures used with each technique. I use the time stamps from the photos to sequence the restoration process that I present to you. I apologize if this makes it hard to follow while reading. This is the way it all happened though
I wanted to give the CA adequate time to cure so I busied myself with the repair/rebuilding of the stem. Someday I’ll get a drill press or a lathe and that cool tenon turning tool and I’ll just make stems rather than try to reconstruct them. There’s that imagination again. Anyway, the stem was removed from deox and wiped with a coarse shop rag. This more abrasive material is great for absorbing the excess deoxidizer and abrading away some of the oxidized vulcanite.
Aug. 15 (I’m using the dates here to show the curing times of the epoxy.)
To rebuild the button, I first cut a dam from a plastic lid. This dam was coated with petroleum jelly and inserted into the airway in an attempt to keep the epoxy for sealing it off. I mixed the two part J. B. Weld black epoxy as per product instructions.
I used a piece of Scotch tape around the bottom of the stem to aid in keeping the epoxy on the top then applied the epoxy to the fill area with a fly tying bodkin. The stem was set aside for 24 hours to cure.
Aug. 16
The next day, I checked on the epoxy to see how well it was working as a fill material.
The dam was removed easily and appeared to have work at keeping the epoxy from the airway.
I took the stem to the photography bench for some better than the phone photos.
The surface was roughed up with a 320 grit sanding sponge to give the next application of J.B. Weld something to bond to and the dam was reinserted.
Another batch of epoxy was mixed then applied to the area to build up the missing material for a proper button. This application was again set aside for 24 hours.
Aug. 17
This was nowhere near as quick as using a black cyanoacrylate (CA, super glue) to fill an area but I was still curious as to its effectiveness. I filed the 2nd application and reformed the button.
The epoxy filed and sanded more easily than CA would have. I was sure that it would cure to a harder consistency in a couple of days.
Aug. 18, 8:30am
A third application of J.B. Weld was applied to the stem. This time to a larger area. I wanted a wider area to use for blending the original stem to the new patch. This application also was spread on the top and bottom of the stem.
A pipe cleaner was inserted to act as a hanger and the stem was hung to cure.
Aug. 18, 9:50pm
13 hours later, I checked on the curing of the epoxy. The surface was rough rather than smooth, as it had been with the previous two applications. I did like the way tha material built up though.
Aug. 19, 1:00pm
Another 15 hours later and I returned to the cured epoxy on the stem. The rough texture remained and the epoxy felt more tacky than the previous iterations. The new material pulled away from the second application as I was filing it. Bah, that won’t do. I peeled the 3rd application off the stem. I was not sure if it was a bad mix or what had happened. One thing that I was certain about was that I preferred to use black CA for rebuilding buttons.
All this time between sessions with the pipe did allow me to thoroughly plan how I wanted the pinning to go. I drilled 3 holes with a 2mm drill bit. Each hole was drilled at a different angle and each transected the crack. The below photo shows each hole with a piece of 2mm brass rod. I had gotten better with my drilling and none of the holes had emerged all the way through the stummel.
The hole depths were measured with their respective rods. Each rod was cut slightly shorter than the depth of the hole.
I applied a small drop of brown CA to a hole and quickly pushed the corresponding rod into it to a point below the briar surface. The below photo shows all three rods pressed into place. You can still see the brass peeking from the holes.
The holes were then filled with another application of brown CA and topped with a small scoop of briar dust. The dust was pressing into the wet CA. The fill was then sanded smooth on the rim and slightly smoothed in the carved areas. This project took an intermission while I waited to schedule a visit to the machine shop of my fellow conspirator.
Sept. 9
A date had been set for the machine shop visit. This was a clandestine operation after hours. In preparation for the event, I needed to glue the shank crack with CA. I used a thin clear CA to penetrate the crack as deeply as possible. This was applied with the ever popular fly tying bodkin and quickly clamped.
The clamping provided no visual compression of the crack but it made me feel like I accomplished something. I then applied a thin line of brown CA to the crack to fill it with the fly tying bodkin.
Sept. 10
Now to protect my fellow conspirator’s identity, since we were infiltrating his shop after hours and without the knowledge of his overlord, I will refer to him as Christian. A fitting name and perhaps title. I explained what I thought we could do and how I imagined it happening. Christian immediately understood and dashed my imagined process with a healthy dose of reality. He said that this was a job for the milling machine. The first order of the new reality based procedure was to shorten my brass cutter to fit into a collar which could be mounted into the chuck of the milling machine.
Next we needed to clamp the stummel into position in a way that limited movement without marring the briar. This was done with a couple of scraps of a clear soft plastic between the vise jaws and the stummel.
The cutter was aligned with the shank.
Turtle speed was selected on the milling machine.
And the cutting was begun, very slowly, maybe 0.5 mm then I’d blow the dust away with the compressor.
This continued and was looking very promising. I hadn’t really thought about how deep to make the slot. It was determined that 5 mm would probably be sufficient.
The depth gauge was set to the 5 mm goal and the cutting proceeded.
Once achieved, the slot looked as good as I had imagined.
The next task was to cut a 4.7 mm wide brass band from the same tube the cutter was made with. This would ensure a perfect fit. We moved to the lathe to square up the end of the brass tube.
The lathe was set to cut a precise 4.7 mm wide band. We thought that this would allow me to press the band into the slot so that it would be flush with the face of the mortise and would require no sanding of the brass band. The no sanding was important for a proper fit with the stem to maintain the shank to stem joint.
The band cutting proceeded successfully on the second attempt after Christian had sharpened the cutter. The first attempt met with a hot mess. Literally, the dull cutter made an out of round band that was very hot.
The band seemed to fit beautifully. It was not pressed in fully as there was no way to extract it once it was in there. Also, my crack glue-job seemed to be holding without the reinforcing band.
After many thank-yous, a Mission Impossible like extraction from the machine shop and a drive back home the Marxman was back to the home workbench.
I thought about which glue to use, CA or epoxy for gluing in the band. I settled on epoxy due to my fear of not being able to move fast enough for the CA and having the CA set-up before I had the band fully pressed into place.
I applied a bead of epoxy to the slot.
Surprisingly, I remembered to roughen the inside and outside of the brass band with a sanding sponge.
The band was then pressed into position.
The excess epoxy was cleaned up with a cotton swab dipped in acetone and… (dramatic pause). OH CARP! There was about 0.2-0.5 mm of brass band sticking up above the surface of the mortise. What had gone wrong? I texted Christian, if that is his real name, and explained what I was seeing. We had both noticed that my brass cutter was significantly more dull when we finished cutting, back at the shop. He thought that the dulled teeth would have given a false 5 mm depth to the cut. I agreed and thought that maybe the epoxy would have added another fraction of a mm. In hindsight, the band would have been better cut at 4.5 mm to ensure greater clearance.
I used a small flat file to remove as much of the brass as I felt comfortable removing. I had to go very slowly and with great care to avoid filing any briar. I then took the stummel to the topping board there. I very slowly sanded the brass to flush with the briar. I failed to photograph any of this, apologies. I did photograph the resulting fit though.
Below is a photo of the internal brass band in all of it’s glory.
Now to finish this stem. I thought I could go over the patch on the bottom of the stem with black CA and that it would make the difference in the vulcanite and the black epoxy disappear. Once again the imagination was working beautifully and all of the imagined repairs were equally as beautiful.
I painted the bottom of the stem with the black CA.
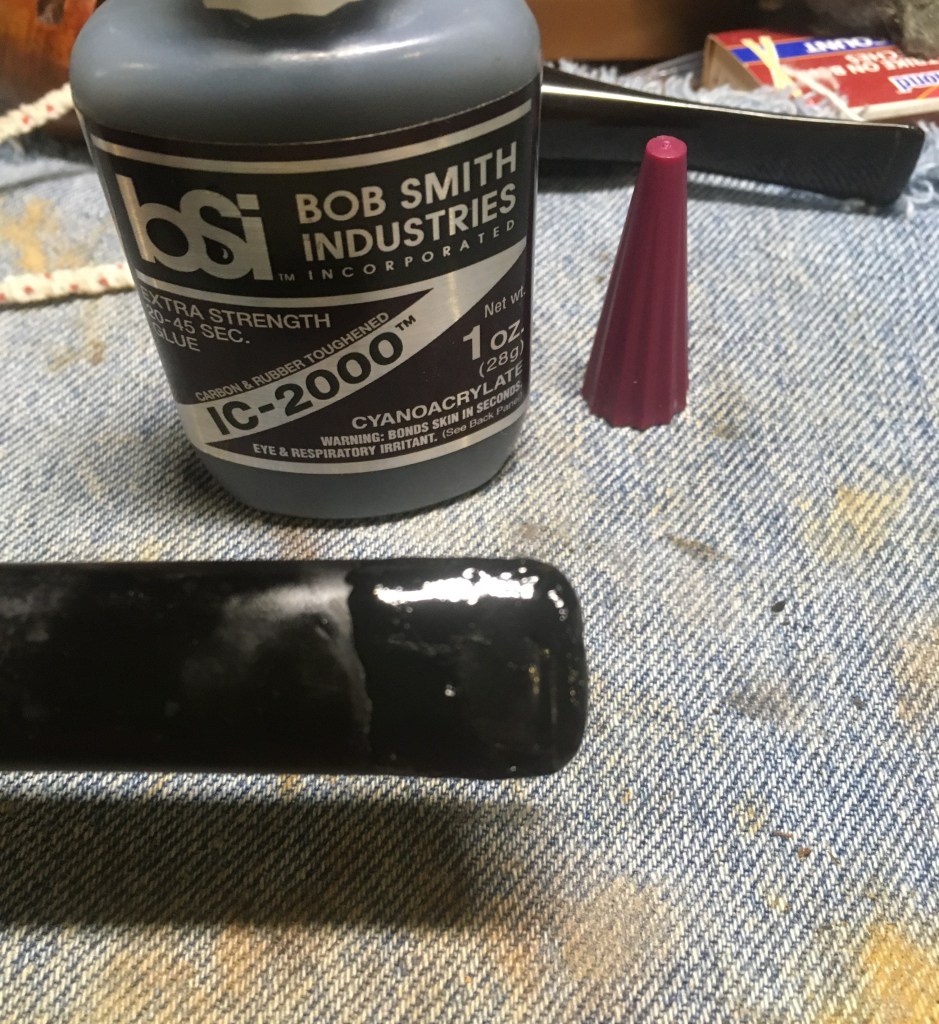
The CA was then spritzed with a CA drying accelerator. The subsequent area was filed and sanded to blend the vulcanite with the patch. You’ll have to wait or jump to the end to see how reality dealt with my imagined results. This is mainly because I failed to photograph it. Umm, I mean, that I want to build anticipation. Yean, that’s the ticket.
To rebuild the button proper, I Scotch taped the stem right against the button This kept me from having to re sand the blended stem patch. It also allowed me to file and sand the button without scratching up the already smoothed stem. I applied layers of black CA to the button, spitzed with the drying accelerator and while the CA was still soft, I made a straight cut through the still pliable CA giving the button a more defined seam where it met the stem.
The above was done for both the top and bottom. Both sides were filed then sanded to a proper shape.
Here you can see the progress from the side.
Eventually the stem was sanded with a series of sanding sponges from 400-3500 grit. Between the sponges the stem was rubbed with mineral oil and wiped with a dry paper towel.
I was apparently getting tired and failed to photograph the micro-meshing of the stem. The next step was to coat the stummel with Before and After Restoration Balm and let it sit for 30 minutes.
After 30 minutes the Restoration Balm was wiped off with an inside out athletic sock.
It was at this point that I decided to try another novel technique on this pipe. I had not worked with a shellac finish on a pipe in a long time, perhaps even before I started blogging back in October of 2023. I slid the stem out about ¼ inch or ½ cm to provide a handle but not get any shellac on it. I used a disposable foam brush to apply a very thin coat of shellac to the stummel. The briar absorbed the shellac quickly and it dried as the alcohol solvent evaporated. Now for the weird part – I slightly wetted a paper towel with 99% isopropyl alcohol and wiped the stummel with the paper towel. This smoothed the shellac remaining on the surface of the panels. I only applied the single coat of shellac as I don’t really like the look of a clear coat on pipes. This wasn’t really a clear coat, more of a sanding sealer and a layer of protection of the carved surfaces from dirt and hand oils. I let the stummel dry for about 15 minutes then took it to the buffer for a polish with white diamond compound. The entire pipe was then wiped with a clean dry cotton cloth to remove any remaining buffing compound. The stem and stummel then received several coats of carnauba wax with the buffer. A quick hand buffing with a microfiber polishing cloth and she was finally finished.
I would like to thank you for making it this far into this dissertation. It is actually longer than many Masters Degree dissertations that I’ve read. Perhaps I’ll be awarded an honorary masters from some pipe restoration university. That’s a thing, isn’t it? A special thanks goes out to the machinist Christian, who may or may not actually go by that name. I had now successfully turned the $16 pipe into a $25 pipe, which equated to about $0.50/hour. Good thing I’m retired or the U.S. The Department of Labor would be filing suit for unfair pay. In all honesty, this pipe provided me with some new challenges and did exactly what I wanted it to do, allowed me to practice doing what I love to do – learn new and hone existing techniques. The pipe turned out amazingly well. This one will be joining my personal collection. The dimensions of this Marxman Jumbo C are:
Length: 6.01 in./ 152.65 mm.
Bowl Height: 1.73 in./ 43.94 mm.
Weight: 2.13 oz./ 60.60g.
Chamber Depth: 1.32 in./ 33.53 mm.
Chamber Diameter: 0.91 in./ 23.11 mm.
Outside Diameter: 1.76 in./ 44.70 mm.
I do hope that you have found something here useful to your own pipe care, maintenance or restorations. If you like this sort of thing, please click the like and subscribe buttons. Thank you for reading the ramblings of an old pipe lover.
Loading…
Below are some photos of the finished Marxman Jumbo C.
Here I go again with another Marxman. Okay, I haven’t restored a Marxman since March 18, that’s like four months. In dog years it is over two years. I think it is about time to return to one of my favorite brands and this is a beauty. An unsmoked Mel-O Pear. How it ended up with a cracked shank, I’ll never understand. This darling came to me from eBay, and traveled all the way from Yuma, Arizona. Maybe that dry desert heat is what contributed to the crack. The description from the seller read as follows, “Vintage Marxman Tobacco Pipe Melo-O Imported Italy there minor cracked other than that very good”. Where they got the “Imported Italy” from is another mystery. True the stamps are faint and partial but I can make out a “B” after IMPORTED and the last time I checked Italy starts with an “I”. The other stamps are MEL~O over MARXMAN. The “MAN” looks to have suffered the same fate and the BRIAR never having been properly stamped. Below are some photos of the Marxman Mel-O as it arrived.
Background
On January 11, 2024 I blogged about a Marxman Gold banded Dublin (linked if you are interested) and wrote the following about Robert Marxman and Marxman pipes:
“My recent fascination with the post-World War Two (WWII, to properly use an acronym) led me to further appreciation of the Marketing genius of Robert Marx, the founder of Marxman Pipes Inc. Allow me to illustrate:
Those are the back covers of Pipe Lovers Magazine for each month of 1946. That represents a substantial investment in building and maintaining one’s brand name.
Here is a quick review of Marxman pipes from pipedia.org:
“Marxman (Marxman Pipe Company) was created by Robert (Bob) L. Marx in 1934, when he was 29, and after he had worked for the William Demuth Company. His pipes were not outstanding because of the quality of their wood (probably Algerian), but Bob started making unique sculpted pieces, which brought the brand fame in the World of Hollywood cinema. Actors like Zachery Scott, Dennis Morgan, Jack Carson, Alan Hale, Joel McRae, and Ronald Reagan were some of the faces that appeared on the bowls.
Bob knew how to innovate and took full advantage of marketing and press advertising in order to sell the brand–one of his slogans being “Relax with a Marxman”.
In a recent forum post on Pipesmagazine.com, contributor jguss posted the following from the February 2, 1935 issue of the UnitedStatesTobaccoJournal:
A remarkable article showing the business acumen as well as a photo of the man himself. Thank you, jguss.
This is one of my favorite quotes about Rober Marx:
“Ted also said: Several years before UST bought Mastercraft, M/C had aquired Marxman Pipes. A wonderful kind man, Bob Marx was still working as a salesman in NYC, and I was fortunate to make a few sales calls with him. You all remember Charles Atlas? Bob Marx was about 76 and had just been awarded the (I think) Atlas Award for being the finest speciman of manhood over 70 years old in NYC, or maybe the state.
M/C had some inventory of Marxman stuff, but not a lot. I know very little about Marxman. Did they make, import, or both?” (Mastercraft – Pipedia)
The “Ted”, who is being quoted above, was the nickname of Tom Douglas. Here is an announcement of Mr. Douglas’ passing from Pipesmagazine forum November 26, 2018:
“Tom Douglas passed away at 71 years of age, this past Saturday, in Florida. It seems he had an infection in his stomach, but I don’t know much more than that, regarding what actually contributed to his death. He did have a history of heart and other health complications. I just spoke very briefly with his wife Joyce; you can imagine how she’s doing.
The impact Tom had on the pipe community is huge…beginning with an immense library of pipe knowledge through the pages of the Dr. Grabow Collectors Forum….his 25 years of service at the Grabow / Sparta pipe factory (where he retired in 1991)….his executive leadership over Mastercraft distribution for many years…”
So, at 76 years old Robert Marx was still involved in the business that he must have loved. This would have been around 1980.”
Then last winter, Mark Irwin, of Peterson Pipe Notes and author of The Peterson Pipe book, sent me a c. 1945 Marxman Brochure. I photographed the pages of the brochure and included them below.
One of the easiest things to date is a Marxman pipe. The company was formed in 1939 and sold in 1953 to MasterCraft. Though the Marxman name continued after 1953 the pipes were made in France or Italy and stamped as such with Country of Manufacture (COM) stamps. This means that a non COM stamped Marxman pipe was made in New York City between 1939-1953.
The Restoration
A clean denim piece on the work surface began this restoration. The edge of the shank was given a very slight bevel with 320 sandpaper. You can see the lighter ring on the briar below from the sanding.
I checked which size of brass tubing would be the best fit for a band for the Mel~O, ⅝ inch was nearly perfect. I measured how wide I wanted the band. For this pipe a narrow band seemed appropriate and would provide the strength needed to compress the crack and not cover the carvings on the shank. A pipe cutter was used to cut the 5/8th inch stock.
The band was cut. The interior edges were lightly filed with a rounded needle file, giving them a very slight bevel on bothe the interior and exterior surfaces. Then the edges were lightly sanded with 320 and 400 grit sanding sponges.
There was zero draw through the pipe. I removed the stinger and noticed that it was completely sealed with some obstruction.
Using needle nose pliers I was able to pull a couple of tiny pieces of metal from the end of the stinger.
At this point I assumed the stinger was meant to be a tube rather than a cylinder. I thought that maybe a previous owner had somehow wedged a pipe cleaner into the draft hole. I tried pushing a fly tying bodkin through what I thought to the tube. It was completely sealed.
I figured that it might be worth a try to drill out the hole through the tube. I tried a couple of drill bits and found the 5/32 inch to be the best fit.
Holding the stinger firmly with a Vise-Grip I tried drilling the aluminum with an electric drill. This proved pretty futile. There was no way that I could hold both the stinger and the drill straight enough to allow a good hole through the aluminum.
To make matters worse there appeared to be a steel wire within the aluminum which was pushing the drill bit to the side. With continued drilling the bit would be forced to the side of the aluminum stinger not through the center. I abandoned the idea of drilling the aluminum. Hmm, perhaps this is the universe’s way of telling me that I need a drill press?
I thought about various stingers. Many are a solid piece of aluminum but they have a groove or slot milled in them to allow for an airway. Perhaps this piece was supposed to have a slot cut in it. How this was neglected, if it were indeed neglected, made little sense but stranger things have happened. I set the stinger aside and continued pondering as I worked on the next task.
The next task was cleaning up the stem. This pipe must have been stored in a box or drawer as it had minimal oxidation, pretty amazing for a 75 year old pipe. I first sanded the surface with a 600 grit sanding sponge. This removed the surface oxidation and dirt and also revealed a strange rough spot. Try as I might I was not able to get rid of the rough area with the 600 sponge so I backed off to a 400 grit sponge. This worked to remove most of the rough area. The spot was resanded and smoothed with the 600 sponge.
I then scrubbed the stem with SoftScrub on make-up pads. This removed additional oxidation and left the stem looking like and black with fresh clean vulcanite.
As I drew air through the stem I heard a whistling. I took this to mean that there was a turbulent flow of air through the airway. The tenon was flat cut. Why not give it a nice countersunk bevel and polish that a bit, I thought.
Using a couple drill bits I just held in hand and twisted the bits removing the rubber from the tenon. This was then sanded with 220, 320 and 400 sandpaper to smooth the bevel. Below you can see the polished bevel. Drawing through the pipe was now silent.
The stem airway was quite clean and only produced the dirt from manufacture and age on the pipe cleaners dipped in 95% ethyl alcohol.
Next the stummel was taken to the sink to rid it of it’s accumulated grime. The three amigos of scrubbing were present and accounted for.
From previous experience with the soft Algerian briar that Marman used I opted not to use the brass brush on the rusticated carvings. I began with Undiluted Murphy Oil Soap and a medium stiff toothbrush. Additional Murphy’s was added and a second scrub with the nylon scrub brush was done. The soap was rinsed with warm water and the stummel dried with a cotton hand towel.
Below is a photo of the scrubbed stummel back at the workbench. I took the shininess to indicate that wax or finish was still present on the briar.
I scrubbed the stummel with 95% ethyl alcohol and a toothbrush to remove any traces of shine.
The stummel was then scrubbed with 95% ethyl alcohol on a make-up pad. Extra attention was paid to the carving grooves.
And again.
There we go, no more shine. I then started to fit the band to the shank. The shank needed to have a slight bit of briar removed in order for the band to fit. I slowly and carefully filed the shank end. I wanted the band to be press fit. A hard press, that is.
Eventually I got the fit that I wanted. I applied thin cyanoacrylate (CA, super glue) to the crack, the thin formula allows ready penetration into the crack. The band was then pressed into place using a tapping block. The outside end of the band required a little bit of filing to allow a precise fit with the stem and a light sanding with 400 and 600 sanding sponges.
The pipe, stem and stummel, were then sanded with a sequence of sanding sponges from 400-1500. Between each sponge I wiped the stummel with a make-up pad dipped in alcohol. The stem received a dab of mineral oil from my fingertip rubbed onto the vulcanite then wiped with a paper towel.
The above was repeated for the 2000-3500 sanding sponges.
The pipe was then micro-meshed with 4000-12000 pads. The stummel was wiped as before while the stem received Obsidian Oil rather than mineral oil.
The pipe was then given a coat of Before and After Restoration Balm and allowed to sit for 20 minutes.
@0 minutes later the Restoration Balm was wiped from the pipe with an inside out athletic sock. Again extra attention was paid to rubbing the carved grooves thoroughly.
I wasn’t sure which type of wax would be best for protecting and preserving the rusticated carvings. I opted for Renaissance Micro-Crystalline Wax. No, not because I like the smell. Well, yeah, kind of because I like the smell. Also because it seems to penetrate into the non-sanded briar.
The wax was applied with a baby toothbrush.
I let the wax dry for 15 minutes and replaced my carnauba wax buffing wheel with a clean flannel wheel and buffed the stummel. I used the corner of the wheel to work into the carvings.
The carnauba buffing wheel was returned to the buffer and the stem, rim and stampings received several coats of carnauba wax.
This was a fun restoration as I enjoy banding cracked shanks. I think the polished brass gives the rusticated briar a touch of classiness. The briar of this Mel~O shows some grain pattern on the rim, nothing great but still pretty. The color though is outstanding and is contrasted very nicely with the glossy black vulcanite separated by the brass band. Overall I am pleased with how the pipe turned out. I am looking forward to the first smoke with this Marxman. There is something unique about the briar with these old pipes, they have a slight spiciness like cinnamon and nutmeg when first smoked. You can get it from a freshly reamed and sanded Markman as well. Strangely satisfying or, I could be imagining it allowing my tastebuds to succumb to my weird emotional attachment to the brand. Either way, I like these old pipes. The dimensions of the Marxman Mel-O Pear are:
Length: 5.40 in./ 137.16 mm.
Weight: 1.30 oz./ 37.00 g.
Bowl Height: 1.61 in./ 40.89 mm.
Chamber Depth: 1.10 in./ 27.94 mm.
Chamber Diameter: 0.78 in./ 19.81 mm. (conically bored)
Outside Diameter: 1.58 in./ 40.13 mm.
I do hope that you have found something here useful to your own pipe care, maintenance or restorations. If you like this sort of thing, please click the like and subscribe buttons. Thank you for reading the ramblings of an old pipe lover.
Below are some photos of the finished Marxman Mel-O Pear.








 NebraskaPeteGeek