Have you ever wondered how to use the terms Dutch, Holland or the Netherlands? Well, this pipe may help. The pipe was made in Holland, two of twelve provinces of the country known as the Netherlands. Yeah, there are two Hollands, a north and a south. The makers of the pipe were Dutch, referring to the culture and language of the region. Okay, I have shown off my undergraduate geography major for four years quite enough for one day.
This pipe caught my eye on eBay recently. I was taken by both the shape and the price. I immediately sent Sascha Mertens a private message via Facebook, asking if it was a good deal. He replied quickly, as usual, saying that it was indeed a good deal for a relatively rare and desirable shape. He had me at “good deal”. I can’t say I place too much emphasis on popular things, I know what I like. While we are talking about Sascha, he keeps me laughing with his complaints of purchasing pipes that are very clean. Yeah, he complains when a pipe is too clean and does not provide him with the opportunity or challenge of cleaning them up himself. This pipe is a wonderful example of that. I think it had only been smoked once. I now completely understand Sascha’s disappointment. Below are some photos of the Big Ben 702 before I did any work, if you can call it that, on it.
The pipe was nearly brand new. There was some unsmoked tobacco remnants in the bowl and a very minimal residue on the rim. I cannot even call it lava. The stem was slightly oxidized due to age with maybe a few light tooth marks. The only other thing to complain about was a slight wax build-up in the beading. This was going to be an “easy button” restoration.
The next search was on pipedia.org. Here too, the entry was lacking specificity for the Classic Line. Well actually it was lacking pretty much everything stating only, “The brand name Big Ben was originally owned by a small trade company in Amsterdam which was already well established in several countries selling pipes among other goods. The firm was bought by Elbert Gubbels & Zonen B.V. – see Gubbels – who were in search for a suitable brand name to further expansion on international markets.
I did follow the link from pipedia.org to the Gubbbels’ website: Want to buy a Big Ben pipe? The best tobacco pipes since 1870 – bigben. This site was a nice shopping and informational site. I found the most impressive thing was that they opened the workshop up to the public every Friday from 10:00am-4:00pm. Here in the US, that would likely meet with stern warnings from Occupational Safety and Health Administration (OSHA).
“Our store is open every Friday! We cordially invite you to take a look at our production workshop. In our store you will find a wide range of Big Ben pipes in all shapes and colors. If your ideal pipe is not listed, we may be able to manufacture a pipe especially for you! Light maintenance of your beloved old pipe can usually be done on site.
Making a pipe requires craftsmanship, a lot of fingerspitzengefühl and experience in working with the unpredictable and capricious material: the root of the Erica Arborea, better known as briar wood. Formed by the rocky bottom of the Mediterranean region, this noble and beautifully textured wood contributes its 50 to 80 years of growth to the value of the pipe. We are proud to be able to tell you the whole story – from carrot to tobacco pipe!
We are open every Friday from 10:00 am to 4:00 pm. On all other days you can visit us by appointment.
There was also a very nice history of the company and a look into their future. It is quite detailed so I will not include it here but this link will take you there if you are interested in a very interesting history.
The Restoration
The restoration began with a clean denim piece which I felt certain would remain clean upon finishing.
I lexamined the tobacco chamber more closely under the bright lights of the workbench. Only smoked once or twice, was my conclusion.
The look down the mortise reaffirmed my thinking.
The reaming of this tobacco chamber only required a brass bore brush, from a 20 guage shotgun and a light scrape from the Smokingpipes Low Country reamer.
I swabbed out the chamber with an alcohol dipped cotton swab. Below you can see that the reaming only produced a tiny bit of carbon and a few flakes of tobacco.
The shank was cleaned out using 99% ethyl alcohol on cotton swabs. These too, came back with little grime.
The stem was cleaned with alcohol and a bristle pipe cleaner.
I used a dental scraper to clear the majority of the wax that was built-up in the bead around the bowl.
The light residue on the rim was removed with saliva and a cotton make-up pad.
I took the stummel to the sink for what was probably an unnecessary scrubbing with undiluted Murphy Oil Soap and a nylon brush. Some habits are hard to break. The soap was rinsed with warm water and the stummel dried with a cotton hand towel.
Back at the workbench, the stem had a slight residue, likely from the airway cleaning.
I rubbed the stem with alcohol on a make-up pad and did get some oxidized vulcanite from the surface.
The stem was taken to the buffer where it was buffed with a blue buffing compound. This removed any additional oxidation along with the slight tooth chatter. It also dulled the bright silver of the stem logo.
To replace the silver, I used Silver Leaf Rub’nBuff. Before applying the fresh silver, I cleaned the logo with a cotton swab dipped in alcohol.
The silver leaf was applied and hand-buffed with a soft cotton cloth.
The resulting fresh silver was back to its original bright finish.
The pipe was given several coats of carnauba wax with the buffer.
The final step was another hand buff with the microfiber polishing cloth.
This beautiful Big Ben Classic Line 702 did not need very much work. I love the shape and the balance of this pipe. It fits my hand well and clenches like a dream. The contrast dye was well done at the factory and really accentuates the briar. THe bright nickel accent on the stem goes very nicely with the silver stem logo. This is just a classy comfortable pipe that I am glad to add to my personal collection. The dimensions of the Big Ben Classic Line 702 are:
Length: 4.74 in./ 120.40 mm.
Weight: 1.48 oz./ 41.96 g.
Bowl Height: 1.97 in./ 50.04 mm.
Chamber Depth: 1.57 in./ 39.88 mm.
Chamber Diameter: 0.68 in./ 17.27 mm.
Outside Diameter: 1.63 in./ 41.40 mm.
I do hope that you have found something here useful to your own pipe care, maintenance or restorations. If you like this sort of thing, please click the like and subscribe buttons. Thank you for reading the ramblings of an old pipe lover.
Loading…
Below are some photos of the finished Big Ben Classic Line 702.
I’ve put a few bits in my mouth which were designed for denture wearers. Usually these are uncomfortable for me and my complete natural teeth. Heck, I’ve never even had a cavity. I know, hard to believe but true. I did try the bit of this Brigham and was surprised how good it actually felt. I am again getting ahead of myself. This restoration is of a 202 Brigham Two Dot Billiard pipe. It was another pipe that came from an estate lot. It was not the target specimen of the lot but more just a member of a group and subsequently got neglected in a box until I rediscovered it over the years later. I do not keep good records of when various pipes were purchased or from where. That may be a 2026 New Year’s resolution which I’ll likely forget to ever make much less abide by. Anyway, the pipe was stamped 202 (rather haphazardly on its bottom) to the right appears to be a double stamping of MADE IN CANADA, in a straight line over or under a more clear Brigham over CANADA. The photos show this more clearly than my description. Below are photos of the pipe prior to work being done:
The pipe had obviously been a well loved and well smoked pipe. The tooth chatter and oxidation of the stem proved that. The amount of lava on the rim also was an indicator of the use this pipe had experienced. The tobacco chamber had been well maintained and looked fairly clear of a thick cake. This told me the previous owner liked a cleaned chamber and judging by the lack of any deep groves cut into the chamber they also had used appropriate tools to keep the chamber clean. The aluminum of the Brigham system was mostly free of oxidation externally and generally clean on the inside as well. This looked like it would by a straightforward restoration of a classic Brigham pipe.
Background
I admit that being my lazy self, I did a search on pipephil.eu for Brigham logos, knowing full well that this is a Brigham pipe.
(Brigham — Pipes : Logos & Markings) The pipephil page had entries for the 1-6 dot pipes as well as some additional specialty pipes. The two shapes from the “Two dot” entry appeared to have a “2” as their prefix.
I stopped being quite so lazy and got out my Brigham Pipe – A Century of Canadian Briar book to look for the 202 shape. Hmm, there was no 202 but there was an 02 Billiard offered since a 1939 Brigham brochure (Lemon, Charles. Brigham Pipe – A Century of Canadian Briar. Copywell, Woodbridge ON. Second Printing, October 2023. Page 17). My conclusion is that the Two dot Brigham is thus stamped 202. A three dot Brighan with an 02 Billiard shape would be stamped 302. Now, enough guessing. I decided to re-read the book.
The ultimate source of information on Brigham pipes is Charles Lemon, the author of Brigham Pipes – A Century of Canadian Briar. This wonderful book is available from Mr. Lemon on his website, Books, from smokingpipes.com (Brigham Pipes – A Century of Canadian Briar | Smokingpipes) if you need to increase the total of your purchase to get the ever popular free shipping, and other various sources. I am unsure about Canadian immigration rules but I think this book should be required reading for prospective immigrants to Canada, especially if they are pipe smokers.
I could go on and quote Charles Lemon’s book extensively but that would require me to do so much typing and I have said it before and likely will say it again, I am a proud Generation-X slacker. Copy and Paste is so much easier. I will say that Lemon’s work is outstanding and it was a pleasure to read and in my case re-read, since old slacker minds apparently don’t hold as much information as they should. The re-reading was done to remind me how the shape numbering system works and to find references to the dental button. This elusive detail was not found and remembered from the first reading and failed to be found on the second round. I resorted to emailing Charles Lemon from the “contact” button on his website, www.DadsPipes.com. Mr. Lemon responded quickly to my request about information concerning the dental button of this pipe. I did include photographs of the pipe, stampings and button in my groveling email which also included a misspelling of the work “bok”. Yeah, it was supposed to say “book”, darn slackers…
Taking apparent pity on my groveling and lack of ability to spell, general ignorance about Brigham pipes, or maybe because he just a great guy, Charles Lemon replied with the following:
“Your pipe dates to the 1980s, and I suspect from the early 1980s. The 02 shape represents Brigham’s smallest Billiard, a shape that fell out of favour in later years as pipes became larger overall.
I don’t have any specific information about Brigham’s use of dental bits but I do know that Brigham offered a choice of stem shapes to clients when they ordered a pipe, dating to at least the 1960s. I suspect that your 202 is either one of the last of the optional stem offerings or a custom request. With the factory attached to the main retail outlet at the time, Brigham had an amount of flexibility to accommodate this sort of request if they chose to.
Hope that helps, It’s not a definitive answer, I know, but it is in keeping with how the company operated at the time. For what it’s worth, I have a small number of dental bits in the shop if you’re interested.” (Charles Lemon personal email)
Wow, is all I could say. Well, I did reply and say more than “wow”. There was also a thank you involved and probably some additional groveling.
That email response provided a pretty definitive date and explanation of the dental bit.
The Restoration
The restoration should have been a rather simple affair and as usual it started with a laundered denim piece on the workbench. Well, the stem got to sit on the denim at least.
I started to clean the stem airway with a bristle pipe cleaner dipped in 99% ethyl alcohol. It was a tight fit at the slot then it became much easier after a tiny “tick” was heard. “Oh crap”, was probably the next sound heard. I had chipped the vulcanite at the slot with my rambunctious behavior. At least that is what my mom always said after I broke something, “Stop being rambunctious!” Hmm, why didn’t she yell that before I broke something? The chip was tiny and fit back together very nicely so I set it aside where it would be safe.
I continued on filing the tooth chatter and smoothing the area above the button. Two small files, one flat the other a tapered ½ round. The rounded file fit the rounding of the underside of the dental button nicely. These areas were also sanded with a 320 sanding sponge as I went.
I then proceeded to clean the stem, with less rambunctiocity. Wow, spell check didn’t say that wasn’t a word.
The stem was allowed to soak in Before and After Extra Strength Deoxidizer. It went in on a Sunday late afternoon. I had to attend a funeral for a cousin in northeast Iowa so it sat in the deoxidizer for about 30 hours.
Upon returning to the wilds of southeast Nebraska, I took up the restoration the next night. If you look carefully at the below photo you can see the chip from the stem propping the pipe up. Apparently that was the safe stop to keep the chip. I cleaned out the shank with a shank brush, cotton swabs and bristle pipe cleaners all dipped in 99% ethyl alcohol. If you are wondering about the purple on the cotton swabs it is probably potassium permanganate (KMnO4). Here is a quote from a chemical supplier who still sells KMnO4 “Potassium Permanganate is a dark purple solid. Dissolving 1 ounce in a pint of water is used to stain woods a pleasant brown. The Potassium Permanganate decomposes on contact with the wood and leaves a brown residue that stains the wood. If the color is too dark it can be lightened by washing the wood with a strong solution of hypo. The brown color imparted to fairly woods will gradually fade when exposed to direct sunlight. Mix only enough solution to do the job at hand as the solution on long standing will lose its effectiveness. Use it with caution as it is a strong oxidizer.” (POTASSIUM PERMANGANATE | WoodFinishing Enterprises)
Next came the assembling of the ream team.
The PipNet with its #1 and #2 blades did most of the work.
The Smokingpipes Low Country reamer and the General triangular scraper were used to touch-up the tobacco chamber.
The reamed chamber looked very good and showed no signs of any heat damage.
I sanded the interior of the chamber with 220 sandpaper wrapped around a wood dowel followed by 320 sandpaper wrapped around a Sharpie marker.
The bare briar indeed was free from any damage.
The rim would hopefully be also free of damage under the layer of smoking residue, aka lava.
The lava was moistened with saliva and gently scraped with a sharp pocket knife.
The stummel was then taken to the sink for a scrub with undiluted Murphy Oil Soap and a nylon brush. The soap was rinsed with warm water and the stummel dried with a cotton hand towel.
Back at the workbench, I wiped the stummel with an alcohol wetted cotton ball. Some color came off the pipe. I did not want to change the look of this pipe by removing and rebuilding the finish.
I gave the stummel a coating of Before and After Restoration Balm and set it aside to work its magic overnight. Hey look, that little ship is still there. Safe and sound.
After the funeral, still the next day though, I returned to working on the pipe. I saw a small black fleck on my denim and threw it into the trash. Stupid little black flecks. I then wiped the remaining Before and After Restoration Balm off of the stummel using an inside out athletic sock.
I retrieved the stem from the Before and After Extra Strength Deoxidizer. I’m just going to call it deox from here on. Nothing personal to Mark Hoover, but that is just too much to type. I placed the still wet with deox solution on my favorite coarse shop rag. The deox on the aluminum had foamed up, presumably a reaction of oxidized aluminum to the deox solution.
I vigorously rubbed the vulcanite with the coarse gag. This absorbed excess deox and abraded away some of the oxidized rubber. Actually a lot of the oxidized rubber.
Back at the workbench, I cleaned the interior of the stem with several thick pipe cleaners then coated the stem inside and out, with Before and After Hard Rubber Balm (HRB, henceforth). This is another great product from Mark Hoover. I like it best as a preservative on a finished stem to combat oxidation but it works well on a stem fresh out of deox too.
The deox had left a mark of the aluminum of the Brigham system. The cleaner shiny aluminum clashed with the more dull original aluminum.
I hand buffed this using Before and After Fine Polish on a paper towel. Tada, much better.
I looked over the tooth chatter and cleaned the HRB from the bite zone with alcohol on a cotton swab. I was prepping the area for a small drop of black cyanoacrylate (CA, super glue) to fill the depression.
It was about here that I realized the little black fleck that I threw away was the chip from the button. “Oh crap!”, may have been spoken. The poor little chip had evaded trouble by staying in its safe place for a couple days before some rambunctious oaf displaced it.
Hmm, how hard could it be to find a tiny black fleck in the trash bin of… a guy who dumps lots of black powdery debris… in the trash bin. Oh crap.
I set out a piece of scrap packing paper and went through the trash, shaking the bigger pieces to dislodge a small black fleck. Eventually I dumped the reaming debris onto the paper, got down on my less than flat belly and started sifting through the black powder searching for a fleck.
Hah! Victory. I actually found the little bugger. By the way, if you think that it’s easy being this dumb, you would be mistaken. It takes years of training and classes in rambuctiocty from the local community college.
And it still fits.
The wound was cleaned with alcohol in preparation of the regluing. I thought about drilling and reinforcing the chip with a 2 mm brass pin but the rough surface of the break and the contours of the fit seemed like they would provide good support on all three sides.
I used a plastic lid cut-out inserted into the slot to keep the CA from being rambunctious. Yeah, I’m going to see how many times I can use that word.
The glue of choice was This rubberized CA from Bob Smith Industries. It was getting a bit old and wasn’t as thin as it used to be but it coated the contact surfaces well. A drop of the CA was placed on the disposable pipette bulb then applied to the stem with a fly tying bodkin.
Once that CA had set, I applied a thinner black CA to fill the seams.
Once the thinner CA set, I applied a bead of the first black CA to the edge of the button to address the rounding of that edge by previous tooth wear and tear.
Once all the CA had cured, I again filed the CA with the two files used earlier then started the sanding with a series of sanding sponges. Between each sponge I rubbed the stem with mineral oil then wiped it with a paper towel.
I was still not happy with the seam of the glueing so I sanded that additionally with 400 grit sandpaper wrapped around the handle of an Exacto knife. I kept my rambunctious nature in check and did not skewer myself with the blade. Yeah, it would have been smart to remove the blade but, it is me we’re talking about here… I then polished the stem with new micro-mesh pads in grits of 4000-12000.
To avoid having another pipe cleaner chipped button incident, I used a cut-off bit in the Dremel rotary tool which was a fraction of a mm thicker than the original slot. This widened the slot enough to pass a pipe cleaner, even bristled, more easily. The slot was polished with a thin folded piece of 400 grit sandpaper.
The pipe was then taken to the buffer for several coats of carnauba wax. This was then hand buffed with a microfiber polishing cloth.
I do hope that you had fun reading about the trials and tribulations of not being the sharpest tack in the pack. I will continue making mistakes and documenting them in hopes that you can learn from them in a less painful fashion than I. This Brigham was actually a fun little pipe to work on. The fact that it was a non-typical version with a dental stem made it more interesting to me. Thank you again Charles Lemon for the insights into Brigham pipes. The pipe itself is a lovely example of a two dot Brigham. The rustication provides an attractive and comfortable bit of briar and the stem though lacking the robustitude to weather a rambunctious restorer still turned out very nicely. The dimensions of this Brigham 202 are:
Length: 6.49 in./ 164.87 mm.
Weight: 1.33 oz./ 37.06 g.
Bowl Height: 1.72 in./ 43.69 mm.
Chamber Depth: 1.41 in./ 35.81 mm.
Chamber Diameter: 0.72 in./ 18.29 mm.
Outside Diameter: 1.30 in./ 33.02 mm.
I do hope that you have found something here useful to your own pipe care, maintenance or restorations. If you like this sort of thing, please click the like and subscribe buttons. Thank you for reading the ramblings of an old pipe lover.
Loading…
Below are some photos of the finished Brigham 202 with a dental stem.
This is the third, though not likely final, restoration of a pipe for the Real American Pipe Smokers (RAPS) Facebook (FB) group. This pipe was sent to me by a fellow member who had asked if I’d be willing to restore some pipes to be given away to RAPS members. I love to work on pipes that I find interesting and doing so for a good cause is even better. The three pipes arrived and were indeed interesting.
The top and bottom pipes were blogged about last week and were a Porcelain Apple and a J. Rettke, Feel free to click those names for links to the respective restorations. The final pipe is a large bent billiard with a chimney-like bowl. The only identifying stamp of the pipe was ISRAEL on the underside of the shank. Below are some photos of the pipe before I began work on it.
The stem had been chewed on a great deal this normally would indicate a pipe that had been smoked a great deal. However the tobacco chamber appeared fairly cake free. The rim did have a layer of lava and the rim edges showed signs of being knocked against hard rough surfaces. Perhaps I had come across a heavily smoked pipe which had been owned by someone who appreciated a clean pipe? There was also a dreaded clear coat finish on this pipe which would have to go. I know, my job is to restore, but I have a disdain for heavy clear coat finishes. The stem did look salvageable and I hadn’t restored one that was this chewed up for a while. Oh, the things I consider fun… I was worried about the ISRAEL stamp surviving the finish removal. Oftentimes the stamping is done on top of the clear coat and the briar below does not preserve the stamp very well.
Background
The number of Israeli pipe making companies is pretty easy to count, one. According to pipedia.org:
“Not much is known about Israel’s sole pipe factory though it’s reported to have operated quite successfully on international markets.
Beside the brand “Shalom” the mainstay brand was Alpha – especially well known in the USA. Alpha was popular for a range of fresh and unusual shapes. Series (afaik): Caprice (s), Citation (s), Classic (b), Pedestal (s), Regent, Region (b), Rex (s). (1)
(1) (b) = blasted, (s) = smooth
Alpha also produced at least one of its Citation forms for Carey’s “Magic Inch” series.
Mentioned in context with Shalom Pipe Factory was a Danish pipemaker named ‘Muki Liebermann’, who later lived and worked in the USA. Muki is known for his unique briar bending technique and his original shapes that gave inspiration to many of the most praised Danish pipemakers.
Also at the bottom of the pipedia.org entry is a blurb about other Israeli brands. It is not clear that these are lines which Shalom produced or if they are separate companies. I assume that they are Shalom lines.
“Other brands from Israel:
Andersen
Burl King (Best known for their Danish-looking “thumbhole” pipes with plateau tops.)
Fader (Presumably for Fader’s Tobacco Shop, Baltimore. Also known: Fader – Made In Denmark.)
As usual the pipe got herself a cleaned denim piece, more for the protection of the workbench than for the pipe’s comfort.
I decided to work on the stem first as I thought it would require the most effort. The top was lightly chewed but had pretty significant calcium deposits.
The bottom side was really chomped on and would need to have black cyanoacrylate (CA, super glue) built up and then reshaped.
I started with a cleaning of the stem with bristle pipe cleaners dipped in 99% ethyl alcohol.
The calcium deposits were scraped off with a sharp pocket knife.
The top and bottom were then filed with a small flat file to remove most of the teeth marks.
Rubberized black CA was used to build up material in the indentation on the bottom surface and button.
The built-up material was filed flat.
Additional black CA was added to allow for smoothing the underside of the stem.
This built-up area was then filed smooth and blended with the existing stem.
The whole area was sanded to check the blending of the vulcanite to the CA seams. It did not look bad. I had not started on the button as of yet.
To better blend the seams I applied a coating of thin CA. This penetrates any tiny crack of seams and would further blend the two materials with finer grade sanding.
The stem was sanded with a series of sanding sponges from grits 400-3500. Between each sponge I rubbed the stem with mineral oil and wiped it with a paper towel. The last thing I did, at this stage, was to apply a coating of Mark Hoover’s Before and After Hard Rubber Balm. Mark sent me this product to try and I think it does a very nice job at preserving a polished stem and keeping oxidation at bay during normal pipe smoking.
I turned my attention to the stummel. The reaming tools were gathered and included the PipNet, Smokingpipes Low Country Reamer and the General triangular scraper.
All three tools were used and the Kleen-Reem reamer was pulled into the fray because of the bowl depth and slightly conical boring.
The rim looked like it had suffered frequent hard knocks on concrete or stone surfaces. This roughened rim also had a coating of lava. Scraping lava from a flat surface is pretty easy but scraping lava from a rough surface is a different matter.
I tried to use the traditional scraping method of using saliva to moisten and soften the lava then scrape it with a sharp pocket knife. With the surface being as rough as it was, I met with limited success.
Normally a light topping of the rim would be done with 320 sandpaper but this rim was rounded and dented. Due to the very deep bowl, I decided that there was plenty of briar there and filing the rim would be a faster was to smooth the surface.
One smoothed with a flat file I topped the rim with 320 followed by 400 grit sandpaper.
The shank was then cleaned with several bristle pipe cleaners and cotton swabs dipped in 99% ethyl alcohol.
Next up was the scrubbing of the stummel with a nylon brush and undiluted Murphy Oil Soap. The soap was rinsed with warm water and the stummel dried with a cotton hand towel.
I wiped the stummel with a cotton ball wetted with ethyl alcohol. The alcohol has no effect on the clear coat. Bah. In the next couple of photos you can see where the finish had been worn off the briar.
Since the ethyl didn’t affect the finish, I tried acetone. It did soften the finish but very slowly and with a great deal of work. I decided to give the whole stummel a bath in acetone. The old jar was not large enough so I had to make use of a wide mouth pint jar acetone bath.
I let the stummel soak for over an hour in the acetone before removing it. Apologies for the poor focus. I’d blame the nitrile glove but I was only wearing one. There was still a lot of finish remaining on the briar. I thought, “why the heck did they apply the finish so thick?”
The good news was that the soaking made the old fills easy to remove. Well, easy if I moved quickly before the acetone evaporated.
There were several deep pits in the briar.
The pits were pretty evenly distributed over the whole stummel and as I said, deep.
At least they didn’t use the bright pink fill that you often find on old pipes. Below are a few of the remnants of fill material.
I sanded the remaining finish from the briar using sanding sponges that I usually never would use on a pipe, 180 and 280 grit. The little 320 sanding sponge just couldn’t cut through the thick hard finish. You can also see the depth of the pits on the shank in the below photo.
Eventually the stummel was sanded with 320 and 40 grit sanding sponges and the fills were refilled with briar dust and brown CA. I could have sworn that I photographed the filling of the pits but I failed to.
I also sanded the interior of the tobacco chamber and discovered some pits there as well. Imperfections in a chamber like this can cause the briar to burn and smolder with the tobacco. That extra surface area is something I wanted to eliminate.
I mixed up a small batch of black J-B Weld epoxy to press into the pits within the tobacco chamber. I used the mini popsicle stick as an applicator to “squeegee” the epoxy into the pits.
After the epoxy had dried for 24 hours I would sand away the excess.
With the epoxy hardening I turned my attention to redoing the color scheme of the pipe. The plan was to use a base coat of black Fiebing’s Leather Dye. This would be buffed and lightly sanded, dying the softer grained briar black while removing the outer surface of the harder, less susceptible briar. Next a coating of Mahogany, again lightly sanded and finally a top coat of orange. The goal was to have a pipe with dark grain highlighted with an orange mahogany. It worked well in my imagination and it should conceal all those dark spots that were the new fills.
The first step, black Fiebing’s looked as expected.
After buffing with a rouge buffing compound and wiping with ethyl alcohol cotton balls the black had indeed penetrated the softer grain.
A light sanding brought out the lighter grained areas more to my liking.
Next came the mahogany dye.
Below is the mahogany after a light sanding and alcohol pad wipe.
Finally the orange top coat.
I discovered why the Israelis had applied such a thick clear coat to this stummel while I was sanding it. The briar was extremely soft and very difficult to work with. Sanding would remove one scratch and create two more. I decided that maybe a couple coats of Danish Oil would help to toughen the briar.
Below you can see how I hung the stummel on a vice for drying. I applied three coats of Danish oil to the pipe and the stummel looked like it had never even seen a drop of Danish oil. Good lord this briar was a pain to work with.
The final steps to the restoration included a trip to the buffer for several coats of carnauba was and a hand buffing with a microfiber polishing cloth. It was at this point that I realized how completely unhappy I was to have forgotten to bend the stem to what I thought was a better bend.
I used a heat gun to heat the stem until it was pliable. I then bent the stem to have a more attractive and more comfortable shape.
The stem before the bending:
And, after the bend:
Of course the heating and bending of the vulcanite ruined the finish of the fill work that I had done to the stem. That was all resanded, a touch of thin CA, and some more sanding then rebuffed. This then led to a rewaxing and re-hand-buffing. Oh, for the love of transparency! I could have left all my mistakes out but then I’d feel dirty or something…
I think that the briar used in this Israeli pipe was the same or similar to the briar used by Robert Marxman, in other words it is Algerian briar. This briar is known to be a great smoking briar but is also known to be very difficult to work with due to the very soft nature of the wood. Think about the heavily rusticated pipes of Marxsman or the Custom-bilts. Those carving techniques were utilized to conceal the soft and imperfect grains of those pipes. Though they are renowned as great smokers, this pipe has the same cinnamon-cardamomscent as my Marxmans. The difficulties in trying to get this pipe to have a flawless smooth surface was difficult and I completely understand the Israeli’s use of a heavy masking clear coat. In the end I think that I did maintain the color scheme of the original pipe though I did lose the stamping, ISRAEL. The stem is another problem area. This vulcanite just would not lend itself to the high gloss sheen that I strive for. Overall I am sure this pipe will provide a great smoking experience but it does not have the aesthetic that I would be proud of. I guess I should be happy by giving this undoubtedly a “basket pipe” a new lease on life and provide its next owner with a good quality pipe.
The dimensions of the Israeli Bent Billiard are:
Length: 5.64 in./ 138.18 mm.
Weight: 2.10 oz./ 42.24 g.
Bowl Height: 2.35 in./ 49.02 mm.
Chamber Depth: 2.09 in./ 38.35 mm.
Chamber Diameter: 0.73 in./ 18.54 mm.
Outside Diameter: 1.57 in./ 34.54 mm.
I do hope that you have found something here useful to your own pipe care, maintenance or restorations. If you like this sort of thing, please click the like and subscribe buttons. Thank you for reading the ramblings of an old pipe lover.
Loading…
Below are some photos of the finished Israeli Bent Billiard.
I included the next two photos to show what the finished tobacco chamber fills looked like after the sanding.
In February of 2024 I joined the Facebook (FB) group Real American Pipe Smokers. I found my first post in that group, below:
I have found in this group a unique group of about 1,600 folks that are open to others and even accept pipe smokers who like Captain Black Grape. Yeah, I know, crazy right. Oh, by the way, I have a jar of Captain Black Grape and a dedicated MM cob for that aromatic delight. The members are everything someone like me is looking for in a FB group, a bunch of friendly, funny, knowledgeable, giving individuals who put up with my nonsense.
Anyway, I have been part of a cabal within the group who has been giving away some of the pipes I have restored and various other items like tobacco, tampers, rare bourbon samples, etc… I was recently asked if I would be interested in restoring three pipes, donated by another member, which we could in turn give away to group members. I said, “Sure”. So the next three restorations will be those pipes. Here is a photo taken of the three:
The first pipe I decided to work on was the porcelain apple, thus the title and subject of this posting. Below are some photos of the pipe before I did anything with it.
This restoration looked to be more of a cleaning and stem polishing than a true restoration. Some work would have to be done to improve the fit of the cork tenon. Other than that there was not a lot that the pipe needed.
Background
There really isn’t much I can say about this pipe without a whole bunch of imaginative conjecture. This pipe has no identifying stamps or marks. If I had to venture a guess, I’d say this pipe was made in Europe post WWII to 1980. I have included some links for those interested in porcelain in general and a couple more specific to pipes below.
The pipe began on the workbench with a cleaned denim piece.
An Exacto knife kit was broken out for a little bit of cork trimming.
The cork tenon had a rough and unsightly end. This would need to be trimmed and sanded.
The cork proved to be very dry and brittle leading me to think that it was probably at least 50 years old.
With the cork trimmed and sanded, I cleaned out the stem using bristle pipe cleaners and 99% ethyl alcohol. I had been using 95% ethyl and recently switched to this product.
To address the dryness of the cork I got out the trusty old tea kettle and started some water on the stove.
The cork was steamed for about 5 minutes. This is precisely the amount of time it takes for the kettle’s whistle to become so annoying that you have to stop or become patient at Homicidal Acres Home for the Mentally Unstable.
I then rubbed some petroleum jelly onto the cork to hopefully preserve the now swollen cork. This did greatly improve the fit of the stem to the stummel.
Next came the reaming of the tobacco chamber. Porcelain is a hard material but in my mind, it is also brittle. I’ve never broken a porcelain pipe during cleaning but I have only worked with one other so my experience was rather limited. I chose to treat it more like a meerschaum pipe and only used the Smokingpipes Low Country reaming knife to scrape the chamber.
A small amount of cake had been deposited within the chamber.
Alcohol dipped cotton swabs removed the smaller particles and more soluble cake remnants.
I used 3200 sandpaper wrapped around a wood dowel and a piece of sandpaper wetted with alcohol to sand the interior of the tobacco chamber.
And some more sanding. The carbon cake seemed to be well on its way to becoming diamond.
I eventually called it quits on the sanding and thought that perhaps a cotton stuffing and alcohol soak treatment might soften the remaining cake and remove any residual “old tobacco” aroma.
The tobacco chamber and shank were stuffed with cotton and then saturated with the 99% ethyl alcohol.
The unglazed porcelain of the shank began to discolor from the alcohol. I did not think this would be permanent with the evaporation of the alcohol.
I compared my other example of a porcelain pipe to this pipe. I was struck by the color difference. My bent pipe has been smoked numerous times and it has taken on a very nice creamed coffee color. It was originally a bright white as well. The apple had obviously been smoked but had not experienced the same coloring.
After allowing the alcohol to work its magic overnight, I removed the now dry cotton. As you can see in the photo below very little smoking residue was absorbed by the cotton. The discoloration on the shank had also disappeared.
I turned my attention to the stem. I filed the tooth chatter with a small flat file and lightly sanded the bite zone with a 320 grit sanding sponge.
The stem was then worked with sanding sponges from 320-3500 grits. Between each sponge I rubbed the stem with mineral oil and wiped it with a paper towel.
The stem was then worked with micro-mesh pads in grits of 4000-12000. Between these pads I rubbed the stem with Obsidian Oil and wiped with a paper towel.
I rubbed a coating of Before and After Hard Rubber Balm onto the stem and let it sit overnight.
The next day the pipe was taken to the buffer where I applied several coats of carnauba wax to the stem and stummel. The final step was to hand buff the pipe with a microfiber polishing cloth.
I think the porcelain pipe is a unique piece of our hobby and history. I only have a single example of my own and I have mixed feelings about it. I do like how mine has colored over time, taking on a creamed coffee color. I do worry about the fragility of the porcelain and my tendency to drop things. This porcelain apple is a wonderful shape and size. The exterior is a brilliant glossy white. The tobacco chamber interior has discolored and I suppose that I could have been more aggressive with the restoration but I did not want to damage the porcelain. My inexperience with this material kept me from “tough love” during the chamber restoration. The expansion of the cork tenon worked well and the stem polished up very nicely. The black and white of the piece is truly eye-catching. The double holes at the bottom of the tobacco chamber provide an exceptionally smooth draw and I am sure that this pipe will treat its new owner with years of contemplative relaxation. The dimensions of the Porcelain apple are:
Length: 5.78 in./ 146.81 mm.
Weight: 1.45 oz./ 41.11 g.
Bowl Height: 1.64 in./ 41.66 mm.
Chamber Depth: 1.17 in./ 29.72 mm.
Chamber Diameter: 0.77 in./ 19.56 mm.
Outside Diameter: 1.62 in./ 41.15 mm.
I do hope that you have found something here useful to your own pipe care, maintenance or restorations. If you like this sort of thing, please click the like and subscribe buttons. Thank you for reading the ramblings of an old pipe lover.
Loading…
Below are some photos of the finished Porcelain apple.
I did a search earlier asking. “How much should I spend on a tobacco pipe?” The result surprised me:
“The average pipe smoker will spend $50 on their first pipe and $200 on their last. You can get a great starter pipe for under $50, and you’ll have it for life. I’m going to assume that you are new to the hobby of smoking pipes and would like to know about the cost involved.” (https://medium.com/@dh651541/how-much-does-a-tobacco-pipe-cost-637c32d32378)
Heck, I’ll set you up with a nice restored pipe for $50. Take a look at the previous restorations, most are still here and have not been smoked once restored. Feel free to email me scimansays1787@gmail.com. “What’s the point of that shameless self promotion?”, you ask. The answer is, today’s restoration of a Cavalier Bent Bulldog. This lovely pipe was certainly not made to be some great investment or someone’s “last pipe”. It was made to be smoked by a pipe smoker for a reasonable chunk of change. The vast majority of pipes made are from factories producing thousands of pipes per year. These old workhorse pipes shouldn’t be considered inferior junk as they were made to be used. Kind of like Craftsman tools. Sure they are not of the same quality as Snap-On but the average Joe probably doesn’t need nor has the money to buy professional grade quality tools. My Craftsman socket set that I received as a graduation gift from high school (1984, if you are wondering) was used to change the oil in the truck this morning. These tools will get the job at hand finished and will likely last for years with proper care.
The Cavalier came part of an estate lot back around the first of the year 2025. The lot was from Eschweiler, Germany and consisted of 13 pipes which I hoped had pipes that were a bit more uncommon here in the United States. The Cavalier had been languishing in the queue and had gotten cut in front of on several occasions. The stampings on the left shank are “CAVALIER” with an oddly placed close quote over GENUINE BRIAR. Below are some photographs of the pipe prior to any work done.
Hmm, I wonder if I paid the duty on that bit of tobacco remaining in the bowl? The Germans can be sticklers for rules, I hear. This pipe did not look like it required a great deal of work. A thorough cleaning, certainly and a good polishing of the stem.
Background
Searches for CAVALIER on both pipephi.eu and pipedia.org proved to be unsuccessful. This obviously is not a Dunhill product nor is a cavalier shaped pipe, which is what those sources respectively referred to. Typically pipes stamped with GENUINE BRIAR were from post World War II. The lack of a country of manufacture (COM) would also typically indicate a US made pipe. I realize these are both very subjective descriptions especially considering that the pipe was purchased from Germany. The only thing that struck me as odd was the aluminum tenon. I Have seen tenons like this before on French made pipes and in all cases they were fitted into cork lined mortises. Below is an example of a restoration I did of a similar looking mortise and tenon:
The tenon of the Cavalier is a very nice fit into the briar not cork.
With nothing to go on All I can say without conjecture is that this is a pipe made from genuine briar. I am not even sure what the stem material is made of. In the restoration it did not produce the typical brown debris of sanded vulcanite. The sanding produced a very black dust. The stem material feels harder than vulcanite between the teeth but sands as if it is much softer than vulcanite. Weird, I know. The stem is also apparently drilled to accommodate a 3 mm filter. This too is more indicative of pipes made for the European market.
The Restoration
After the photo shoot the Cavalier made its way to the workbench and a laundered denim piece. I removed the used filter from the stem and wondered about the effectiveness of such a filter.
The ream team was collected and prepped for use.
Well, barely put to use. This Cavalier didn’t seem to have been smoked too much or the previous owner had kept the cake to a minimum perhaps by leaving tobacco in the bowl unsmoked?
The reamed bowl looked pretty good some sanding would still be required.
The shank cleaning went well. The tars and smoking residues were softened with 95% ethyl alcohol. These were then scraped using a dental scraper. Between scrapings I used cotton swabs and/or a nylon shank brush to scrub the airway.
The tobacco chamber was sanded with 320 sand paper wrapped around a wood dowel. The chamber was sanded to bare briar and showed no signs of any damage from heat or charring.
As clean as the tobacco chamber had looked the rim told a slightly different story. The lava deposits were quite thick indicating that the pipe had been smoked more than the chamber cake may have implied.
I softened the lava with saliva and began scraping with a sharp pocket knife.
The rim cleaned up nicely with the scraping.
I took the stummel to the sink for a scrub with undiluted Murphy Oil Soap and a nylon brush. The rustications of the carvings had trapped an impressive amount of dirt and grime.
After the nylon brush I repeated the scrubbing with more Murphy’s and a brass brush. The soap was rinsed with warm water and the stummel dried with a cotton hand towel.
Back at the workbench the stummel looked better in some ways and worse in others. It was clean but now I could clearly see the dreaded clear coat and the light spots that were areas where fill or putty had been applied to fills, pits or flaws in the briar.
Quite a few light spots indicating that these carvings were an elaborate flaw concealment.
To address the dreaded clear coat I decided to give the stummel a bath in acetone for about one half hour.
I started working on the stem while the stummel was in the acetone. I had difficulty passing a pipe cleaner through the slot. The slot was constricted with smoking residue, was my first thought.
I used bristle pipe cleaners dipped in 95% ethyl alcohol and a slot tool from Vermont Freehand.
Cleaning the stem went better from the tenon end and was done with bristle pipe cleaners dipped in alcohol. The stem material did not seem adversely affected by alcohol like a phenolic aldehyde (Bakelite).
The slot was poorly cut at a slight angle and slightly off center. To fix this I decided to expand the slot with a Dremel rotary tool and the below bit.
The below photo shows a closeup of the slot before being expanded.
After the slot was expanded the slot was made longer and straightened. The interior would need to be shaped more into a Y with a small diamond file.
The Y was cut with a file, slot tool and smoothed with sandpaper.
The stummel was then removed from the acetone and wiped with a paper towel.
The clear coat was thicker or tougher than I thought. The finish now took on a “crinkle” look as the acetone evaporated.
Rather than just letting it soak for another half hour I started scrubbing the stummel with a nylon brush dipped in acetone. I put a nitrile glove on my hand for holding the stummel.
The acetone scrub worked to remove the clear coat. I probably should have done another half hour acetone soak but impatience got the better of me. In the photos below you can still see the remaining clearcoat in the deeper rustications. My other fear was that extended time in the acetone would dissolve the old fill material. I made the mistake of picking one fill from the front of the stummel. Below it was the topmost horizontal fill. After I picked the material out I realized that there would be very little chance that I could match the old rustication/carving pattern thus creating a bunch of new fill that stood out in unattractive fashion.
The old fills now stood out even more as light spots all over the stummel. I would have to ponder on how to repair these.
Another photo of the light spots.
I turned my attention to the stem for some “pondering” time and a nice repetitive sanding. I masked the shank with painters tape to keep the briar from being sanded. The stem material, as previously mentioned, did not behave like traditional vulcanite. It was not oxidized like vulcanite and the sanding produced a very black dust. Apparently my pondering got in the way of my documentation of the sanding with me failing to photograph the entire process. Apologies. The stem was sanded with a sequence of sanding sponges from 320-3500 grit. Between sponges the stem was rubbed with mineral oil and wiped with a paper towel. The stem material did take nicely to the mineral oil.
After the sanding sponges I buffed the stem rather than using a sequence of micro-mesh pads. The stem material buffed well and took on a lovely glossy black finish.
I wanted to get a better look at how the briar would look when finished so I could envision a remedy to the light spots so I decided to apply Before and After Restoration Balm. The balm was applied by finger and brushed into the carvings using a baby toothbrush.
20 minutes of pondering time later, the excess Restoration Balm was removed with a vigorous hand buffing with an inside out athletic sock.
The solution that I came up with would be a three step process. Step 1 would be restaining the light spots with a Furniture touch-up marker. Mahogany best matched the color.
Step 2 – after the re-staining, the old fills would have brown cyanoacrylate applied. This would soak into the old fill material and strengthen the old fill (so my pondering concluded).
Step 3 – Give the stummel a coat of Danish Oil thus encasing the newly restrained and hardened fills with another layer of protection and blending the residual clearcoat in the rustications with the new finish. The Danish oil was applied with a folded pipe cleaner.
Another pipe cleaner was inserted into the button and acted as a hanger allowing the oil to dry.
I left the pipe to dry overnight. The next day I applied Renaissance Micro-Crystalline Wax to the stummel with a toothbrush and hand buffed it with a soft cloth. This product was chosen over carnauba wax as it would not cake up the rustications and lead to future accumulation of general ickiness.
The stem was given several coats of carnauba wax with the buffer as was the flat stamped surface. The final step was to hand buff the pipe with a microfiber polishing cloth.
This attractive little bulldog turned out very nicely. Given there wasn’t a tremendous amount of work that it needed. The cleaning of the internals, the strengthening of the fills and the slight adjustments to the button certainly improved the pipe. The carvings have a great deal of character and provide for a nice feel in the hand. The stem polished up beautifully even though I do not really know what the material is. Overall this is just a very nice little pipe that will provide years of enjoyment to the next owner. The dimensions of the Cavalier Bent Bulldog are:
Length: 4.70 in./ 119.38 mm.
Weight: 1.04 oz./ 29.48 g.
Bowl Height: 1.44 in./ 36.58 mm.
Chamber Depth: 0.95 in./ 24.13 mm.
Chamber Diameter: 0.69 in./ 17.53 mm.
Outside Diameter: 1.46 in./ 37.08 mm.
I do hope that you have found something here useful to your own pipe care, maintenance or restorations. If you like this sort of thing, please click the like and subscribe buttons. Thank you for reading the ramblings of an old pipe lover.
Loading…
Below are some photos of the finished Cavalier Bent Bulldog.
I’ve restored a few Danish style pipes recently and there is just something I find appealing about their curves. Kind of like the graceful curves of a 1940 Ford Coupe.
I can’t say why I find them attractive, I just do. Well this pipe screamed out to me in a similar fashion. A far more affordable fashion, I may add. I saw the pipe while perusing eBay.
I have to say that I was unfamiliar with the brand and had to do some research to find out even the name. Still this pipe was calling out. The bidding went on and was won. The Jirsa arrived here and was bumped to the front of the queue. Below are some photos of the pipe upon its arrival.
The pipe looked to be in good shape. The stem was oxidized but not severely. The worry there was that the stem looked like it was made of three different materials; an acrylic spacer, a briar band and the stem proper, with the stem only showing oxidation. My worry was how the other two materials and their glue would react with the deoxidation treatment. Otherwise the restoration looked like it should be pretty easy.
Background
As I said earlier, I was not familiar or even aware of Jirsa pipes. To be honest, I didn’t even know what the logo was nor could I easily make out the stamps. I went to pipephie.eu in search of the logo. Starting with what I could see, a circled, “letter”?
Wow, the Jirsa logo looked the same, right down to the briar band. Following that lead I gave it a click. I had a match. The JIRSA stamp on the example from pipephil.eu was even faint like the pipe in hand and a photo of the maker, Goldrich Jirsa.
It was also the first pipe I had ever worked on from the Czech Republic.
I next visited pipedia in search of additional information. The information found was surprisingly detailed. I’ll include it in its entirety:
“Jirsa is a Czech Republic brand owned by the family company headed by the artisan Oldrich Jirsa. They use Ebonite and cumberland stems. Best Grading: SG (Grain), three stars. Symbol: stylized J coming out of an oval.[1]
Sysop Note:Apparently Jirsa no longer uses Ebonite and Cumberland as reported above, but now makes there stems in house using a proprietary, food-safe plastic mixture, which is reported to be very bite-friendly and somewhat softer than acrylic.
The following is an excerpt from a blog post written by Christian Probst for Cigar World:
Jirsa pipes from the Czech Republic may have been known to some pipe smokers for several years. The pipe smokers who already know this brand value it for its excellent price-performance ratio, interesting shapes and good workmanship.
Olda Jirsa, the company owner, writes about his company on his website :
I have been making pipes since 1994. We are a small workshop and we have always strived for pipes with the intention of “making good pottery rather than expensive china”. A lot has happened over the years. We have moved three times and faced various crises, both privately and professionally. The world of pipes has changed, small pipe shops are disappearing and everything is shifting to the internet and social networks. The world is changing and new technologies are influencing more and more aspects of our lives, but we want to stick to traditional craftsmanship as much as possible. We use a modern CNC milling machine for standard production, but each tube is still more than 80% handcrafted. Most pipes are produced in small series, but a small part is personally and entirely handcrafted by me. But in any case, all pipes are made with an interest in them, and also in you. Olda Jirsa
What can still be said is that although Jirsa is a small manufacturer, the manufacturing processes are very modern and economical. Some specialists speak of the most modern workshop equipment in a European pipe manufactory. This has a positive effect on the precision. Holes sit, transitions are right – perfect function.
Also worth mentioning is the in-house mouthpiece production, which gives Jirsa additional flexibility in shaping the pipes. Neither acrylic nor ebonite is used here, but a proprietary, food-safe plastic mixture is used, which is very bite-friendly and somewhat softer than acrylic.
As usual for a Central European manufacturer, they almost exclusively use pipes with a 9mm filter hole, which mostly suits German pipe smokers.
The design language and style are also very characteristic, a unique “handwriting” is clear. Especially bulldog variants of Jirsa have numerous lovers and fans. The fact that small, light-colored acrylic applications are often used between the stem and the mouthpiece is another very attractive detail that makes a Jirsa pipe recognizable as such at first glance.
If you take a look at our Jirsa range, you will see that we currently have predominantly rusticated pipes in the shop. The reason for this is simple – we can only upload the pipes one at a time, but smooth pipes will follow in a timely manner!
Among other things, there will also be very beautiful, light-colored pipes made of great wood quality.
So look forward to absolutely “cheap” pipes in the literal sense, which are worth trying out!” (Jirsa – Pipedia)
Observations were meeting with the information on the pipe with the exception of the founder’s name, is it Oldrich Jirsa, Olda Jirsa or Goldrich Jirsa. Personally, I think Oldrich sounds more reasonable with the “Olda” as more informal. The shaping of the pipe definitely looked far more artisanal than factory matching the 80% handcrafted claim. The stem material, I found very interesting and concerning. Would my standard practices work on restoring it? Stay tuned…
I still wanted some first person knowledge about the company so I messaged my European Connection. No not Gene Hackman, he passed away last February and he was only a French Connection. The great Sascha Mertens, my German connection and European knowledge base. I sent him a photo and asked what he knew about Jirsa pipes. His reply was typical of the all knowing: “Nice pipe! Have none but was told they’re pretty good!” ( Mertens, Sascha. Personal communication). There you have it, time to get to work. Oh, one more thing, here is a link to the official Jirsa site: Website for Jirsa Briar pipes. Now I can get to work.
The Restoration
The pipe made its way to the workbench and a cleaned denim piece. Have I mentioned how much I like this shape?
I started with the stem. It did seem slightly different from vulcanite in the way it had oxidized. I did not appear to react adversely to 95% ethyl alcohol during the cleaning with bristle pipe cleaners.
Into the Briarville Pipe Stem Oxidation Remover. I planned on leaving it overnight.
Returning to the stummel, I gathered the reaming kit. The #2 PipNet blades were a loose fit but the #3 seemed too tight so I grabbed the Kleen-Reem. The Kleen-Reem also proved to be too low of a gauge. I scraped with the General triangular scraper and found the bowl had some kind of a bowl coating. This concoction was more paint-like though I am sure it was not a type of paint. I tried the PipNet #3 blades again and found the bore diameter was correct. A great deal of effort later the old bowl coating was removed.
The interior of the tobacco chamber was in great shape, obviously well protected by that bowl coating. The chamber was sanded with 320 sandpaper wrapped around a wood dowel.
Next came the rim. There was a little bit of lava deposited on the rim.
The rim was moistened with saliva and scraped with a sharp pocket knife. It looked much better but unfortunately also uncovered the charring of the briar from a lighter.
Hmm, I guess not everyone has access to soft flame pipe lighters and some poor souls have to use regular Zippos or war surplus flame throwers.
I lightly topped the rim with 320 sand paper followed by a lighter touch with 400 grit paper.
The rim appeared better but I did not want to alter the shape or the glorious curves of this pipe. Have I mentioned how much I like the shape of this pipe?
To the sink! The stummel was scrubbed with Murphy Oil Soap, undiluted and a nylon brush. The soap was rinsed with warm water and the stummel dried with a cotton hand towel.
Returned to the bench the stummel was wiped with 95% ethyl alcohol on a make-up pad. The stain color was unlike any that I’d seen before. Apricot colored was the term that came to mind.
There were four factory fills of briar flaws. The color of the fills was very similar to the briar but the fill material was very hard and shiny. The reflective spots of the next three photos are of the factory fills. I opted not to dig them out as they all were hard and secure.
I lightly sanded the stummel searching for additional spots which may require filling. That is where I stopped for the night. In the morning the stem would be ready and my eyes more awake.
The next morning I returned to the basement to check on the stem’s progress. “AUGH, what have I done?” May have been heard in surrounding counties. I removed the stem from the Briarville solution and laid it on my shop rag. The color was a spotty olive green, very similar to what I expect the color of a ½ composted zombie would be.
I feverishly rubbed with the coarse shop rag wanting to erase the sin of my putting the stem in that solution. Oh, cool, it comes off with vigorous rubbing.
Back at the workbench the solution had been wiped off or dried and what remained was a buff colored residue. This was definitely not vulcanite now acrylic. By George, this must be, “proprietary, food-safe plastic mixture” as stated above. From here on I’ll use PFSPM in place of proprietary food safe plastic mixture. The second alarming thing to note was the darkening of the briar spacer. I had an idea for a fix for this as well.
I proceeded like I would with a vulcanite stem and scrubbed the surface with Soft Scrub cleanser on a make-up pad. The buff colored residue came off with rubbing. It did heavily foul the make-up pad as seen in the photo below. The stem material was much softer than traditional vulcanite, perhaps from the extended time in the Briarville solution. I decided that I would only work this PFSPM with dry methods going forward.
I used Scotch tape to cover and protect the logo. I thought that it already was much more faint than it was before the Briarville solution and my rubbing/scrubbing. I did not want to further degrade it.
I used Scotch tape on the shank stamps as well. “Why Scotch tape?, you ask. I wanted to sand as close as I could to the stamps and the clear tape is easy to see and trim.
I had left the stummel lightly sanded with 320 followed by 400 sanding sponges the night before. I continued the hunt for briar flaws with fresh eyes and found one. It was a tiny pit requiring a small drop of brown cyanoacrylate (CA, super glue).
Once the CA had cured it was filed with a small flit file.
The stem and stummel were then sanded with a series of sanding sponges from 320-3500 grit. Between sponges the stem was rubbed with mineral oil and wiped with a paper towel. The stummel was wiped with a make-up pad wetted with alcohol.
The sanding did not lighten the color of the briar spacer of the stem. Plan B, using a saturated solution of oxalic acid to bleach the wood. I carefully applied the oxalic acid solution with a cotton swab.
Below is a before oxalic acid photo.
And here is an after oxalic acid photo. It worked better than I had hoped. I had a friend who used to say, “better lucky than good, any day”. Truer words have rarely been heard.
Now I wanted to bring up the shine around the logo without eroding it, a tough job. I carefully avoided the logo while buffing the stem.
The stem looked great and the logo was still intact.
The original logo looked white so I tried a white acrylic paint. This is a water based model paint for figures with fine detail for gaming. I allowed the paint a few minutes of dry time and carefully tried scraping it from the stem while leaving paint in the depressions of the stamp. Failure. I tried a second time allowing additional dry time. Another fail. The paint was not adhering to the PFSPM.
Hmm, silver is not white but a close second. I tried applying Silver Leaf Rub’nBuff. This is a solvent based wax. I thought that maybe it would adhere better.
Success. You can see the area around the loge where the Scotch tape had kept the logo safe from sanding and also showed that my buffing hadn’t affected the logo much. I hoped that the Rub’nBuff residuals would be removed with the next step.
Next came the Before and After Fine Polish followed by the Extra Fine Polish. Both of these were hand buffed with a soft cotton cloth (AKA t-shirt rag). The logo looked good and the stem looked fantastic.
With the stem looking great it was time to see what magic the Before and After Restoration Balm would work on this lovely piece of briar. Have I mentioned how attractive I think this pipe’s shape is?
The remaining Restoration Balm was wiped from the stummel with an inside out athletic sock. The balm did whatever it did beautifully.
It was time for several coats of carnauba wax. This was applied with the buffer.
The insides of the pipe were clean, the exterior had been restored, one thing remained, a bowl coating. I like to use pure maple syrup and carbon powder or charcoal, if you prefer.
A cotton swab was used to apply a very thin coating of maple syrup to the interior of the tobacco chamber. A pipe cleaner was inserted into the airway to keep carbon powder from the airway. A capsule of activated charcoal was opened up and poured into the chamber. The rim was sealed with a piece of painters tape. I then vigorously shook and tapped the stemmel on my knuckles. I rotated the stummel repeatedly and shook and tapped some more.
The tape was removed and the remaining powder dumped. I removed the pipe cleaner and gave the airway a couple of hard blows from my mouth.
Below you can see a nice even coating which would dry after a few days.
The final step was a hand buffing with a microfiber polishing cloth further deepening the shine.
This Jirsa Danish Style Bent Egg was a fun pipe to work on despite what appeared to be a disaster at one point. I love how it is such a unique piece and can only imagine the craftsmanship required to make such a wonderful shape. Most of the restoration I do are on factory made pipes this is far from that. Though Not a piece of flawless briar I commend the folks at Jirsa for making a very nice pipe. The drillings are spot on the fills where well done and have withstood the test of time. The stain or dye used was very nicely done and looks more like a natural finish. The stem polished up beautifully and though I may never know exactly what PFSPM is, I can say that it can be restored to its past glory. It also has a very nice feel between the teeth. The dimensions of the Jirsa Danish Style Bent Egg are:
Length: 5.75 in./ 146.05 mm.
Weight: 1.81 oz./ 92.88 g.
Bowl Height: 2.26 in./ 57.40 mm.
Chamber Depth: 1.89 in./ 48.00 mm.
Chamber Diameter: 0.78 in./ 19.81 mm.
Outside Diameter: 1.63 in./ 41.40 mm.
I do hope that you have found something here useful to your own pipe care, maintenance or restorations. If you like this sort of thing, please click the like and subscribe buttons. Thank you for reading the ramblings of an old pipe lover.
Loading…
Below are some photos of the finished Jirsa Danish Style Bent Egg. Oh, have I mentioned how attractive I find the shape of this pipe? If you are interested in having this pipe for your own please feel free to email me: scimansays1787@gmail.com.
I have said it before and I’ll say it again, “I blame Sascha Mertens for my Denicotea fascination.” Sascha is a pipeman from Germany and has become one of the few people that I communicate with on a near daily basis. When I asked him what shape this Denicotea is, he replied “Quaterbendzublin danish Style!
This thing is absolutely danish! Reminds me of an old Stanwell….” Hmm, “Quarterbendzublin”. That looks more like some Mayan word than anything I was familiar with but, I completely see what he was saying. I think I’ll just use the “072” though.
The previous owner was apparently not aware that they were not supposed to have a cake build-up in a meerschaum lined pipe or that wiping off the rim after a smoke is a possibility. Thus started the list of things to address with this restoration. There was one ugly fill on the left side of the shank that would have to be removed. The oxidation of the vulcanite would have to go. I was not sure how well the rim would clean-up, nor exactly what to do with the meerschaum part of the rim. Oh well, it will all get sorted out.
Background
Fortunately, for me, I have done a few Denicotea restorations. This makes the writing of this section easy. I can just recycle research from previous blogs. Yeah, I’m a Generation X slacker.
“Pipedia.org has a short article on Denicotea. I will include it here in its entirety:
“Willy Heineberg founded the company Denicotea in 1932 and began manufacturing and selling smoking accessories such as filters, filter inserts, cigarette holders and pipes.[1] The company headquarters was initially in Cologne, but was relocated to Bergisch Gladbach after the Second World War.[2]
Denicotea is actually the name of a silica gel filter, cigarette holders and care products for pipes and cigarette holders.
I still find it a bit confusing as Denicotea seems to be a company[3] and a brand as well which is operated by COMPOSING-STUDIO GmbH[4].
Brands
Adsorba
Adsorba is a fantasy series of pipes produced by Luigi Crugnola for the German market.
Aldo Morelli
Aldo Morelli is a fictional name. The brand Aldo Morelli has been registered for Denicotea on February 26th, 1992.[5]
Stefan Petzuch points out this brand appears to have similarities to the Mauro Cateni pipe brand, in particular they are both fictional Italian brands by German companies, and both have the “HAND CUT” imprint on the stem as seen bellow. This may connect the Aldo Morelli brand to Gebr. Heinemann KG in Hamburg, who had registered the Mauro Cateni brand. Or perhaps there is a connection between Denicotea and Gebr. Heinemann KG, or perhaps these pipe brands simply used “Hand Cut” stems from the same source.” (Denicotea – Pipedia)
Interesting and weird are the two qualifiers that come to mind in reading that. The four makers mentioned in the article; Luigi Crgnola, Cesare Barontini, Gig and Molina are all Italian pipe manufacturers. Where does the MADE IN ENGLAND stamp on the example on pipephil.eu or the stamp on the pipe I purchased come in, I cannot say. I can say that I am not the first person to have little success researching the origins of Denicotea pipes. Dal Stanton, who is far more diligent in his background research than I, had a French made Denicotea. He traced its origins to the St. Claude area but not to a specific maker. Dal’s blog was posted on Steve Laug’s rebornpipes.com site. Here is the link to Dal Stanton’s blog post: https://rebornpipes.com/2016/09/29/nice-find-in-plovdiv-bulgaria-denicotea-deluxe-curling-bruyere-extra/”
Now for this Denicotea 072 or as my German accomplice calls it, a “Quaterbendzublin danish Style!”, the world may never know where, when or by whom this pipe was made. I wonder if the added mystique adds to the smoking pleasure?
The Restoration
Dang, that’s a good looking pipe. Even all dirty and sitting on a cleaned piece of denim at the workbench.
I started by lightly sanding the surface oxidation from the stem. I’m not sure what to call the mortise attachment piece of vulcanite that is glued to the shank. Maybe stem one, the below and stem 2 the attached?
The stem was skewered with a pipe cleaner to act as a hanger in the Before and After Extra Strength Deoxidizer (deox) and suspended in the solution.
Since this is a meerschaum lined pipe I relied on the Smoingpipes Low Country Reamer and the General triangular scraper for the reaming this very conical tobacco chamber.
Oh how I wish that someone had explained to the previous owner that meers could be washed out with warm water after a smoke and that cake is not a good nor necessary thing. Oh well, the scraping continued.
After the scraping and a bit of work with a 410 gauge brass bore brush, I used cotton swabs dipped in alcohol to clean the remaining cake from the meerschaum.
The lava on the rim was softened with saliva and scraped with a sharp pocket knife.
I cleaned the airway of the shank with several bristle pipe cleaners dipped in 95% ethyl alcohol. Cotton swabs also dipped were used to clean out the mortise.
The stummel was taken to the sink where it was scrubbed with undiluted Murphy Oil Soap and a nylon brush. The soap was rinsed with warm water and the stumel was dried with a cotton hand towel.
Back at the workbench the stummel was wiped with an alcohol wetted make-up pad. Once the alcohol had evaporated I wrapped the briar shank with masking tape to protect it from the sanding of the vulcanite part of the shank.
I wanted to preserve the logo as much as possible so a piece of Scotch tape was cut and placed over the logo. This proved tricky to sand as I didn’t want to round the edges where the vulcanite would meet the stem. I decided to give the rim top a beeswax coating to protect it from future lava and make the meerschaum more resistant to wear. I heated a small glass jar of beeswax in a pan of water on the stove top. This allows the liquid beeswax to remain liquid longer as the hot water allows the wax to cool more slowly.
The tobacco chamber was plugged with a cork. I picked up an assortment of different sized corks from Amazon and that has been much easier whenever I need to plug a chamber.
The meerschaum was heated with a heat gun then painted with liquid beeswax.
The beeswax cooled quickly and was then heated again with the heat gun. The cork remained in place. As the beeswax was remelted excess dripped off the stummel and was caught by a strategically placed tin.
The cork was removed and the rim was wiped with a clean dry paper towel.
Below is a photo of the newly rewaxed rim back at the workbench. Please ignore the photobombing S. Johnson pipe in the background.
The stem had been soaking in deox for a little over two hours. I removed it and let it drip excess solution back into the jar.
The stem was then vigorously rubbed on a coarse shop rag to rid it of remaining deox solution and some of the oxidized vulcanite.
Next the deox within the stem was cleaned out. Apparently I didn’t clean the stem prior to the deox dip. Darn old people…
The stem, both parts, were sanded with a series of sanding sponges from 320-3500 grit. Between each sponge I used Mark Hooovers new product, Hard Rubber Balm (HRB) rubbed on with my fingers and wiped off with a clean dry paper towel. Mark sent me a sample of the HRB and asked me to try it and give my impressions. So here they are, the HRB is thicker or more viscous than mineral oil. As such it tends to fold the sanding sponges more than mineral oil. A more careful wiping of the HRB from the stem with a paper towel lessens this. The fouled sponges are easily cleaned with a little bit of alcohol rubbed on with a finger tip then wiping them off on the denim surface protecting cloth. The HRB excels as a coating of stems after they have been restored. Since it is a heavier or thicker oil it should evaporate more slowly from the vulcanite. I really like how HRB works for preserving stems. How well it lasts over time is still undiscovered as I have only been using it for a couple of weeks but it looks like it is a solid competitor of Obsidian Oil and should actually last longer based on it’s properties.
The stems were then worked with micro-mesh pads in grits from 4000-12000. Again the HRB was rubbed on and wiped off between pads.
The stem was then taken to the buffer where I buffed it with white buffing compound on the dedicated white wheel.
The buffing compound was wiped from the stem and I cleaned the logo area with alcohol. I used a white acrylic modeling paint to repaint the depressions of the logo stamp.
The entire pipe was returned to the buffer where it was given several coats of carnauba wax.
The final step was a hand buffing of the pipe with a microfiber polishing cloth.
I think this Denicotea Quaterbendzublin Danish Style!, hmm, I just can’t do that. I think this Denicotea 072 turned out beautifully. The visual appeal is very much to my liking. The light weight along with the bend make it a very comfortable pipe to clench and the longer stem keeps the smoke out of my eyes. Though not uncomfortable in hand the pipe does not fit into my hand as well as many others. The rustications add character and seem perfect for the shape with the briar grain on the right side matching the lines of the rim. The stem polished up very well with its high gloss black accentuating the rustic mahogany of the briar. The dimensions of the Denicotea 072 are follows:
Length: 5.06 in./ 128.52 mm.
Weight: 1.42 oz./ 40.26 g.
Bowl Height 2.00 in./ 50.80 mm.
Chamber Depth: 1.60 in./ 40.64 mm.
Chamber Diameter: 0.67 in./ 17.02 mm.
Outside Diameter: 1.68 in./ 42.67 mm.
I do hope that you have found something here useful to your own pipe care, maintenance or restorations. If you like this sort of thing, please click the like and subscribe buttons. Thank you for reading the ramblings of an old pipe lover. This one is going in the personal collection.
Loading…
Below are some photos of the finished Denicotea 072.
I worked on several meerschaum pipes last summer. I wanted to improve my skill set by branching out from briar pipe. They were fun and produced some fine smoking pipes. You may be familiar with the saying, “use it or lose it”. I felt the need to work with meerschaum again. I am more than certain that what I know about the mineral would hardly fill a tobacco chamber so when I saw this lovely carved meer I had to bid. Winning it for under $17 was a bonus I hadn’t planned for. The pipe headed south from Cokato, Minnesota to the tropics of southeast Nebraska where the current temperature is 14° F (-10 c). I am sure it’s warmer here than in Cokato as they are about 350 miles north. The pipe was free of any markings or stamps. The style and early stages of coloring indicate that this is a Turkish made meerschaum pipe. The photos below show the pipe as it appeared before any work.
The pipe was in very good condition. It had been smoked but not a great deal. There was a light cake built up in the tobacco chamber and there were telltale signs of smoking residue and tar in the stem. There was a small crack along the back side of the bowl but this did not appear to be anything more than superficial. The pipe had begun to color something that I hoped to work on developing. The beeswax coating on the pipe was in good condition and there did not appear to be any “dry” looking spots to the meerschaum.
Background
I have pretty much told you all that I know about this pipe and I admit that a good deal of that is hypothetical. I think this is a Turkish made meerschaum pipe made from Turkish meerschaum. That sounds like there may be a woodchuck chucking nearby. Turkish meerschaum is known to be the best quality meerschaum and Turkish craftsmen have honed their skills well. According to Google’s Artificial Intelligence (AI)I when posed with the question “where is the highest quality meerschaum mined?”, “The highest quality meerschaum is mined in the region around Eskisehir, Turkey. This is considered the only place in the world where the purest and best quality meerschaum blocks are found, primarily in the Sarisu mines located within Eskisehir.” The below map was screenshot with a search asking for “sarisu meerschaum mines eskisehir turkey”. Thank you AI. I am trying to be nice and polite to the AI as I hope it will remember those who were kind to it when it unleashes the Terminators.
As usual I began with a cleanish piece of denim on the workbench.
The reaming tools were just scrapers and sandpaper on a stick as I did not want to cause any additional torsion to the reaming process with a reading tool.
The Scraping did a good job of removing the cake deposits.
Below is a photo of the tobacco chamber after being sanded. No interior damage was observed.
The ri had some lava which was removed with 95% ethyl alcohol on cotton swabs.
The stem was gunked up much worse than I originally thought. This required a good deal of scraping with the dental pick and numerous alcohol dipped cotton swabs.
A shank brush with alcohol was also used with numerous bristle pipe cleaners.
To improve the polish of the airway and remove the traces of dark tar I used a churchwarden pipe cleaner and some whitening toothpaste. The toothpaste was applied to the pipe cleaner.
One end was clamped into a tabletop vice. The stem was then threaded onto the pipe cleaner. The stem was moved up and down the length of the pipe cleaner allowing the toothpaste to scrub the airway.
The stummel was then taken to the sink for a scrub with warm water, no soap, and a nylon scrub brush. The stummel was dried with a cotton hand towel.
Back and the workbench the airway of the stummel was cleaned using a number of bristle pipe cleaners dipped in 95% ethyl alcohol. At one point I thought that the airway was too constricted so I used a 532 inch drill bit, by hand, through the nylon tenon and into the meerschaum. I blew out the meerschaum dust and continued cleaning.
When the airway was finally clean I bega heating the beeswax in a small glass jelly jar. I placed the jar into water in a pan. This allowed the beeswax to melt in the jar using the hot water to melt it. This serves a couple of purposes; one, the hot water keeps the wax hot longer than hot wax alone and two, it keeps the wax from vaporizing. Vaporizing wax over a propane stove burner sounds like a bad idea to me.
Below is what I call the beeswaxing kit: A heat gun, an aluminum catch tin to collect dripping beeswax, the always needed paper towels and the pipe.
The stummel was heated with the heat gun prior to brushing on the liquid beeswax. Once hot, I started applying the beeswax starting at the shankend. The stummel was constantly moved around heating it from all sides. Excess melted wax accumulated in the catch tin.
Once I finished applying the beeswax I continued to move the stummel around in the hot air stream until it quit dripping. I put on a glove to protect my hand and wiped the surface of the pipe with a paper towel. The pipe was returned to the workbench and allowed to cool.
The stem on this pipe looked good so no sanding was done. I did give it a light buffing with white buffing compound with the white flannel wheel. The stem also received several coats of carnauba wax from the buffer. The stummel did not receive any carnauba due it having just gotten a nes coat of beeswax. The entire pipe was hand buffed with a microfiber polishing cloth to rain the shine.
Well there it is another learning experience of working with meerschaum and completing a lovely Carved Meerschaum Apple. I am still learning camera settings and photo editing for the white background. Feel free to comment on background preferences. As for the pipe, I think it turned out nicely. I can report that it is a fine smoking pipe. I am generally not a fan of carved pipes but the grapes, leaves and vines gave this piece a feel of the Mediterranean and seemed quite fitting. Besides, I am a sucker for a nice apple shape. The pipe looks very good with the new beeswax and it did seem to draw out more color. The pipe feels great in hand and is my perfect size chamber. The crack in the meerschaum does not appear to be an issue so I did nothing with it. If it fails in the future then I will have gained even more knowledge about meerschaums. The dimensions of the Carved Meerschaum Apple areas follows:
Length: 6.22 in./ 158.00 mm.
Weight: 1.44 oz./ 40.80 g.
Bowl Height: 1.88 in./ 47.75 mm.
Chamber Depth: 1.65 in./ 41.91 mm.
Chamber Diameter: 0.78 in./ 19.81 mm.
Outside Diameter: 1.60 in./ 40.64 mm.
I do hope that you have found something here useful to your own pipe care, maintenance or restorations. If you like this sort of thing, please click the like and subscribe buttons. Thank you for reading the ramblings of an old pipe lover.
Loading…
Below are some photos of the finished Carved Meerschaum Apple.
This is only the second Alpha pipe that I had laid hands on. Oh wow, that sounds like some religious experience. Let me rephrase that, this is the second Alph pipe that I had ever worked on. Whew, much less responsibility, there. Although, this pipe may need a miracle to save it. The first Alpha was many years ago and I still see it when I visit a buddy at his farm a couple miles south of here. It was a sandblast Dublin which became his birthday present and still sees its share of tobacco. This pipe may make it his way as this year’s birthday present and to keep the other Alpha company. Don’t tell him, okay? The Alpha was part of an estate lot from only a few miles away, Falls City, Nebraska. Falls City is also the hometown of Larry the Cable Guy. Well, the pipes were in rough shape but, I figured I would support a local antique dealer. The below photo is of the lot.
I did the math and it was cheaper to actually have the pipes delivered than to make the drive in my 20 year old pickup. A short time later the dilapidated darlings arrived. This Alpha was stamped ALPHA over GALAXY on the left shank. The GALAXY was hard to make out as it looked like the stamper was only applying pressure to the top of the stamp during the stamping. The A logo on the stem was clear but light and appeared to be more paint than a true stamp. No other marking could be discerned. Below are some photographs of the Alpha Galaxy before work had begun.
It was safe to say that this was someone’s favorite pipe judging by the wear on the blast pattern. Perhaps a local farmer who frequently had extra grit on his hands of gloves to abrade the pipe surface. The pipe had seen a good deal of use as evidenced by the wear, cake, lava on the rim, stem oxidation, tooth chatter and general brokenness. Yeah, that would probably have to be dealt with too, the broken stem, that is. I bet a new Delrin tenon would work. This was not going to be an “easy button” restoration.
Background
I started researching Alpha with a look on pipephil.eu. This is my go to site for logos and often a first step in seeking answers to pipeological questions. The screenshot below shows two country of manufacture (COM) flags. That usually indicates a more convoluted history. The A on the pipe’s stem was a match with two of the photos.
Next I turned to pipedia.org and a search of Alpha. Here I found the following information:
“Alpha was originally a brand of the Shalom Pipe Factory in Israel, owned by Bernard Hochstein, former CEO of Mastercraft. The Alpha line was made exclusively for export to the United States. They were made in Israel from the 1970s into the 1980s, at which point the name was sold to Mastercraft, and later to Lane, Ltd., who produced very few Lane Alpha pipes at the end of the 1990’s. Lane Alphas were sold in five finishes, each denoted with a Greek letter. After Lane, Mastercraft again marketed the Alpha, under the name Alpha USA, with finishes named Sierra, Delta, Mark V, Blue Ridge, Sabre, and Big Boy, some of which were not stamped with the Alpha name.
Alpha Citation, shape 2535
Among others, the Israeli made Alpha pipes were available in a line marketed as “Citation”.” (Alpha – Pipedia)
I thought that it made sense that Israel would be a pipe producing country due to their Mediterranean geography which would place them in the natural range of briar (Erica Arborea). Well in looking up the range of Erica Arborea, I was surprised to see that it does not encircle the Mediterranean. Poor Israel seemed to have an abundance of enemies and a dirge of briar. The world not making sense returned to normal and I continued my research.
Within the first pipedia.org article there was a link to the Shalom Pipe Company. I followed this and was rewarded with the following:
“Not much is known about Israel’s sole pipe factory though it’s reported to have operated quite successfully on international markets.
Shalom Flyer, courtesy Doug Valitchka
Beside the brand “Shalom” the mainstay brand was Alpha – especially well known in the USA. Alpha was popular for a range of fresh and unusual shapes. Series (afaik): Caprice (s), Citation (s), Classic (b), Pedestal (s), Regent, Region (b), Rex (s). (1)
(1) (b) = blasted, (s) = smooth
Alpha also produced at least one of its Citation forms for Carey’s “Magic Inch” series.
Mentioned in context with Shalom Pipe Factory was a Danish pipemaker named ‘Muki Liebermann’, who later lived and worked in the USA. Muki is known for his unique briar bending technique and his original shapes that gave inspiration to many of the most praised Danish pipemakers.
Shalom was taken over by Robert L. Marx of New York City, later Sparta, NC, then of Mastercraft. Mastercraft continued the Alpha pipes introducing new lines.
Other brands from Israel:
Andersen
Burl King (Best known for their Danish-looking “thumbhole” pipes with plateau tops.)
Fader (Presumably for Fader’s Tobacco Shop, Baltimore. Also known: Fader – Made In Denmark.)
Interesting information but lacking the details, such as dates of purchase or sale. These details might be helpful in narrowing the dates of origin of this pipe. I knew that Robert Marx started Marxman Pipes in 1939 and sold it to Mastercraft in 1953. This made the initial dates given in the pipedia.org article confusing. It states that, “They were made in Israel from the 1970s into the 1980s”. Israel was formed May 14, 1948. It is very doubtful that any COM would predate that. With no other information I will defer to the 1970s-1980s quote as the probable date of manufacture. Pipedia.org did have a few photos of the Alpha Galaxy which appears to be a smooth twin to the Alpha Galaxy in hand.
(Alpha – Pipedia). The purchase of Alpha by Mastercraft appears to have come with changes to the stem logo. I use that bit of evidence to be the upper limit of production for this pre-Mastercraft Alpha.
The Restoration
The broken beauty, well potential beauty, received a cleaned denim piece on the workbench.
The first task was to free that broken tenon from the mortise. I used a disposable pipette to drip some 95% ethyl alcohol onto the seam of the mortise/tenon. Then screwed a drywall screw into the airway.
It took some wiggling and tapping but the broken tenon came loose.
Next came the reaming of the tobacco chamber. This was done with the PipNet, General triangular scraper and Smokingpipes Low Country Reamer.
The PipNet was used with the #2 and #3 blades.
The chamber looked good for a pipe used as much as this one had been.
The lave on the rim was further evidence of the use this pipe received.
The rim and chamber were brushed with a brass shotgun bore brush. On the rim I wetted the surface with alcohol and wiped it with a paper towel, after brushing.
The tobacco chamber was sanded both with the sandpaper wrapped wood dowel as well as by hand. Wide diameter bowls make this a much easier task.
The shank airway was cleaned out first by running the Cleen-Reem tool’s shank drill through. This required several starts/clean the tar from the dril/restarts. Bristle pipe cleaners folded and dipped in 95% ethyl alcohol and a nylon shank brush were used to clear the airway.
The stummel was then taken to the sink for a scrub with undiluted Murphy Oil Soap and a nylon scrub brush. Thesoap was rinsed with warm water and the stummel dried with a cotton hand towel.
Back at the workbench the stumble was wiped with a make-up pad dipped in 95% ethyl alcohol. The lack of color on the pad indicated that the stummel was clean and free of any finish.
I cannot say how or why I neglected to photograph the treatment of the stem before going into the Before and After Extra Strength Deoxidizer (deox) other than perhaps I was thinking that the entire stem may have to be replaced if the attempts at restoring it failed. After having soaked for several hours in the solution I removed the stem and allowed it to drip excess solution back into the jar.
The stem was then vigorously rubbed with a coarse shop rag to remove the remaining solution and some of the loosened oxidation.
I cleaned the airway with bristle pipe cleaners dipped in 95% ethyl alcohol.
The surface of the stem was scrubbed with Soft Scrub cleanser applied to make-up pads.
The remaining tenon was filed with a flat file. I did not want to get too close and risk filing the shoulder of the stem thus rounding it and making the shank to stem joint look ill fit.
The plan was to use increasingly large drill bits to enlarge the draft hole until I could insert a replacement Delrin tenon. Delrin is the preferred material for replacement tenons. According to the Great Google AI: “Delrin is a high-performance, semi-crystalline thermoplastic that’s a popular choice for engineering applications:
Properties Delrin is known for its high strength, stiffness, dimensional stability, and low moisture absorption. It’s also chemically resistant to solvents, hydrocarbons, and neutral chemicals.”
That and it’s what the replacement tenons from Tim West (https://jhlowe.com/) are made of. He sells various sizes and styles of tenon material and is a pleasure to work with.
Back to the subject at hand. To center the drill bits as best I could using hand tools, I chose to chamfer the existing hole using a countersink bit. Yeah, I know, I need a drill press.
I used tape to mark each bit to the depth that I desired , about 5 mm. In the photo below you can see the replacement tenon immediately above the drill bits. This tenon was 5/16 inch (0.31in. or 8 mm) in diameter.
I stepped up the hole size with increasingly large bits until I got to a size where I no longer felt comfortable drilling by hand. I was afraid I’d break the stem.
I used the tenon cutting tool from the boys at Vermont Freehand (https://vermontfreehand.com/)to cut one end of the tenon to fit the hole.
I left the surface of the cut purposefully rough to allow the epoxy greater surface area to adhere to. I tested the fit and depth. The fit was good but the length was too long. That was an easy fix – shorten it.
Using a Dremel tool and cut-off bit I trimmed the tenon.
There, I had a nice fit. The tenon itself was far too long but that was another trim from the opposite end.
Below, you can see the final fit of the stem with the replacement tenon.
Glueing was done with 2 part JB Weld epoxy.
The mixed epoxy was applied to both the stem and the replacement tenon using a fly tying bodkin.
The replacement tenon was inserted into the stem then a pipe cleaner dipped in acetone was run through the airway several times to clear it of any overflow epoxy. The stem was interested in the shank and wrapped tightly with painters tape. This project then was set aside for a couple of days to allow the epoxy to set and cure.
After curing, the joint between the stem and shank was filed for a perfect fit/seam. I wrapped the shank slightly below the shoulder with painters tape to protect the stampings but allowed the briar to be sanded with the stem to further reduce the seam. The stem was sanded from 400-3500 grit sanding sponges. Between each sponge the stem was rubbed with mineral oil and wiped with a paper towel. After the curing period I placed the pipe in a 220°F (104 c) oven for 8 minutes then bent the stem to shape. Personally, I prefer to use the oven over a heat gun for shaping stems. Besides, I was going to be using the oven anyway.
The tape was removed and the stem worked with 4000-12000 micro-mesh pads. I rubbed the stem with Obsidian Oil and wiped it with a paper towel between each micro-mesh pad.
The stummel was coated with Before and After Restoration Balm and allowed to sit for 20 minutes.
The remaining balm was hand buffed with an inside out athletic sock to remove the balm.
There remained a stubborn patch of brown oxidation on the stem right at the joint where it connected to the shank. I hoped that the Before and After Fine Polish would work at removing this. The stem was polished using a soft cotton cloth and the Fine Polish.
The Fine Polish was followed by the Extra Fine Polish. The brown spot was eliminated.
I gave the stummel an overnight treatment of cotton and alcohol to rid it of the slight Old tobacco smell. Cotto was stuffed into the bowl and airway and approximately 10 ml of ethyl alcohol was added via pipette.
The next day, I removed the cotton and ran alcohol dipped pipe cleaners through the airway again as well as a couple of dipped cotton swabs around the bowl.
The pip was then taken to the buffer for several coats of carnauba wax. The sandblast of this pipe was not very deep and I thought that applying carnauba would work with the texture.
Overall I am quite pleased with how well this restoration turned out. The worn sandblast has a wonderfully comfortable feel in the hand and makes you think that this pipe has been yours for many years. The vulcanite took quite a bit of extra effort to get to look good, unfortunately at the cost of the stem logo. The logo is barely observable but you can still see it. The pipe has a lovely set of curves and is equally comfortable to clench. The dimensions of the Alpha Calabash are:
Length: 5.43 in./ 137.92 mm.
Weight: 1.22 oz./ 34.59 g.
Bowl Height: 1.06 in./ 26.92 mm.
Chamber Depth: 0.85 in./ 21.59 mm.
Chamber Diameter: 0.80 in./ 20.32 mm. (Conically bored diameter is at the top)
Outside Diameter: 1.48 in./ 37.59 mm.
I do hope that you have found something here useful to your own pipe care, maintenance or restorations. If you like this sort of thing, please click the like and subscribe buttons. Thank you for reading the ramblings of an old pipe lover.
Loading…
Below are some photos of the completed Alpha Calabash pipe.
I picked up a pipe rack for churchwardens the other day and upon placing pipes in it I realized I was short one churchwarden. Well, my Obsessive Compulsive Disorder (OCD) could not stand for that. Actually I think it should be CDO (compulsive disorder of obsessions) that way it is in alphabetical order. Anyway, I did happen to have a little churchwarden in need of restoration. I had apparently led a life of sunlight exposure and wore the oxidation scars to prove it. The little Czech appeared as below prior to any work done.
Yeah, she looked rough. The glaring issues were the chipped faded clear coat, the charred rim and the heavily oxidized stem. The good news was that the briar was nice, thick and looked structurally sound, there were no deep bite marks on the stem and the mortise to tenon fit was tight. This restoration would be some work but it looked promising.
Background
I did not have much to go on researching this pipe. The only stamp was CZECH on the left shank. Both pipephil.eu and pipedia.org came up empty for that stamp. Surprisingly, pipephile.eu only has 6 makers listed from the Czech Republic and they all appear to be artisan carvers. This pipe does not strike me as artisanal. Pipedia.org lists significantly more than 6 with nearly all of them also artisan pipe makers. The one factory pipe maker mentioned was BPK. The BPK name in the country index listed had the following:
Upon following the link to BPK this short entry is all the information to be found,
“A long tradition of producing pipes. BPK company exports pipes to more than 40 countries. The production of pipes has been traditionally connected with small town Prosec u Skutce since 1842. Prosec is situated in the heart of Czech Republic, approximately 150 km (93 miles) far from Prague. Since the change of political situation in 1989 the company BPK, Ltd has been continueing in the traditional production.” (BPK – Pipedia).
BPK
Located in the town of Proseč, Czech Republic, the BPK workshop makes pipes since 1842. The firm succeeded at a time when pipe market was growing. At first, BPK pipes were actually not made with briar, but with other types of wood: alder, maple or pear tree. M. Zabor Bernard Kopperle (officer of the company) will only begin to use briar in 1910 for his pipes. The result is stunning because of the briar properties, particularly for tobaccos combustion: more heatproof and better for smokers when it comes to the taste. The BPK pipes success was immediate, and pipes were therefore exported in numerous neighbor countries. In the late 30s, more than 600 craftspeople worked for the production of BPK pipes! Nowadays, these pipes are still liked by smokers thanks to their classical design. Their silhouettes are simple and without any flourishes. Last criterion, and an important one: BPK pipes are proposed at an affordable price!
I think I need to get some larger and fresher denim for workbench working surfaces.
The reaming tools were gathered.
The #1 blades of the PipNet did the majority of the work with the Smokingpipes Low Country Reamer and the General Triangular scraper just finishing up the process.
The interior of the tobacco chamber was sanded with 320 sandpaper wrapped around a wood dowel. No signs of any damage were observed in the bare briar.
The rim was scraped with a sharp pocket knife to remove the lava. The stummel was topped using a piece of 320 sandpaper laid flat on a counter. This was followed by topping the stummel with 400 grit sandpaper. I then tried a technique described to me by Sascha Mertens, a pipe restorer from Germany, where petroleum jelly is rubbed onto the charred briar and then gently scraped with a sharp knife. This application of petroleum jelly and scraping was repeated several times.
The stummel was then taken to the sink for a scrubbing with Undiluted Murphy Oil Soap and a nylon scrub brush. The soap was rinsed with warm water and the stummel dried with a cotton hand towel.
Back at the workbench the now clean finish could be seen more clearly.
I tried dissolving the clear coat with an acetone dipped make-up pad. The finish did surrender to the acetone but the process was slow. The remaining finish was thickly applied and soaking the stummel seemed to be a more effective approach.
The stummel was submerged in a jar of acetone for 30 minutes.
Upon removing the stummel from the acetone, I could see the finish had softened and bubbled up from the briar. This was rubbed off with a couple of make-up pads dipped in acetone.
In places the remaining finish was scraped with my thumbnail while it was still soft. As the acetone evaporated the finish rehardened but was far easier to remove with additional rubbing with the make-up pads.
While the airway was still moist with aceti=one I quickly worked with folded bristle pipe cleaners to remove the softened tar. Additional cotton swabs dipped in 95% ethyl alcohol were used to clean the shank along with more pipe cleaners.
The rim looked far better than it did originally however there remained a darker area where the charring was the worst. This can be seen in the below image even with the poor focus.
I decided to try to lighten the briar by bleaching it with a saturated oxalic acid solution.
Rather than just treating the darkened areas I treated the entire stummel. An empty 20 gauge shotgun shell was used as a handle as it fit tightly into the tobacco chamber. The oxalic acid solution was painted using a cotton swab. As the solution soaked into the briar and/or dried additional oxalic acid was applied.
The stummel was allowed to dry and to let the oxalic acid work. 30 minutes later the dry stummel appeared as below.
The stummel was taken to the sink where it was rinsed with warm water and scrubbed with a dish detergent. My thinking was that the basic nature of the dish soap would neutralize any acid remaining. Back at the workbench the stummel was wiped with a95% ethyl alcohol on a make-up pad. No significant color came off the stummel with the alcohol.
The pits and old fills were picked with a fly tying bodkin to remove the old fill material. New fills were done using brown cyanoacrylate (CA, super glue) and briar dust. The CA was placed into the pit with a fly tying bodkin then briar dust was pressed into the wet CA. The subsequent fills were filed with a small flat file then sanded with a 400 grit sanding sponge. This was repeated for larger pits.
To further conceal the slightly darkened rim and the new fills as well as accentuate the briar grain, I decided to give the stummel a contrast dye with black Fiebing’s Leather Dye. The counter was covered with a folded paper towel. The 20 gauge shell was wrapped with a layer of masking tape to tighten the seal to the tobacco chamber and limit dye from entering. A folded pipe cleaner acted as the applicator for the dye.
The black dye was applied with the pipe cleaner then flamed with the lighter. This allows the solvents in the dye to burn off and fix the dye to the briar. The process was then repeated.
The dye was allowed to dry for about 30 minutes. The stummel was then sanded with a 320 sanding sponge to remove the outermost layer of black dyed briar. The dye penetrates more deeply in the softer grained wood. By lightly sanding the surface and removing only the outermost layer the briar grain can be differentially dyed. The stummel was then sanded with a series of sanding sponges from 400-3500 grits. In between each sponge the stummel was wiped with a make-up pad moistened with alcohol to remove sanding debris.
The stummel was then worked with 4000-120000 micro-mesh pads. Between each pad the stummel was again alcohol wiped.
The stummel was given a liberal coating of Before and After Restoration Balm and allowed to sit for 20 minutes while the balm worked its magic on the briar.
The balm was then wiped from the stummel using an inside out athletic sock.
This heavily oxidized stem was so long that I couldn’t manage a container which could hold Before and After Extra Strength Deoxidizer. Removing that from my restoration arsenal, I had to rely on sanding alone. I knew that this would probably result with a finished product that retained some brown rather than the desired black. The brown oxidized vulcanite would probably be near the shank end where extra sanding would remove so much material that the fit to the shank would be negatively affected. Oh well, I figured that I would cross that bridge when I got there. I started the sanding with a light touch and the 320 grit sponge. The oxidation removed better than I had hoped. I proceeded through the series of sponges 400-3500, though the photo below only shows 400-1500. Between each sponge I rubbed mineral oil onto the stem and wiped it with a paper towel to remove sanding debris.
I cleaned the airway with bristle and soft pipe cleaners dipped in 95% ethyl alcohol. I had to approach the stem from both ends for the cleaning due to the length.
The stem was then worked with micro-mesh pads 4000-12000. Between these pads I rubbed the stem with Obsidian Oil and wiped it with a paper towel.
The final polishing was done with Before and After Fine Polish hand rubbed with a soft cotton cloth. This was repeated several times with fresh Fine Polish. I eventually ended with the Before and After Extra Fine Polish and the soft cotton cloth. The stem looked good but did show slight oxidation at the shank end. I hate it when I’m right about these things.
The pipe was taken to the buffer where it received several coats of carnauba wax. The final step was a hand buffing of the pipe with a microfiber polishing cloth.
All told, this lovely Czech churchwarden turned out very nicely. The best part is that it completely fills the 6th slot of my churchwarden pipe rack enabling me to sleep OCD free at night. The contrast dye worked at accentuating the briar grain while concealing the previously charred rim and numerous fills. The stem polished up better than I had anticipated. And looks very good in normal room lighting. Bright lights do allow the oxidized vulcanite to be seen at the shank end. The dimensions of the Czech Churchwarden are:
Length: 10.75 in./ 273.05 mm.
Weight: 1.35 oz./ 38.27 g.
Bowl Height: 1.59 in./ 40.39 mm.
Chamber Depth: 1.19 in./ 30.23 mm.
Chamber Diameter: 0.63 in./ 16.00 mm.
Outside Diameter: 1.38 in./ 35.05 mm.
I do hope that you have found something here useful to your own pipe care, maintenance or restorations. If you like this sort of thing, please click the like and subscribe buttons. Thank you for reading the ramblings of an old pipe lover.
Loading…
Below are some photos of the completed Czech Churchwarden.


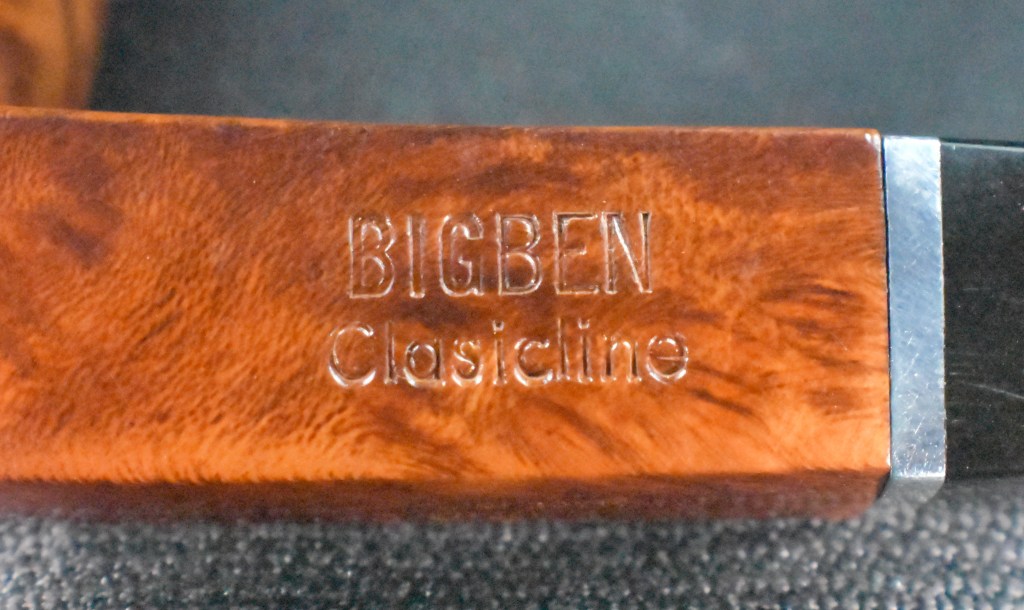


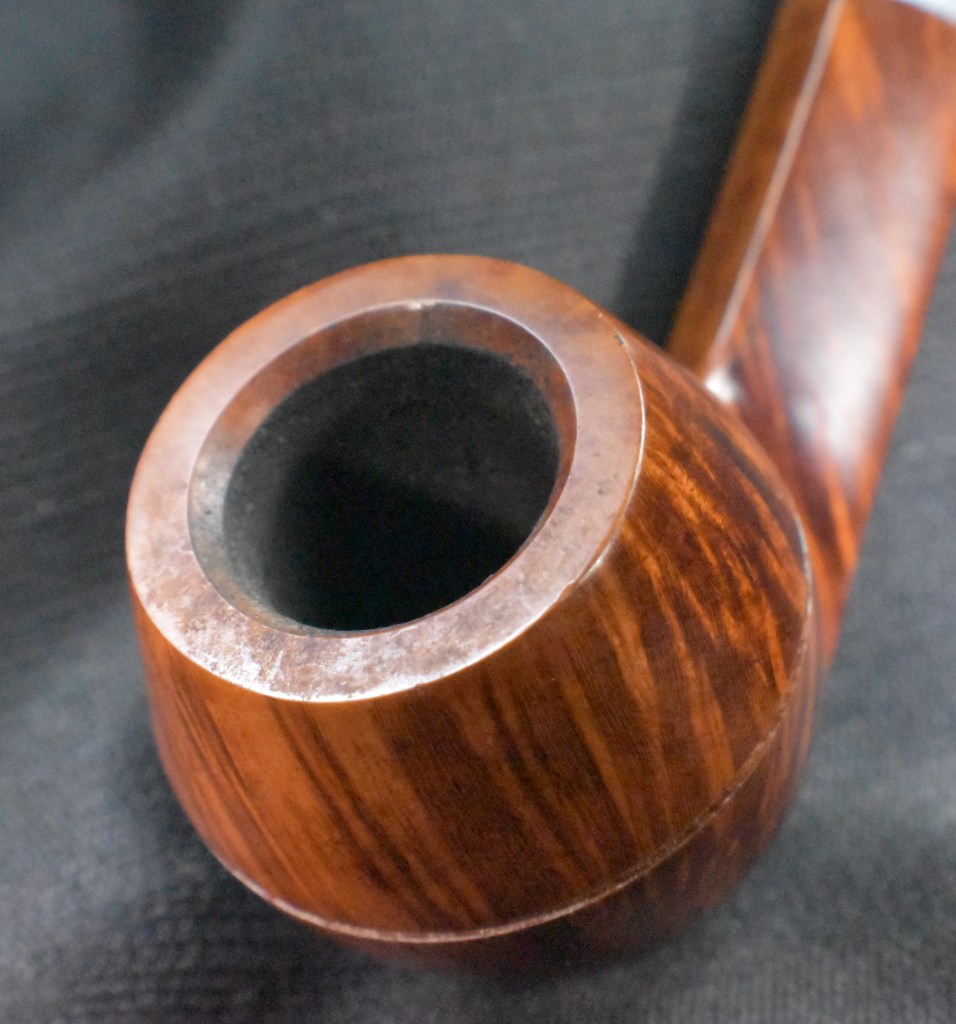
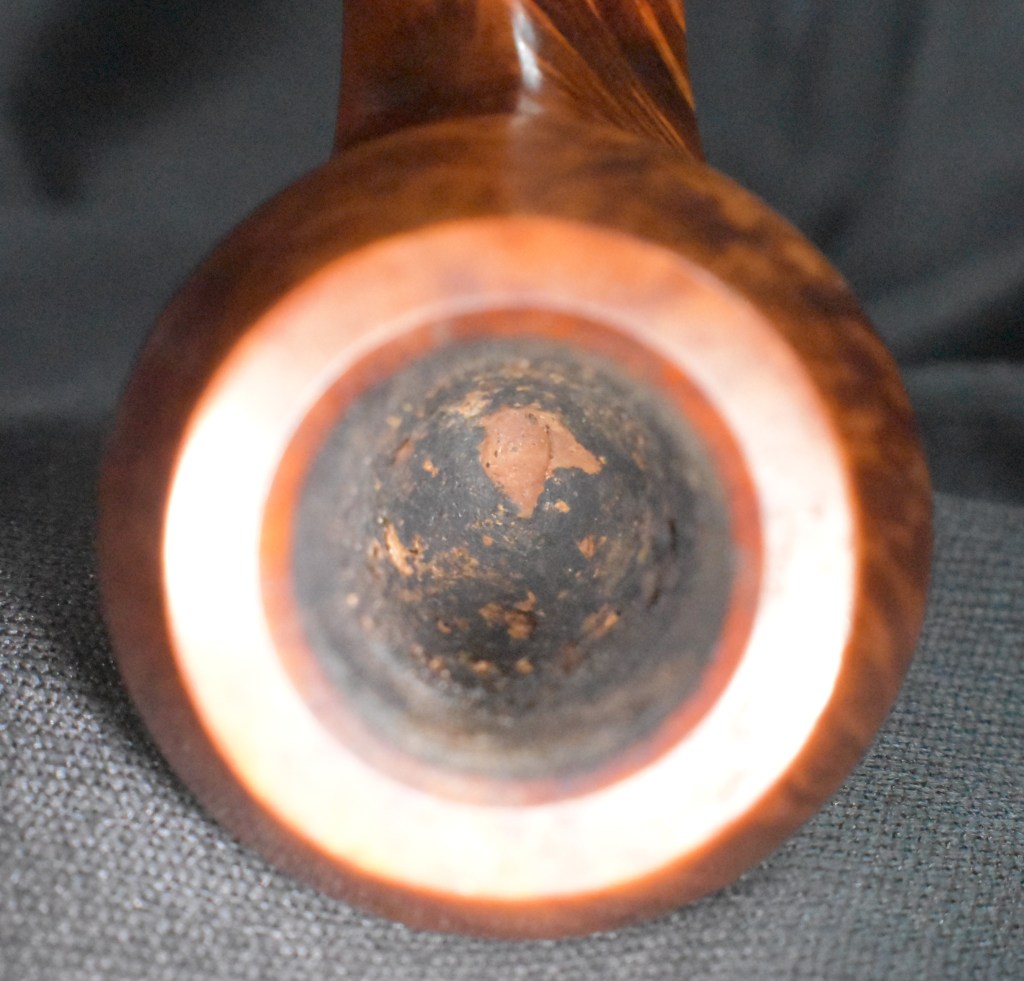
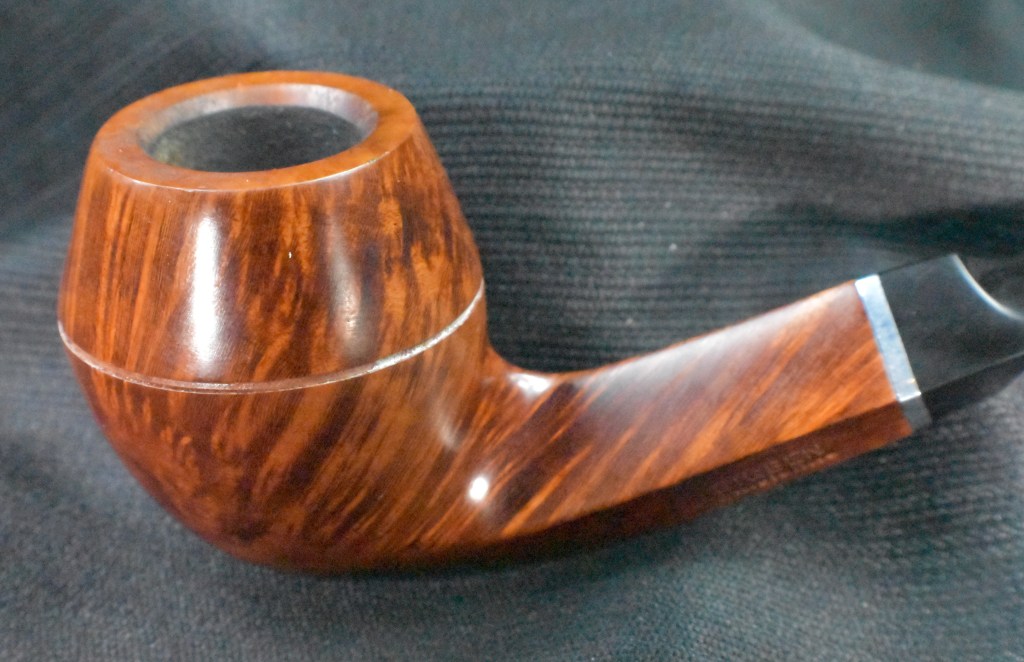
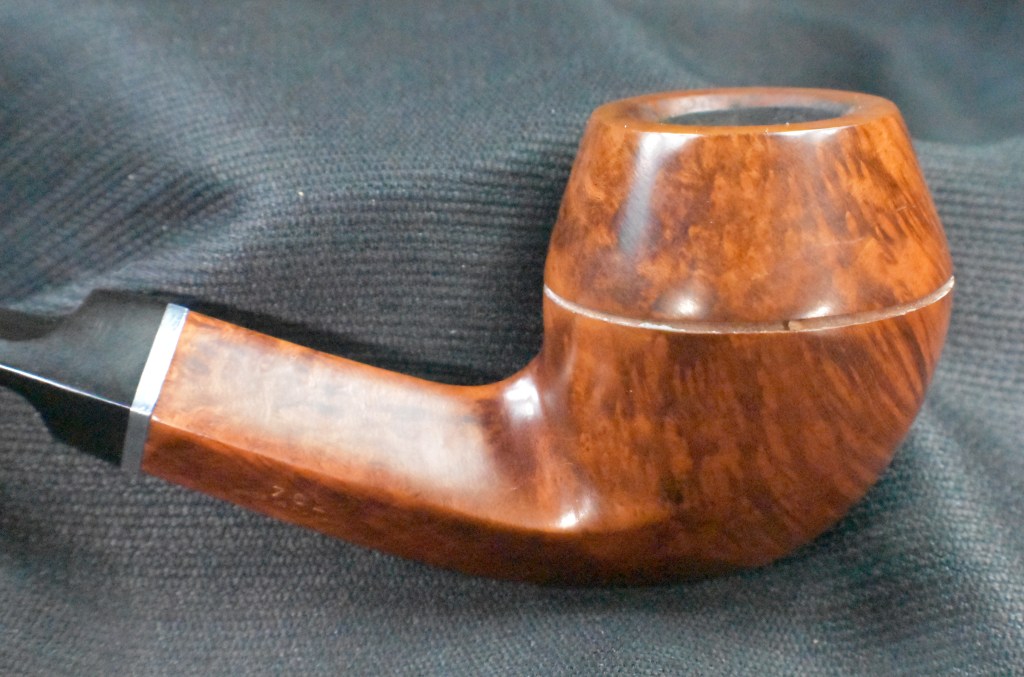

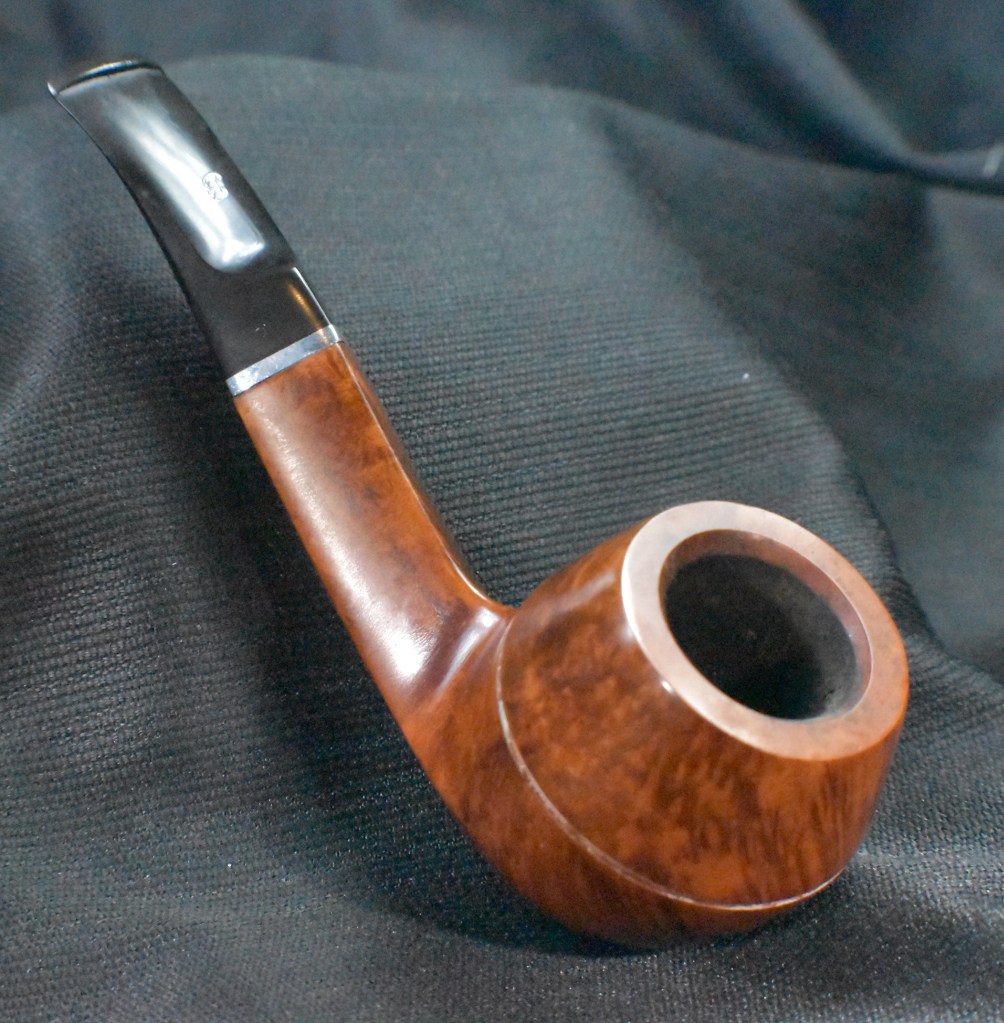


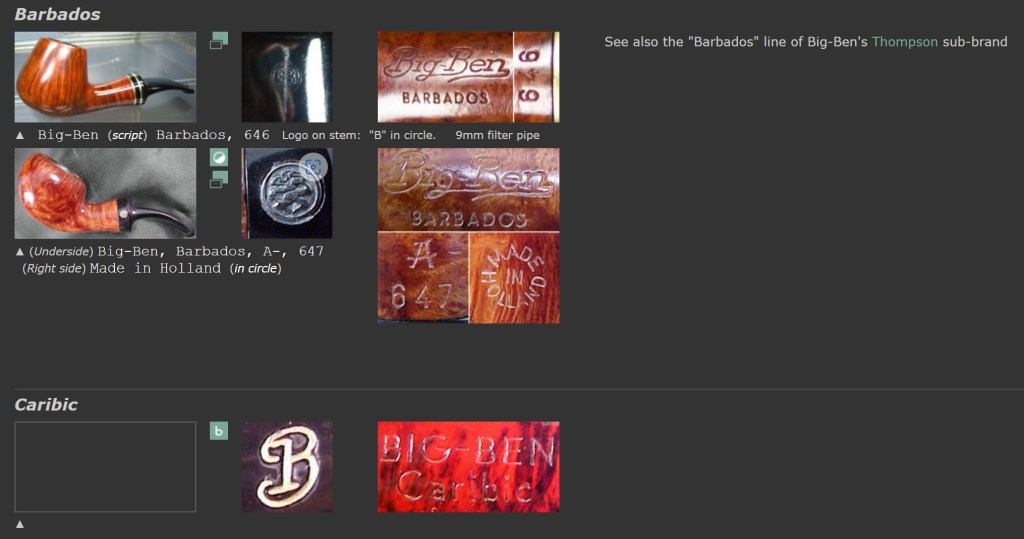

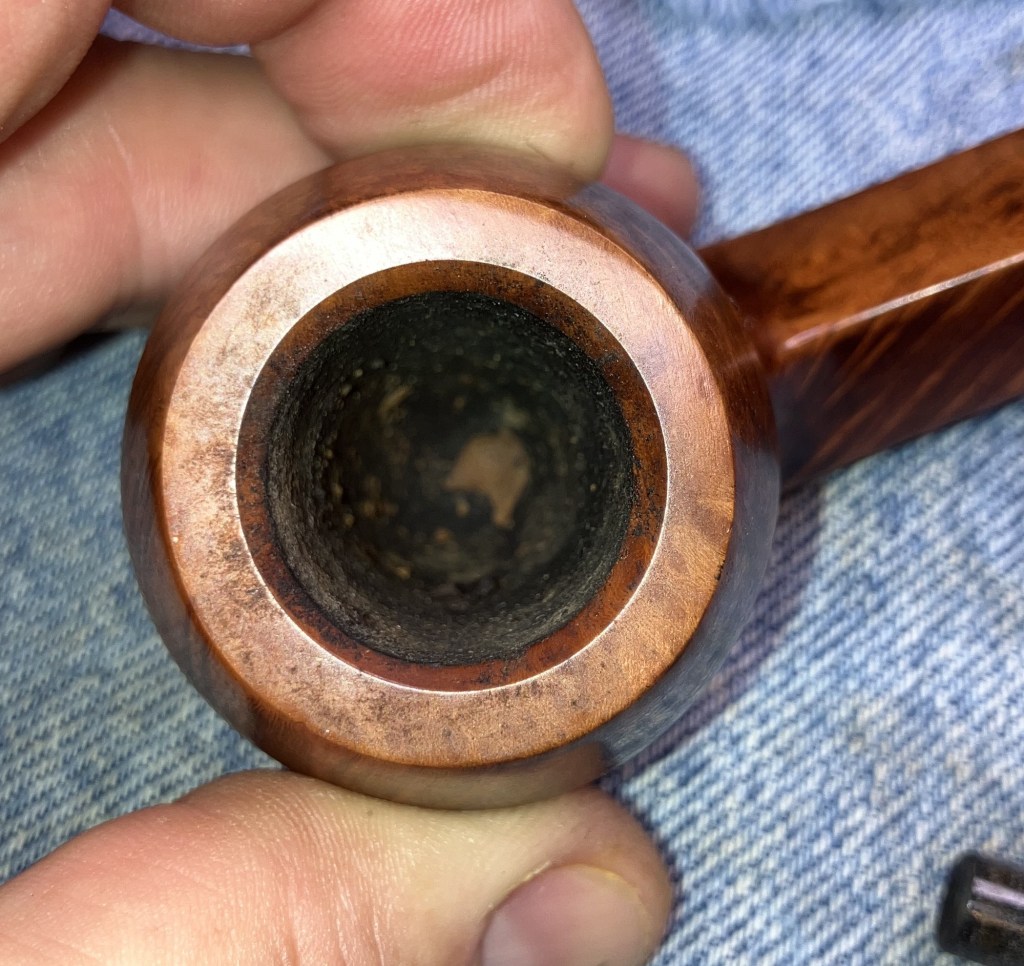

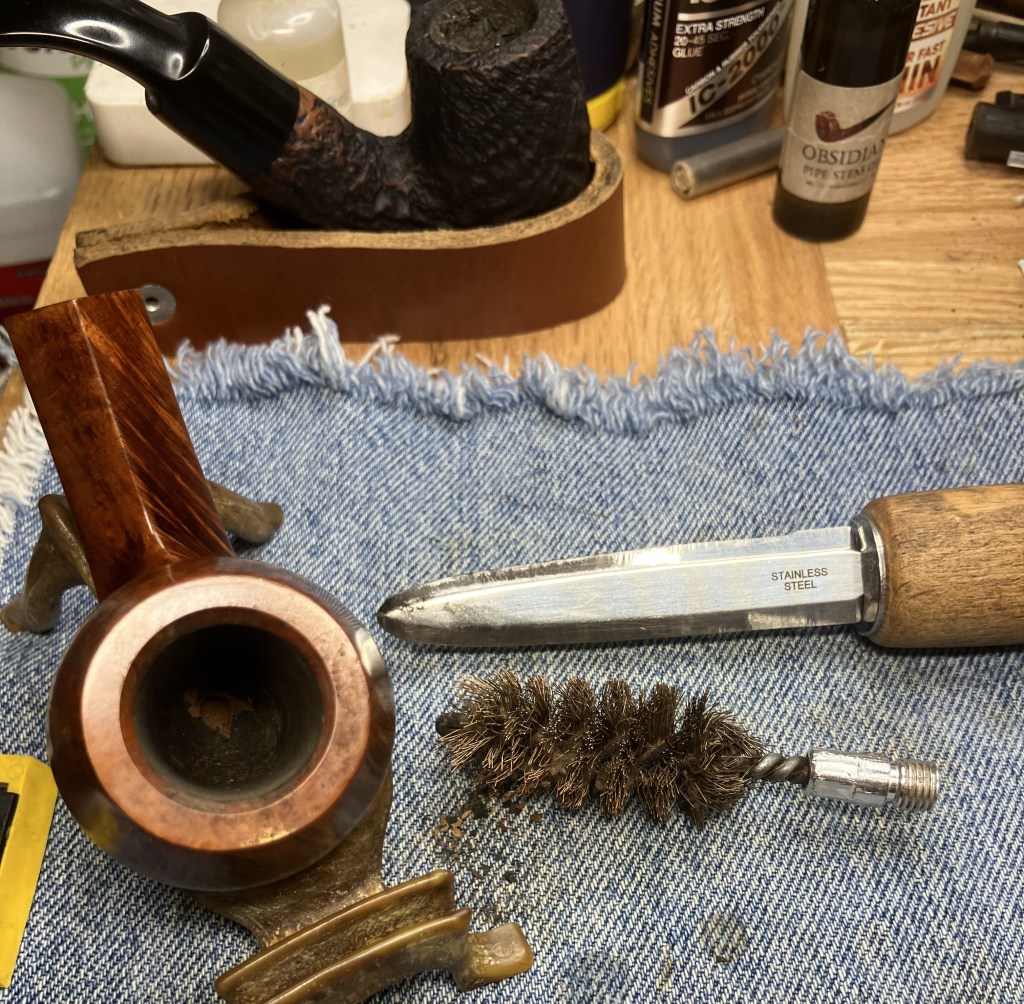
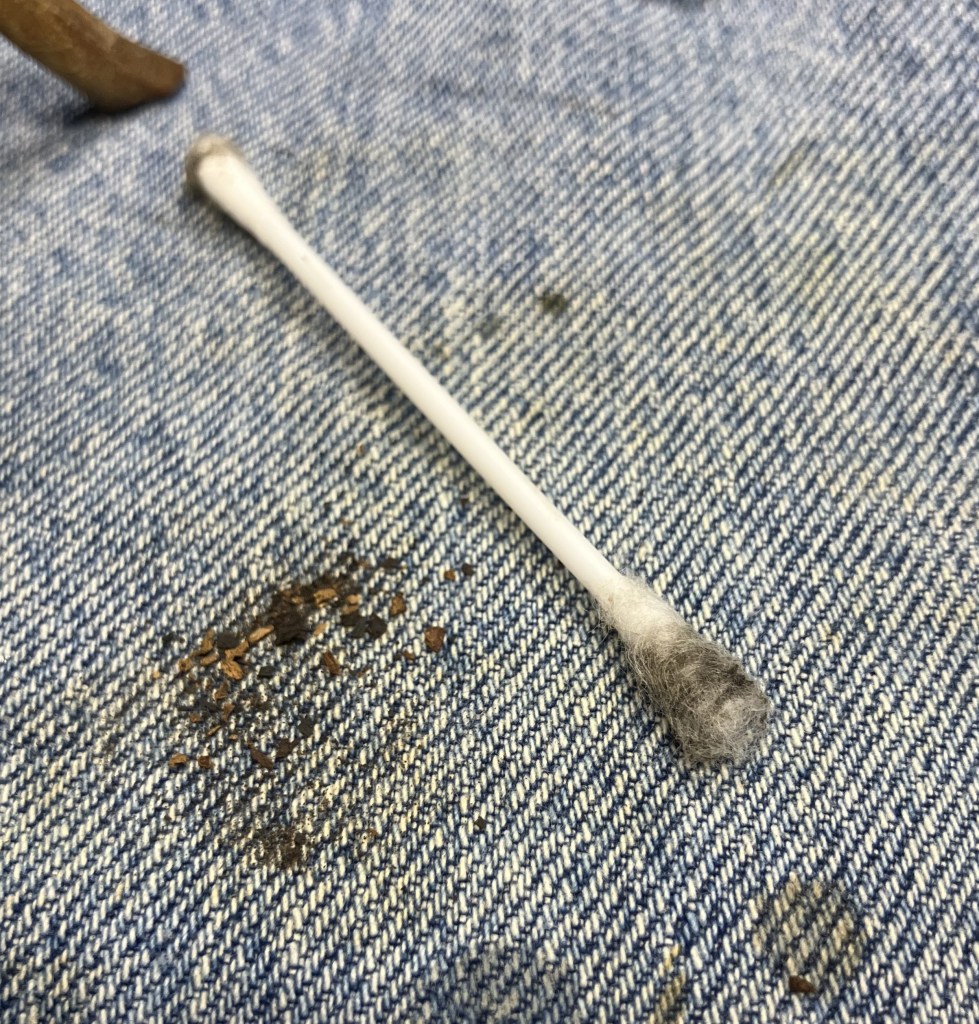


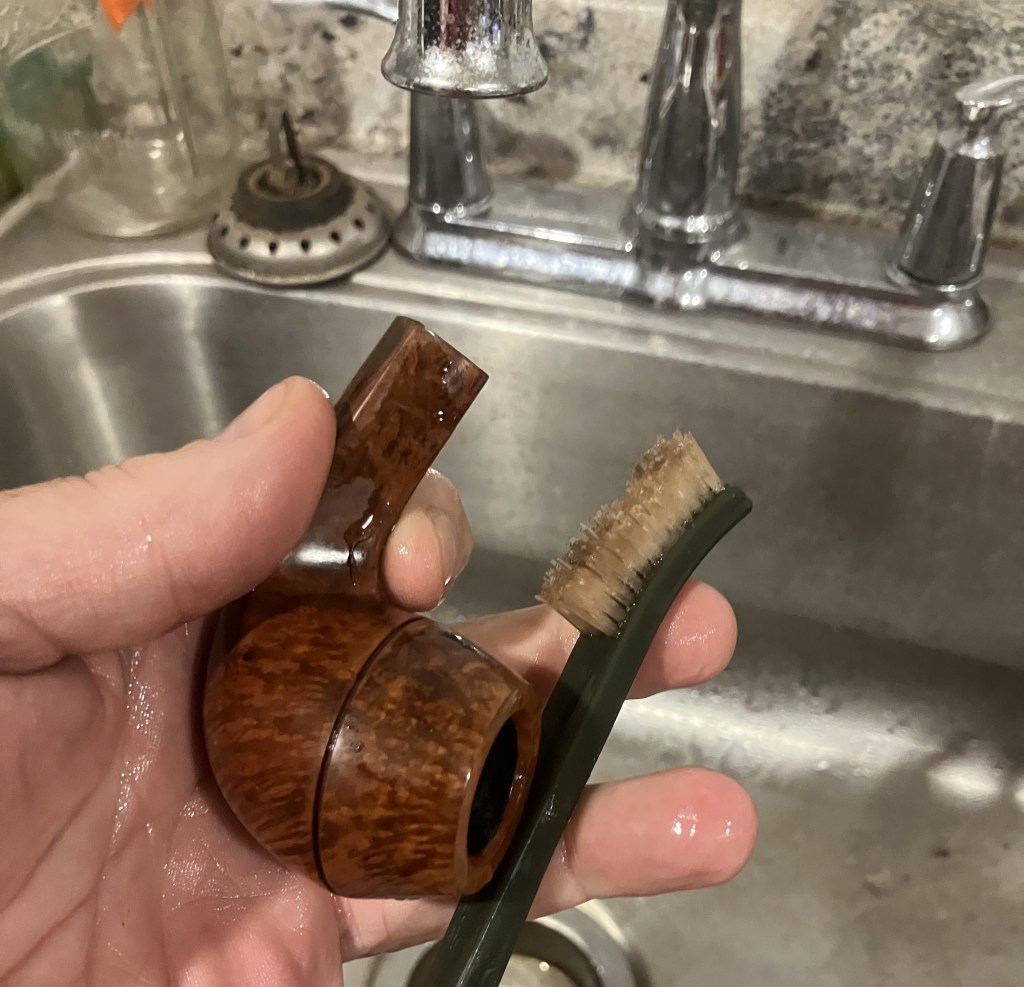
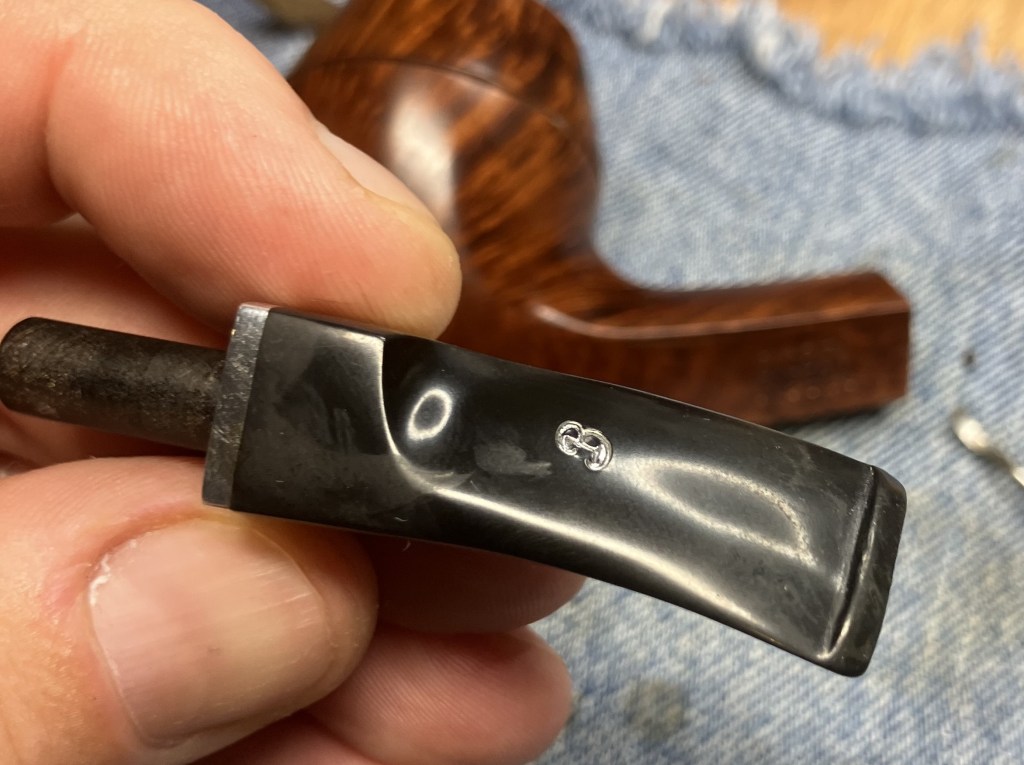
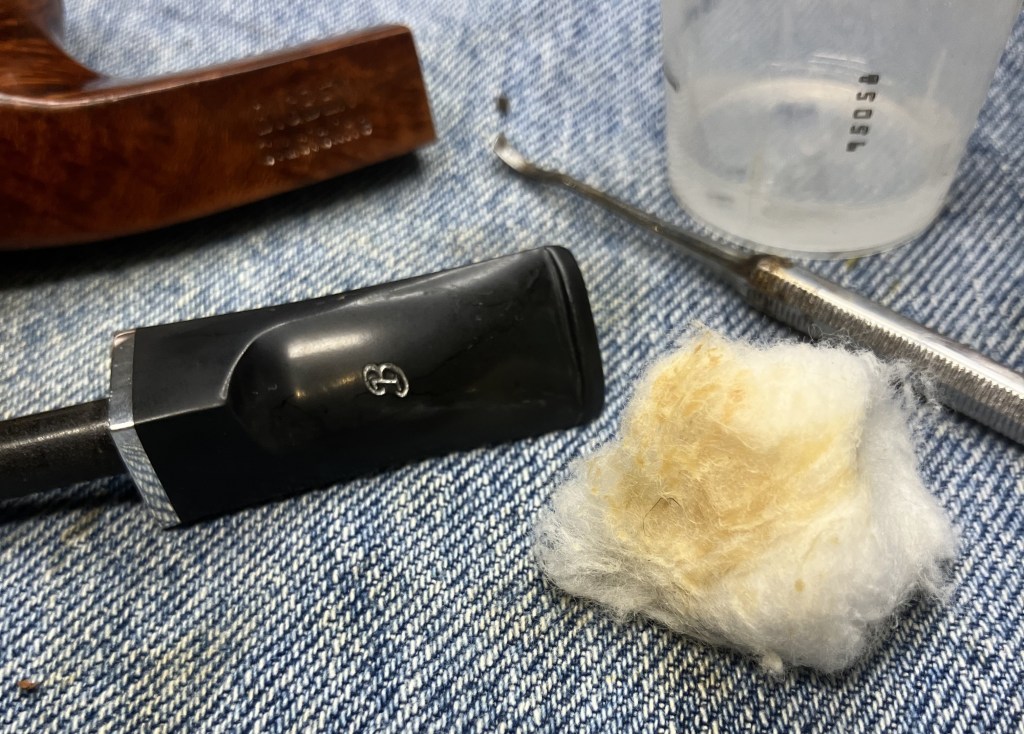
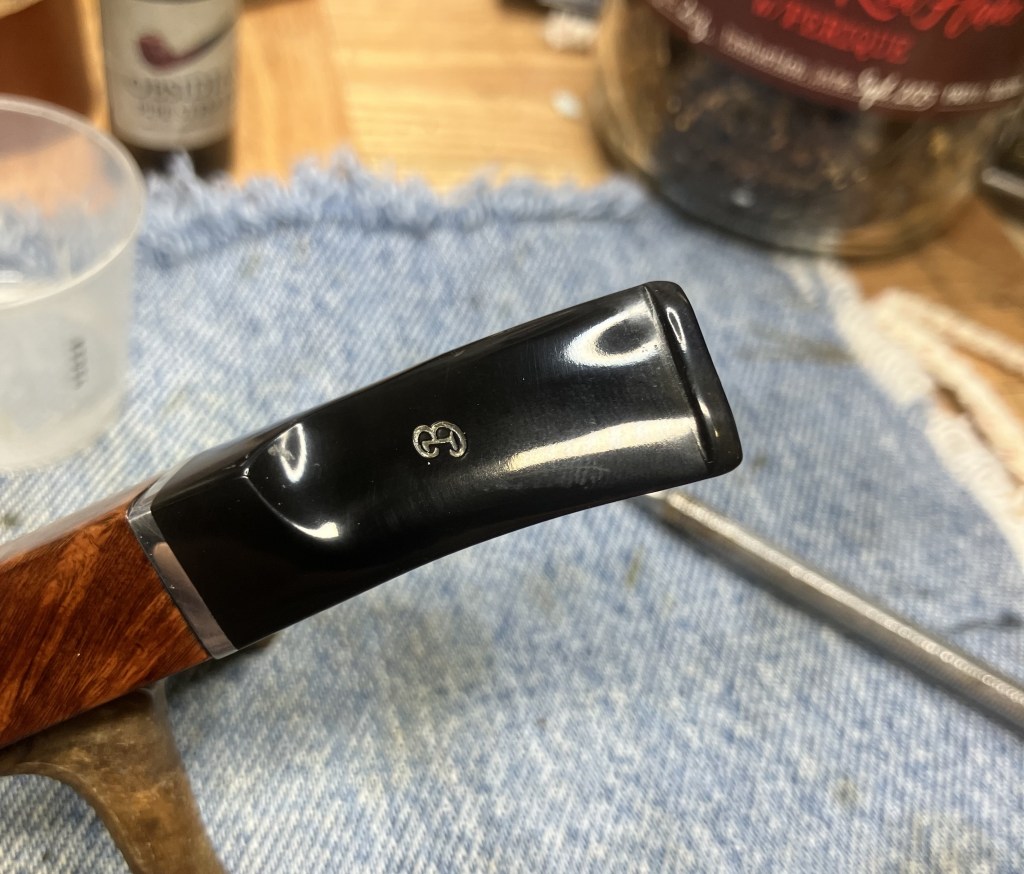

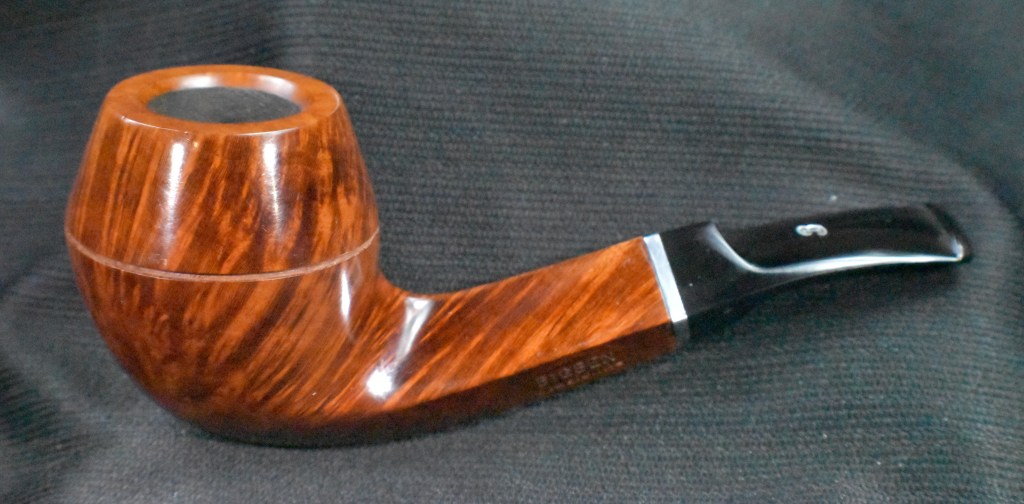


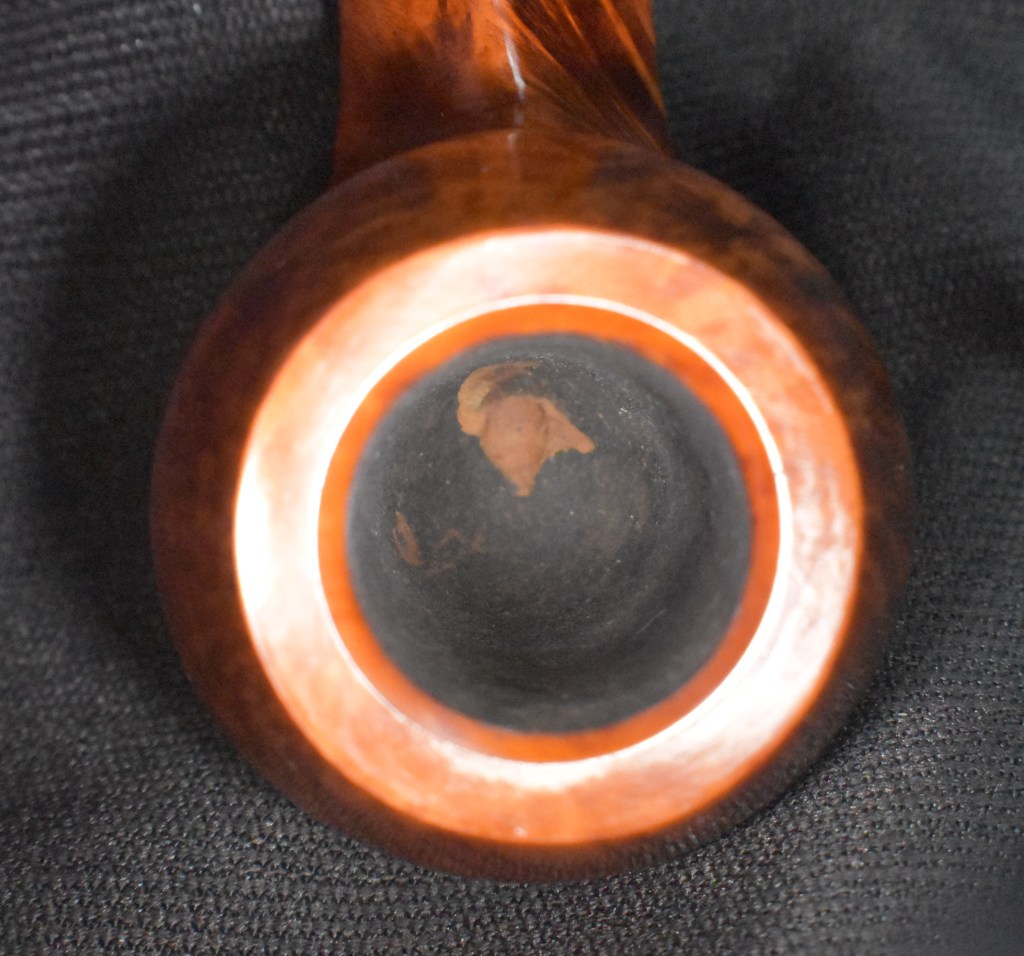
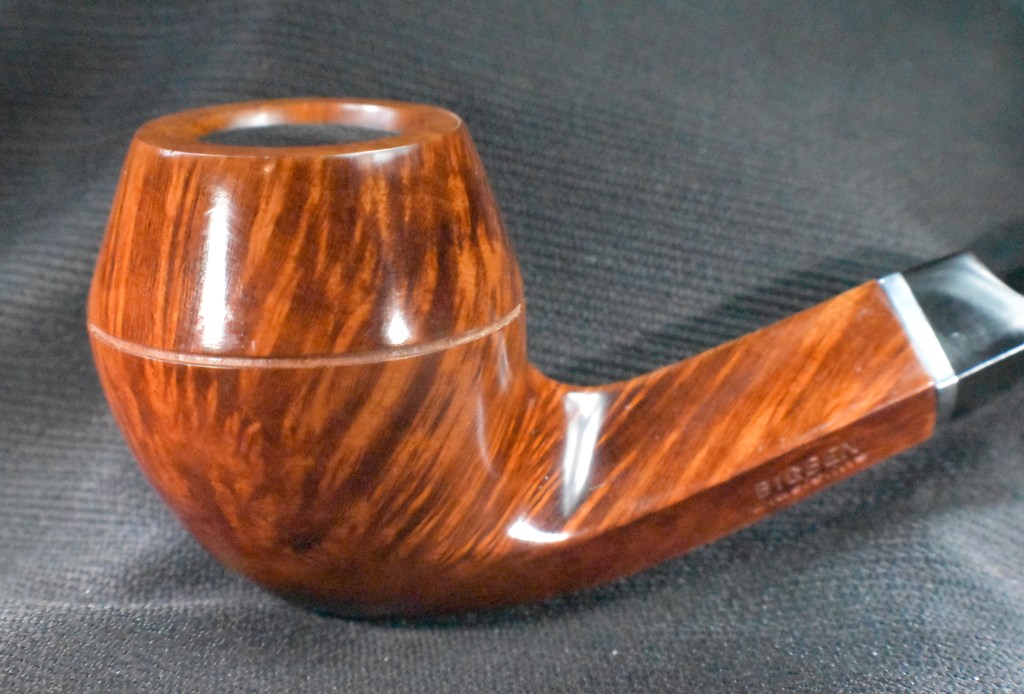
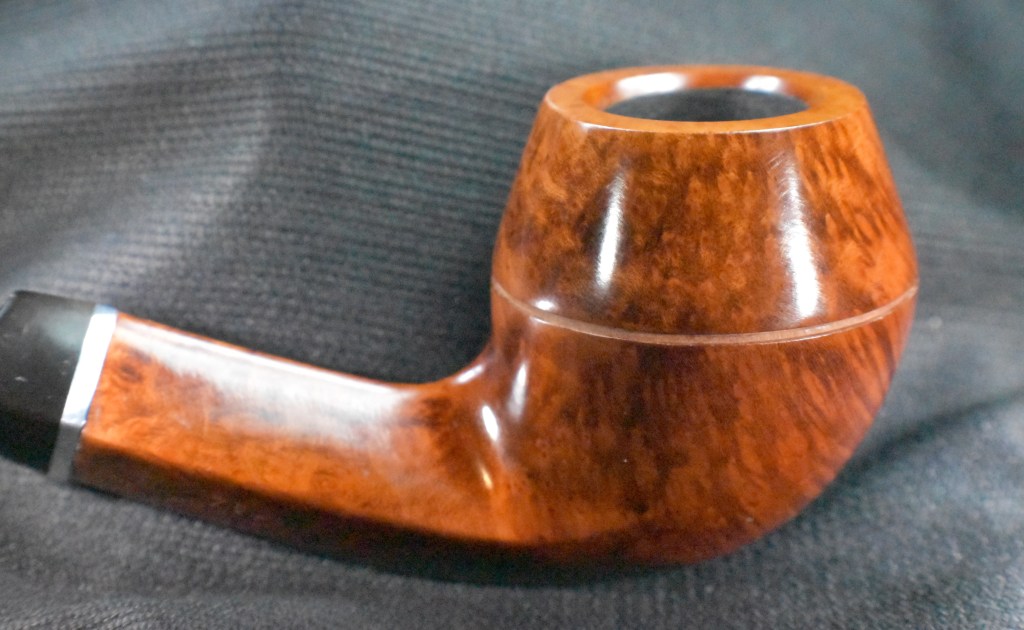

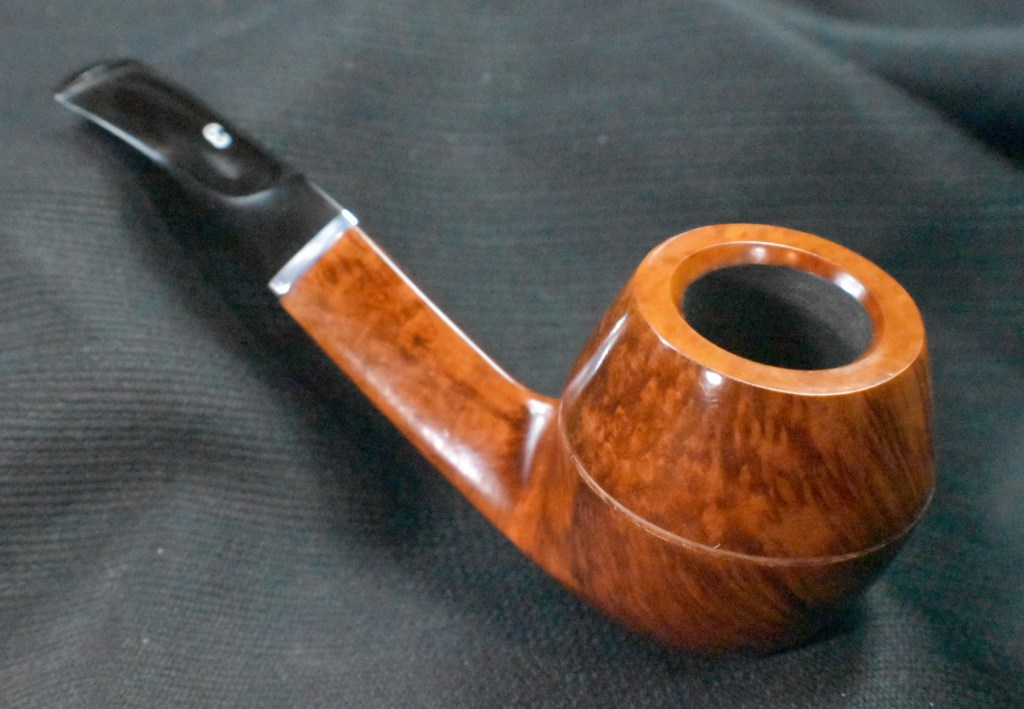

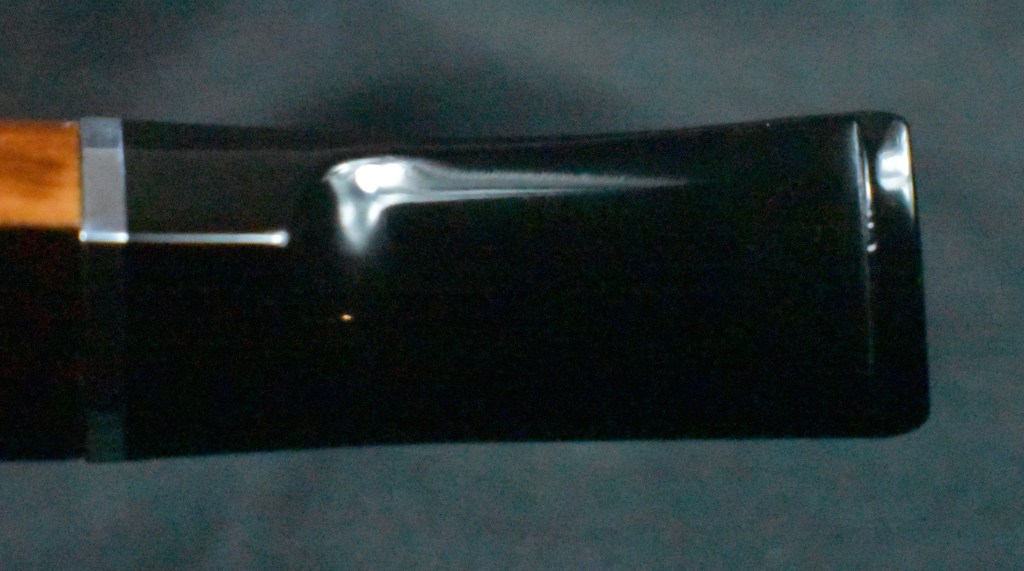


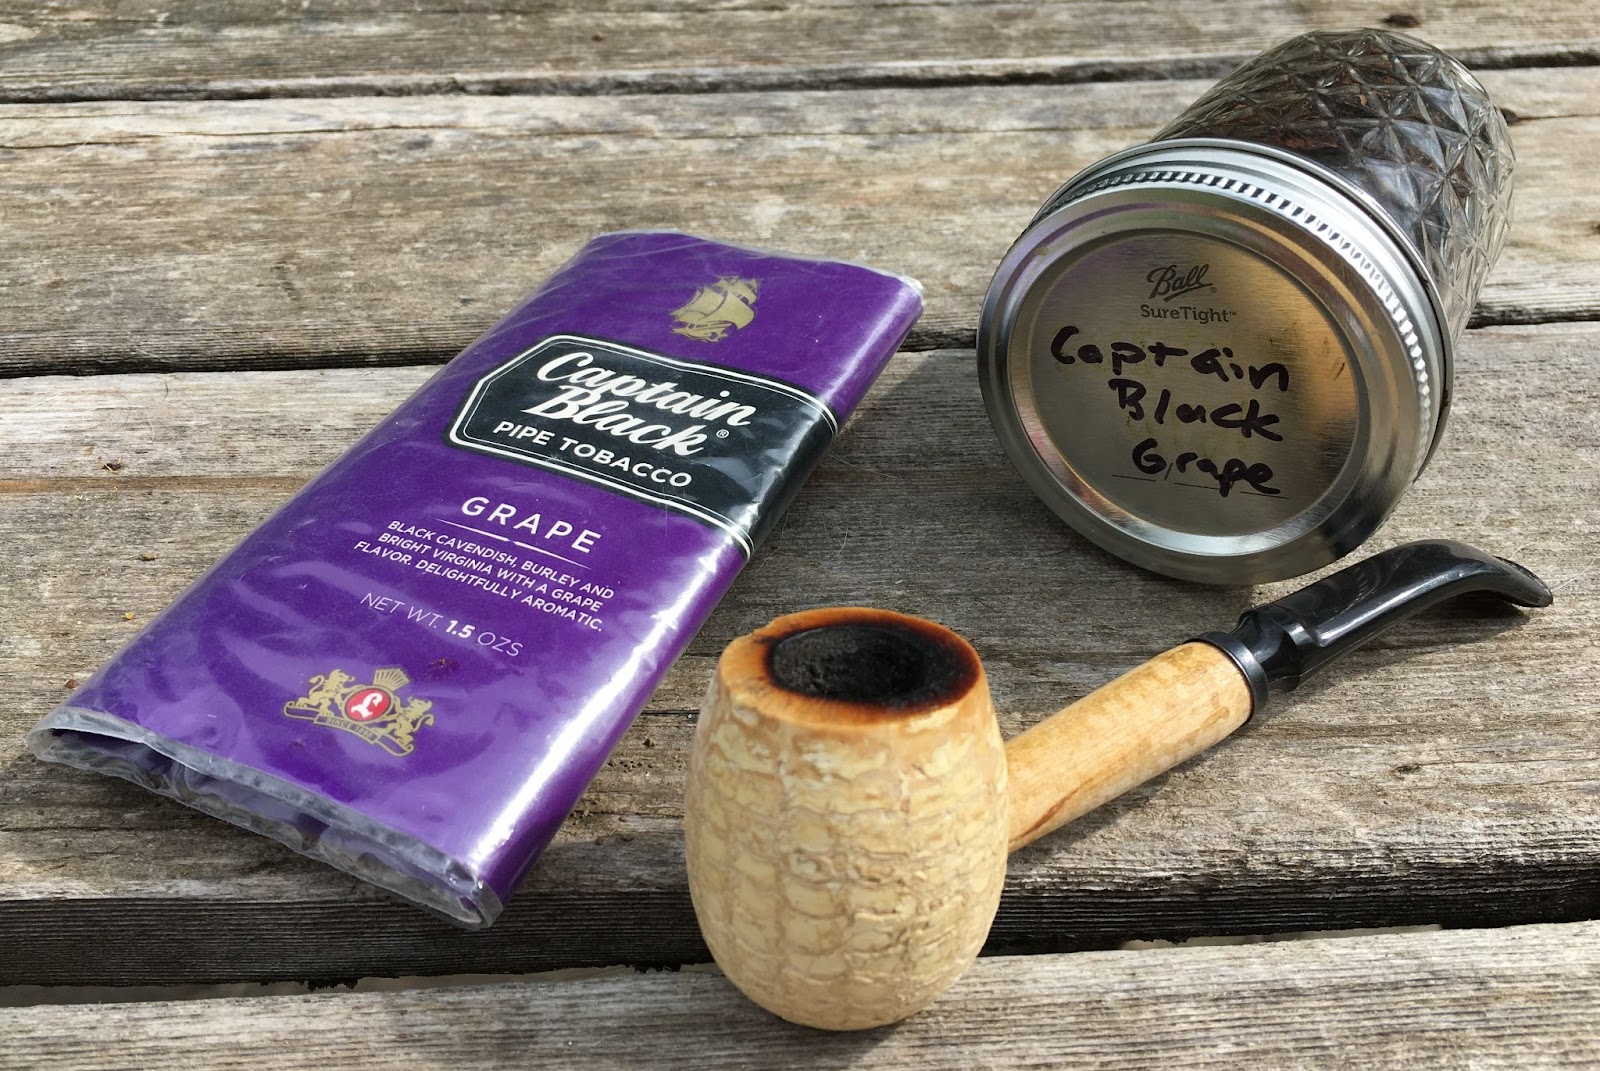
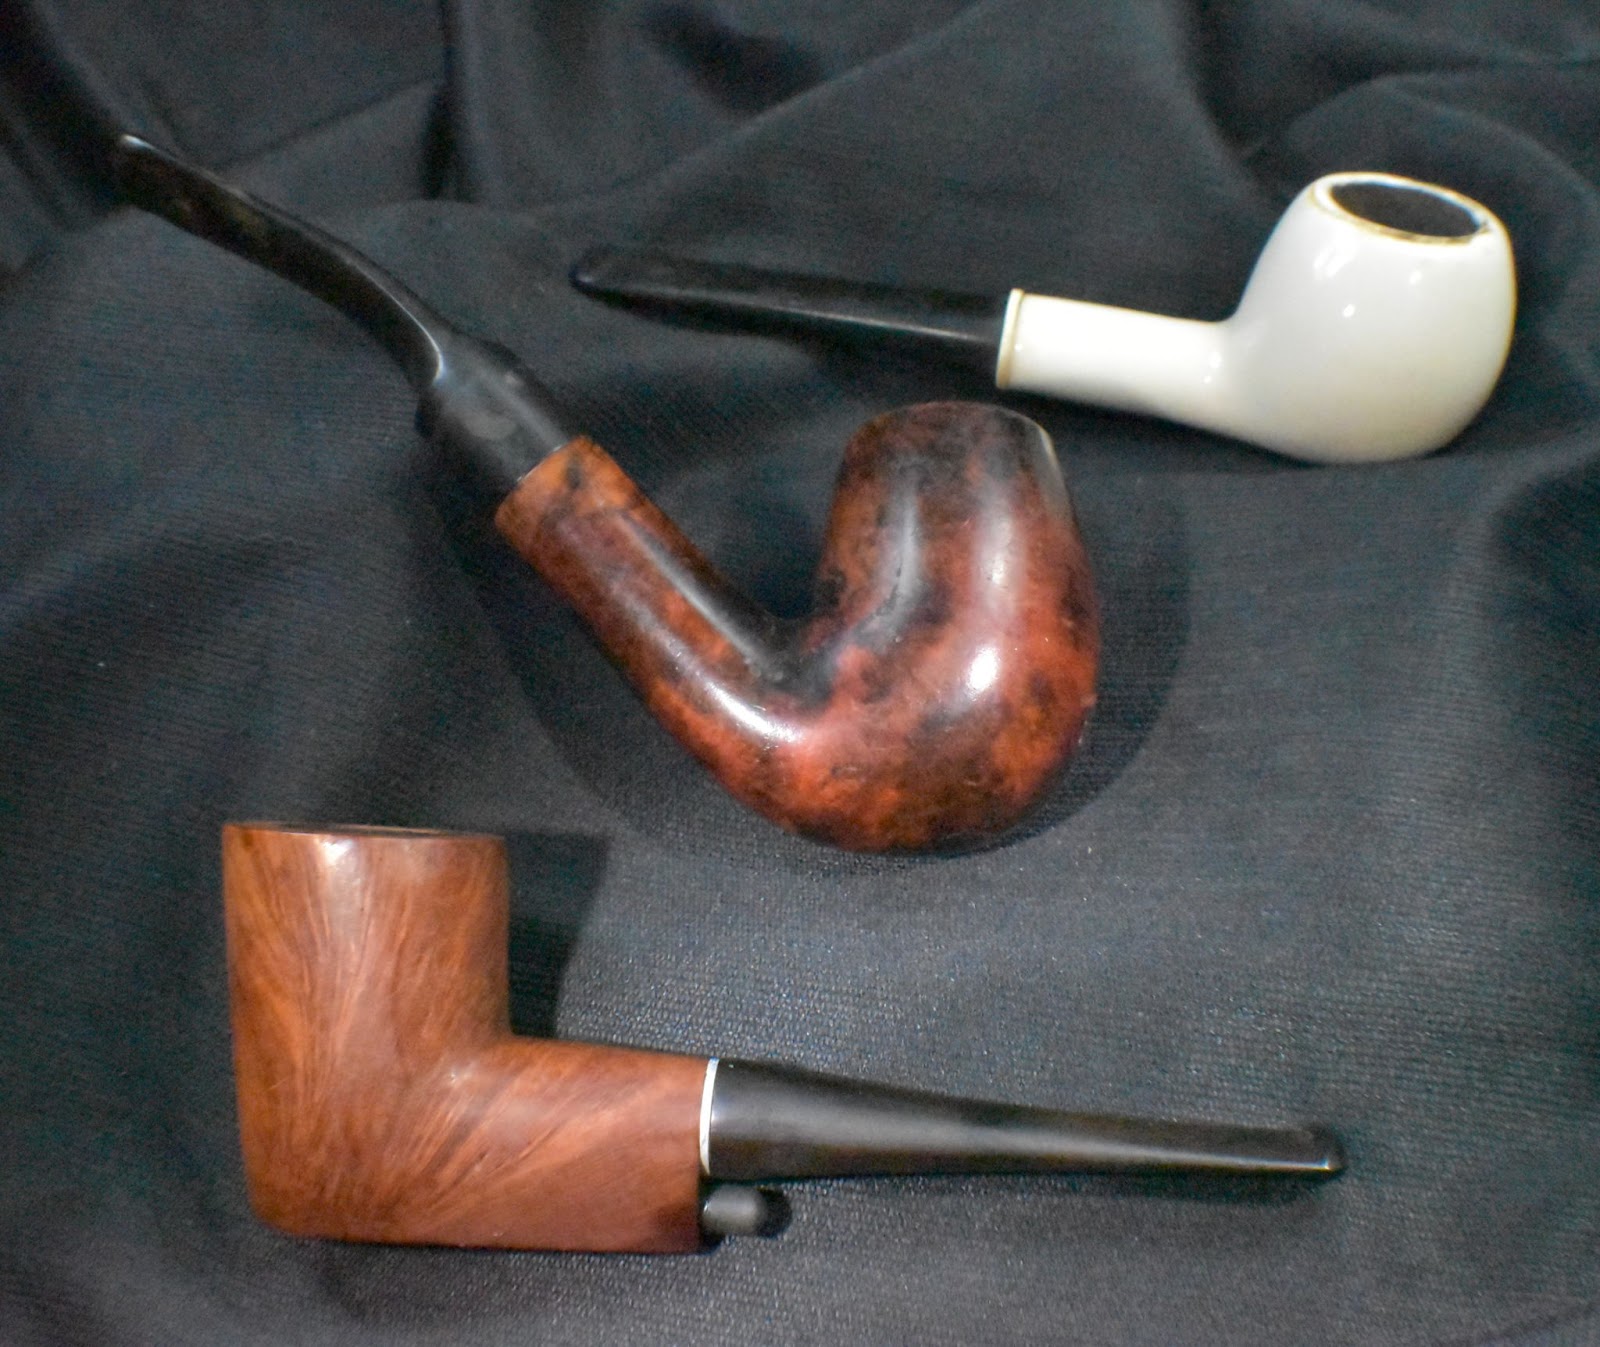
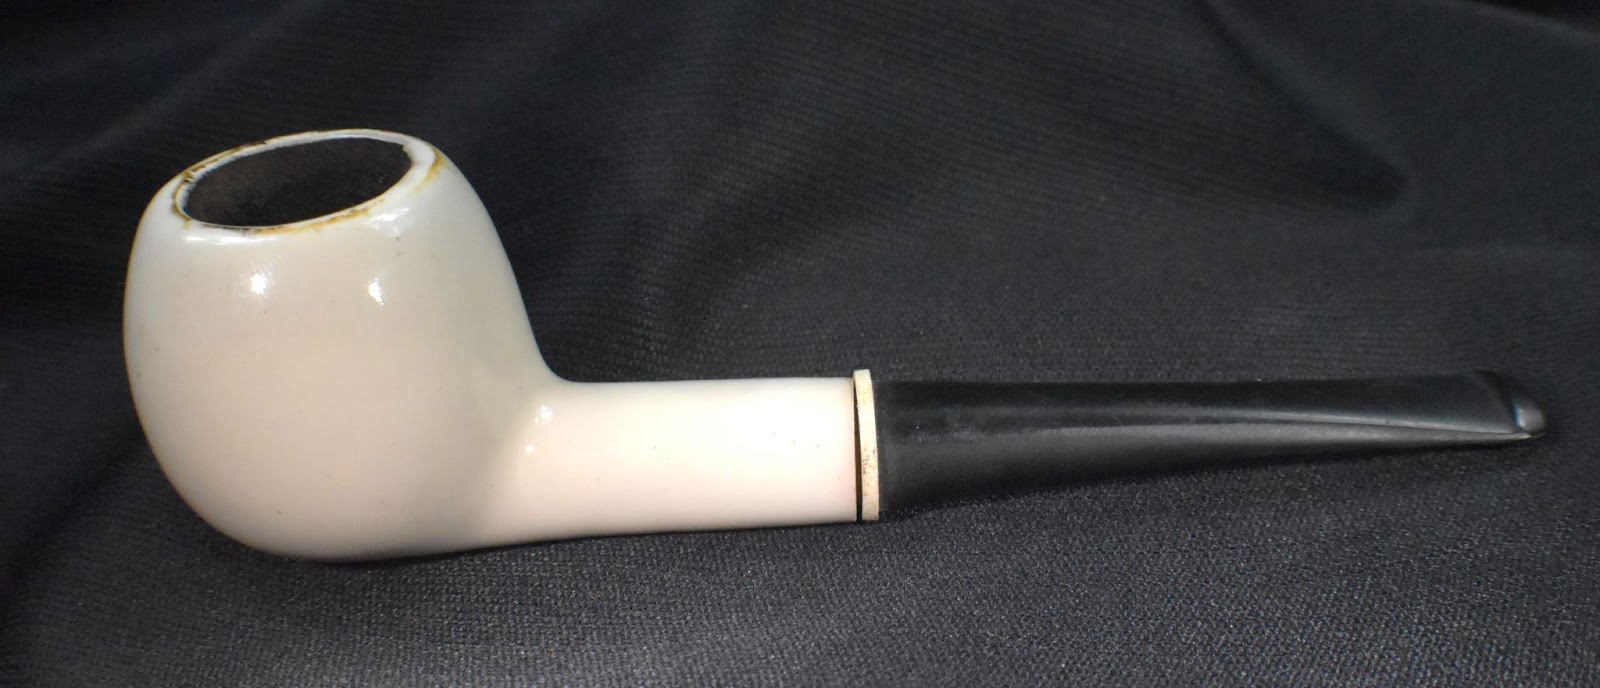


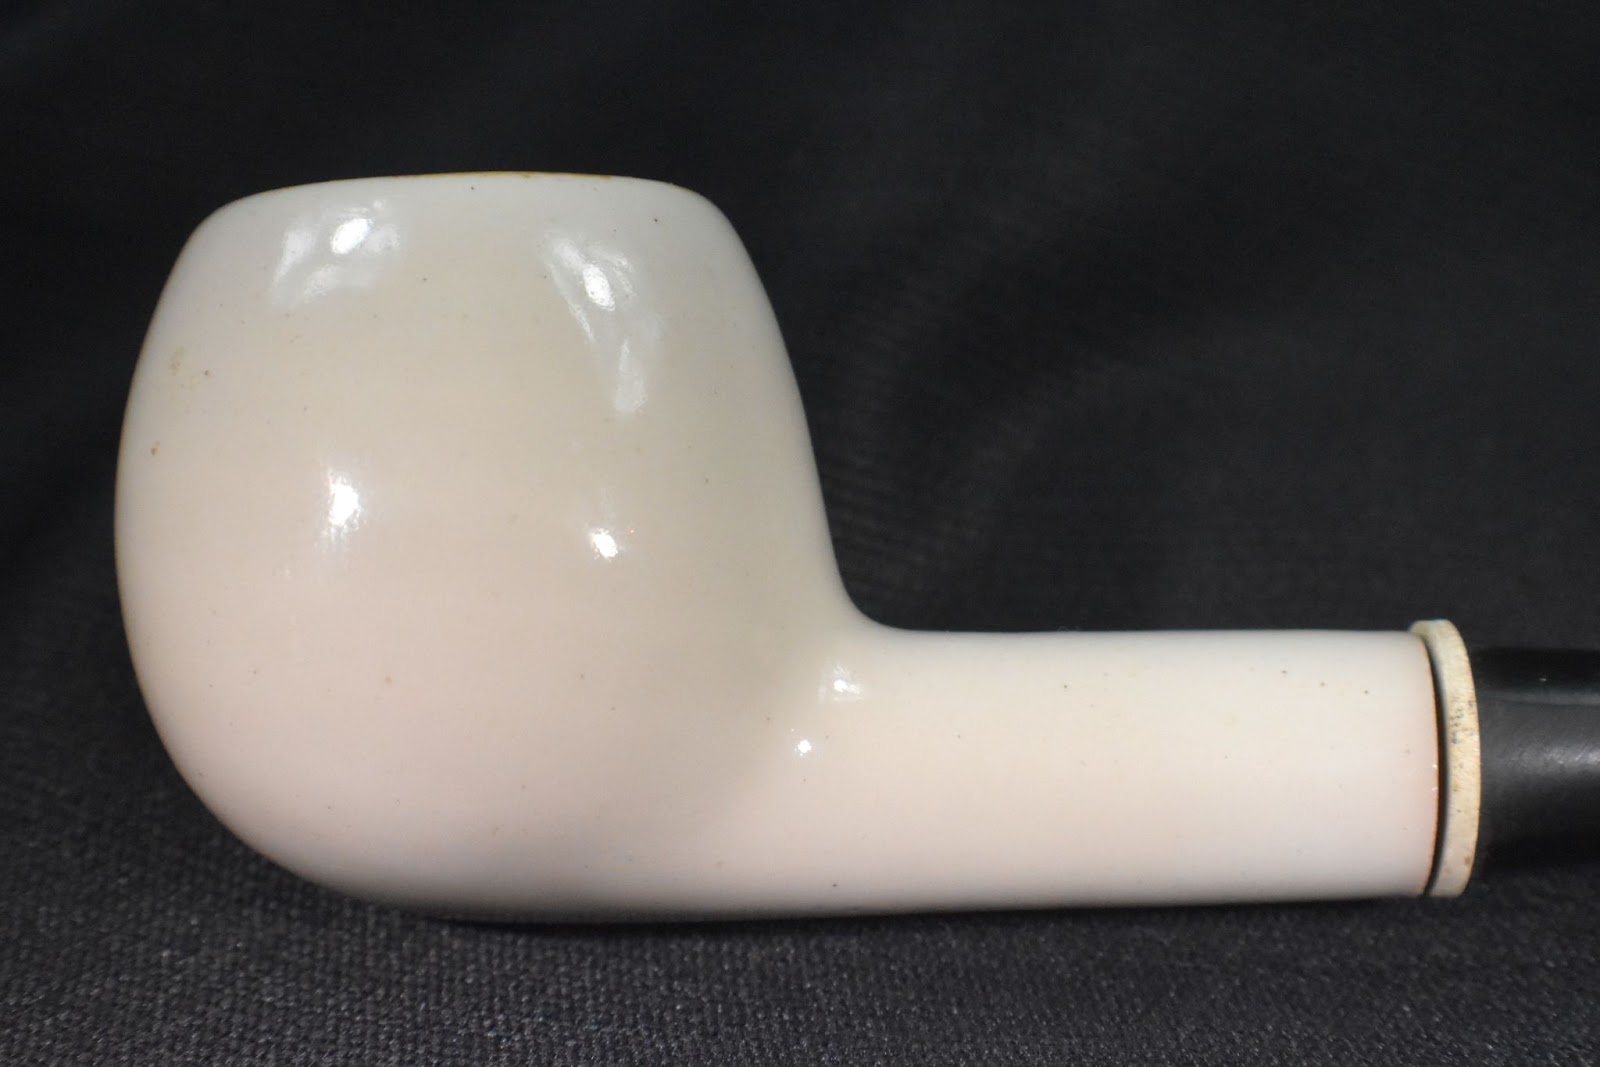

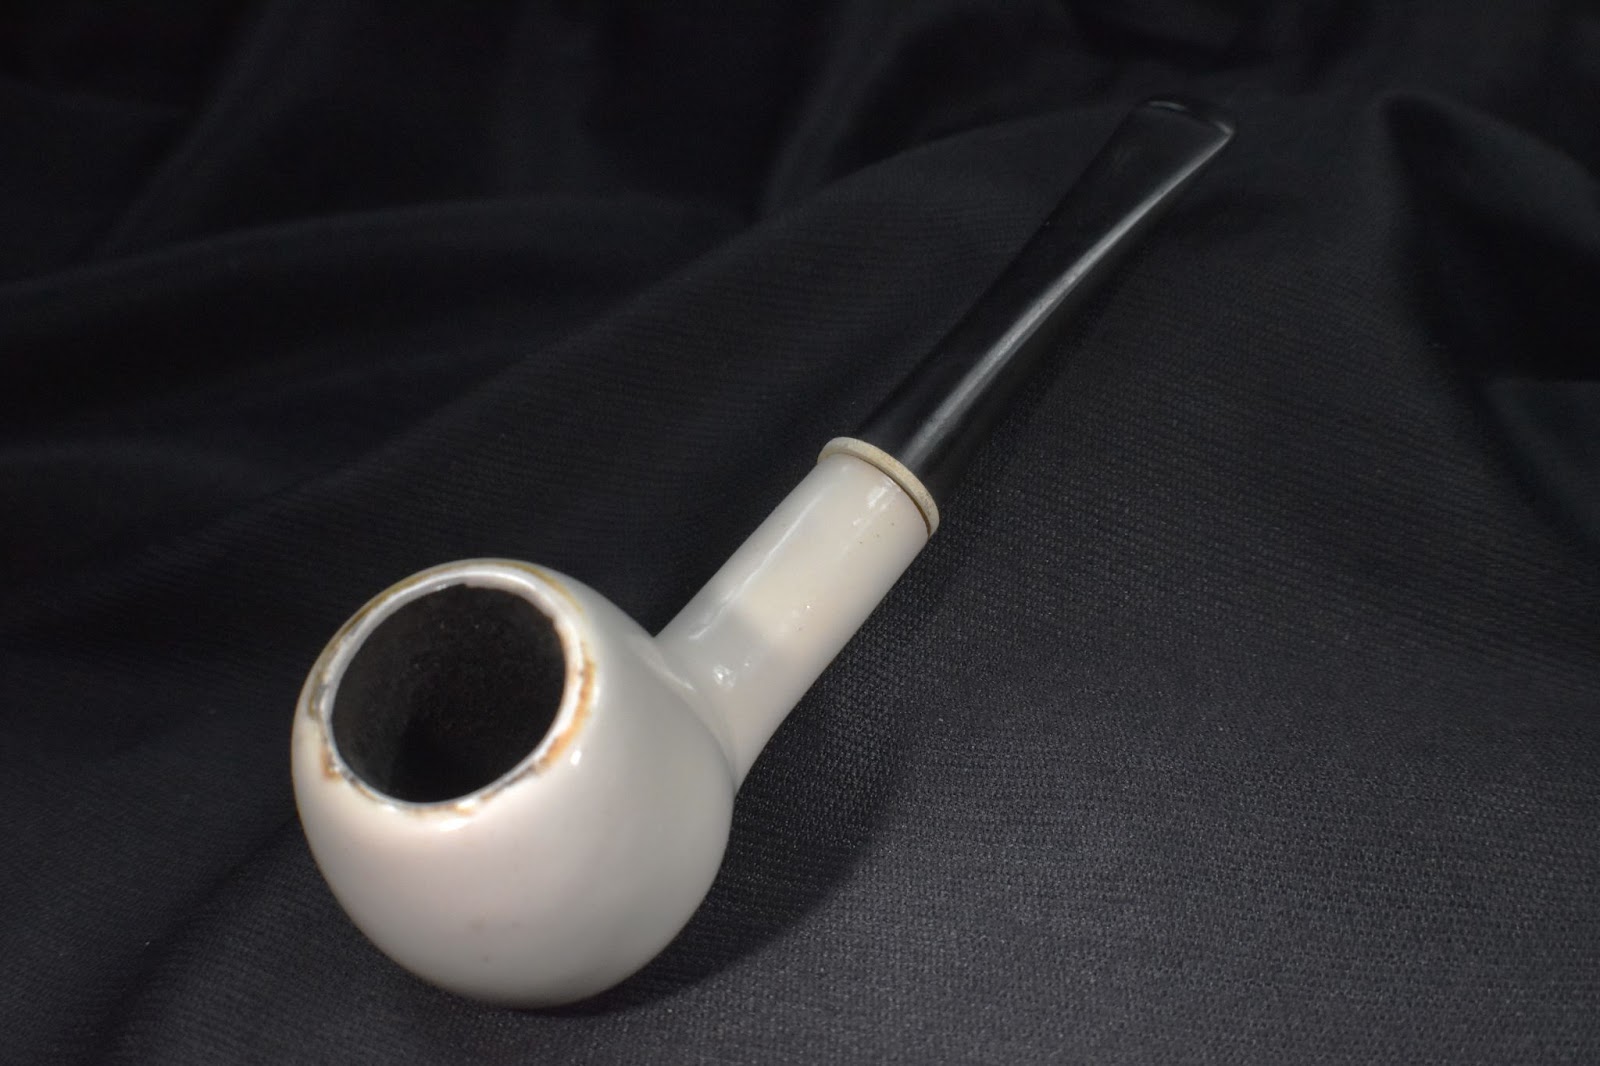


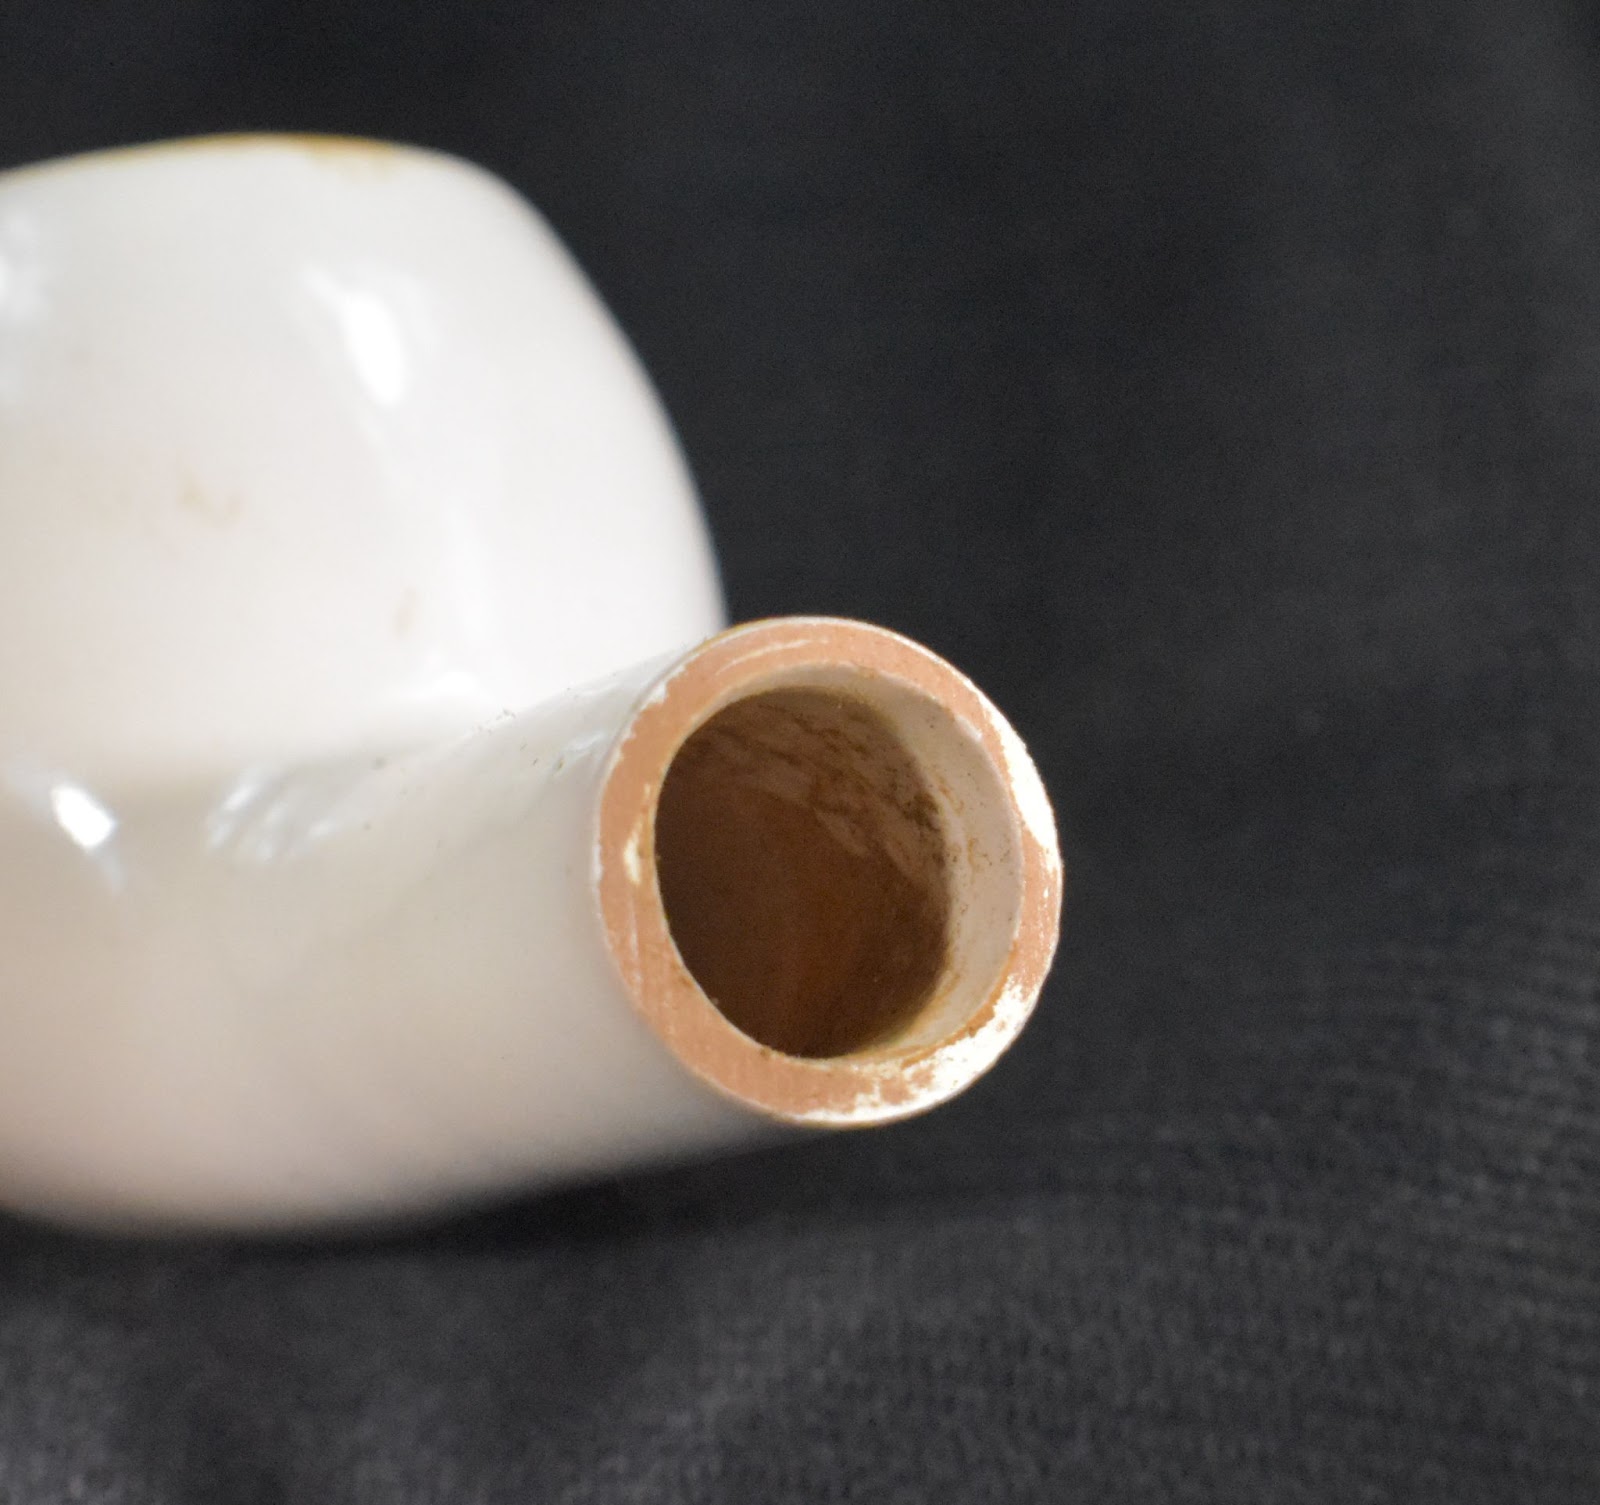

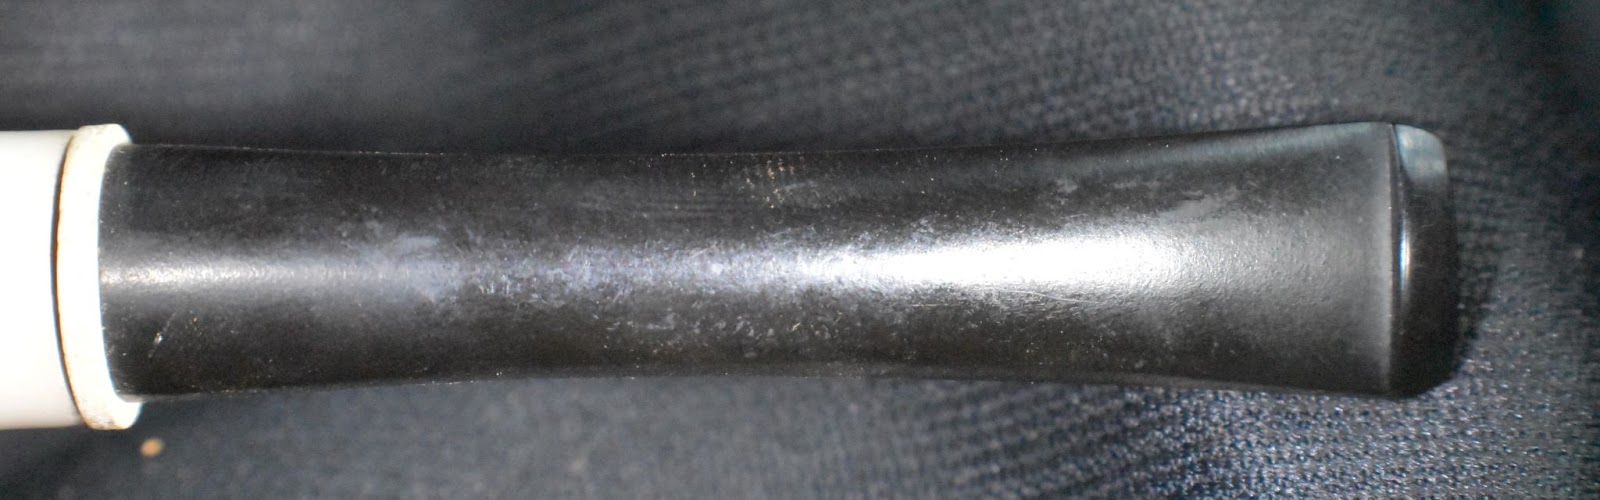


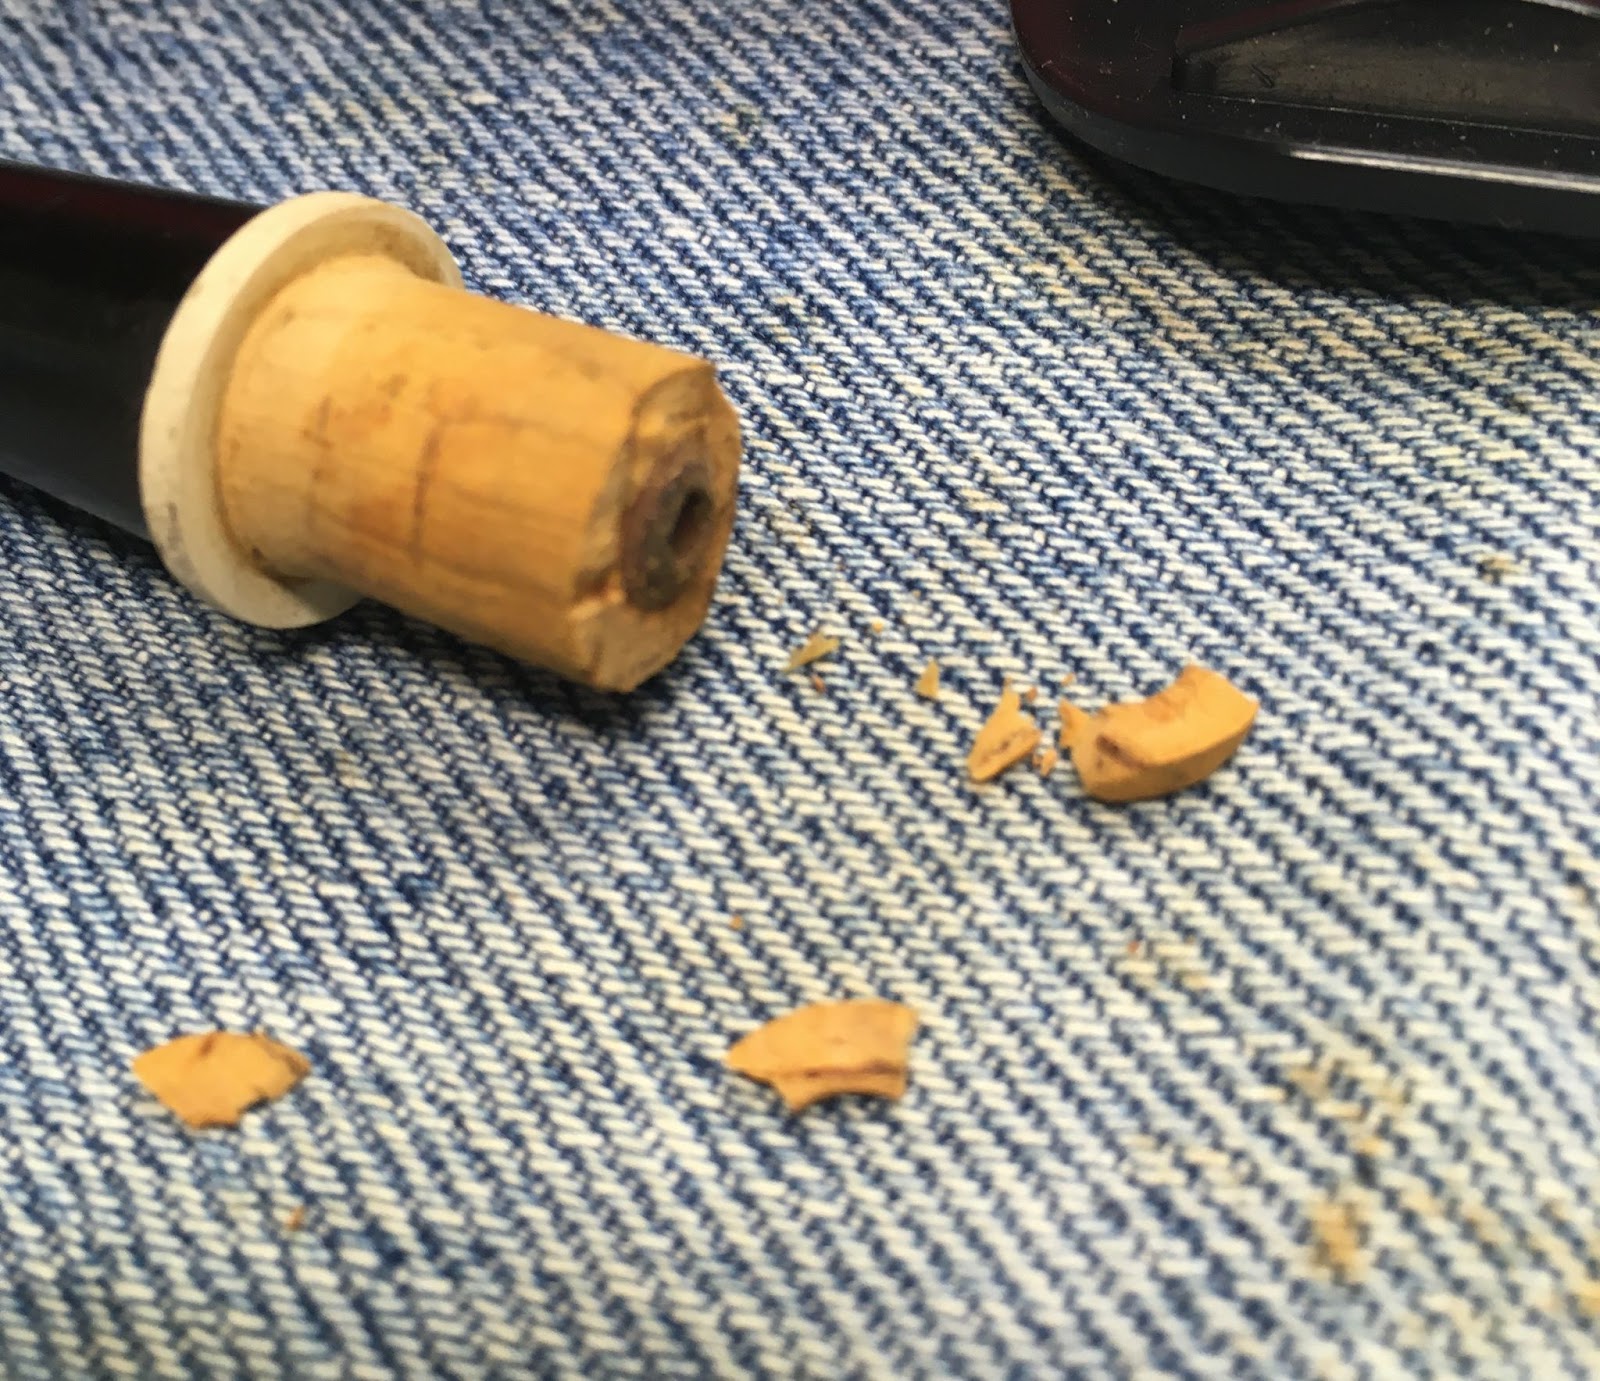
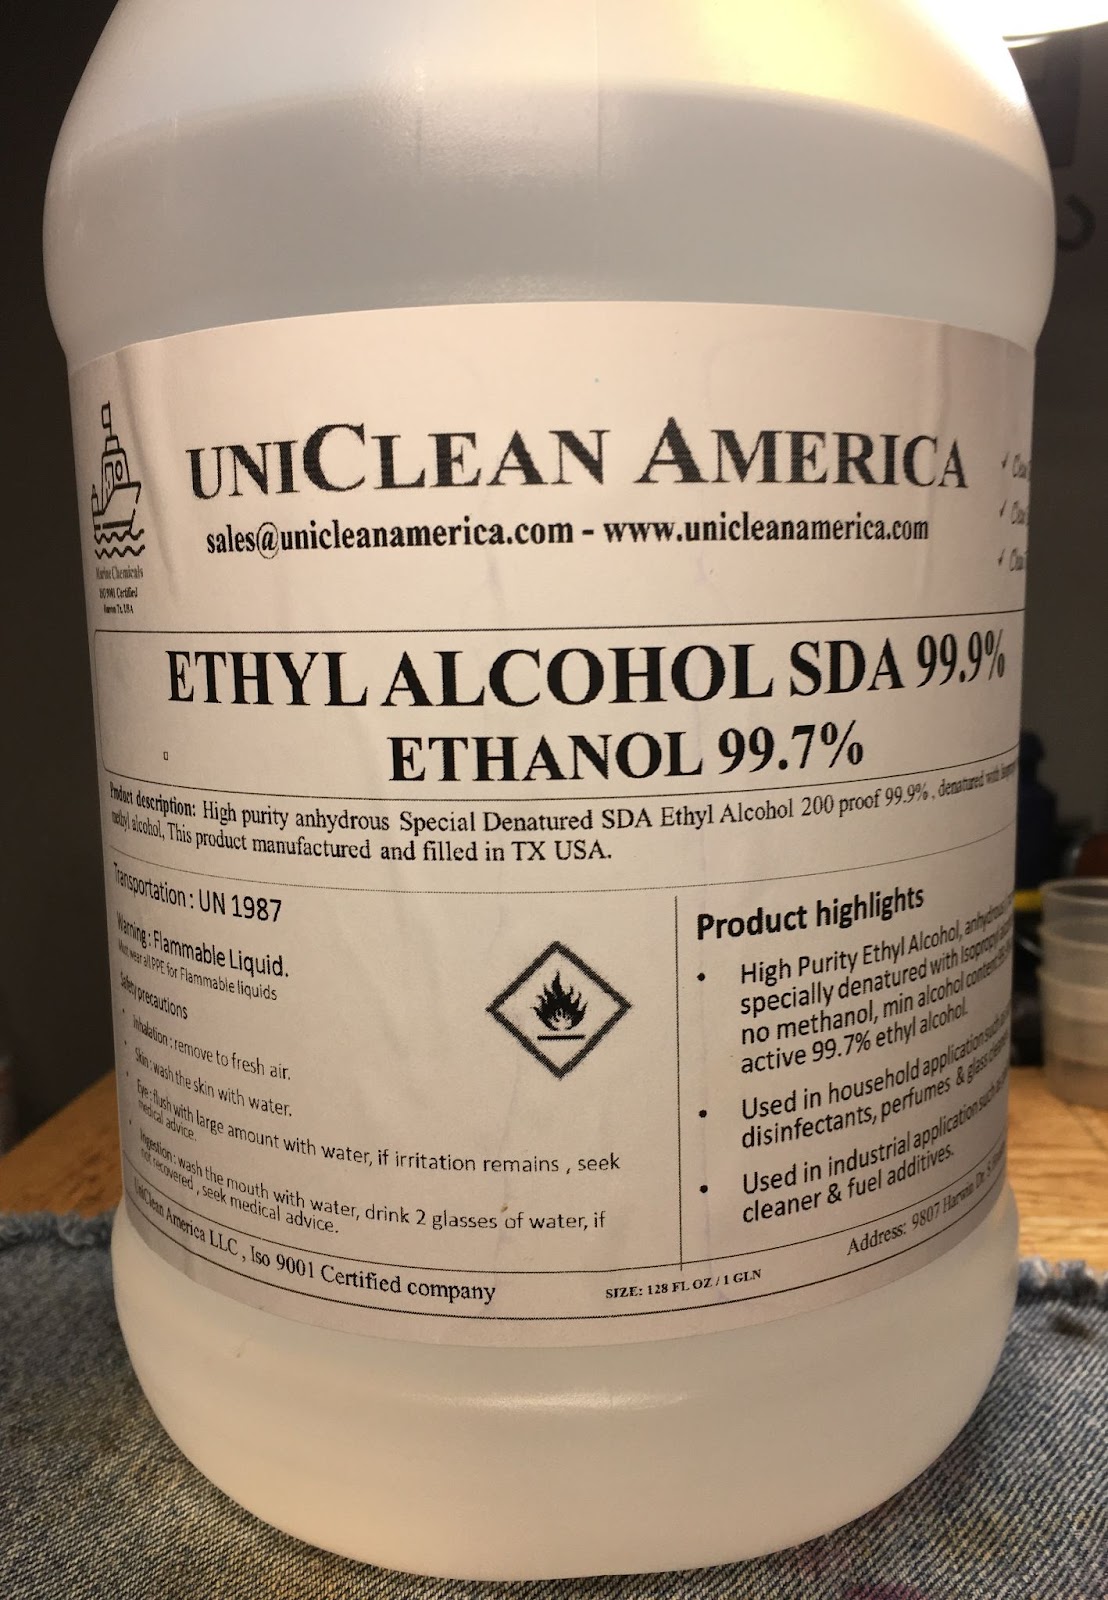


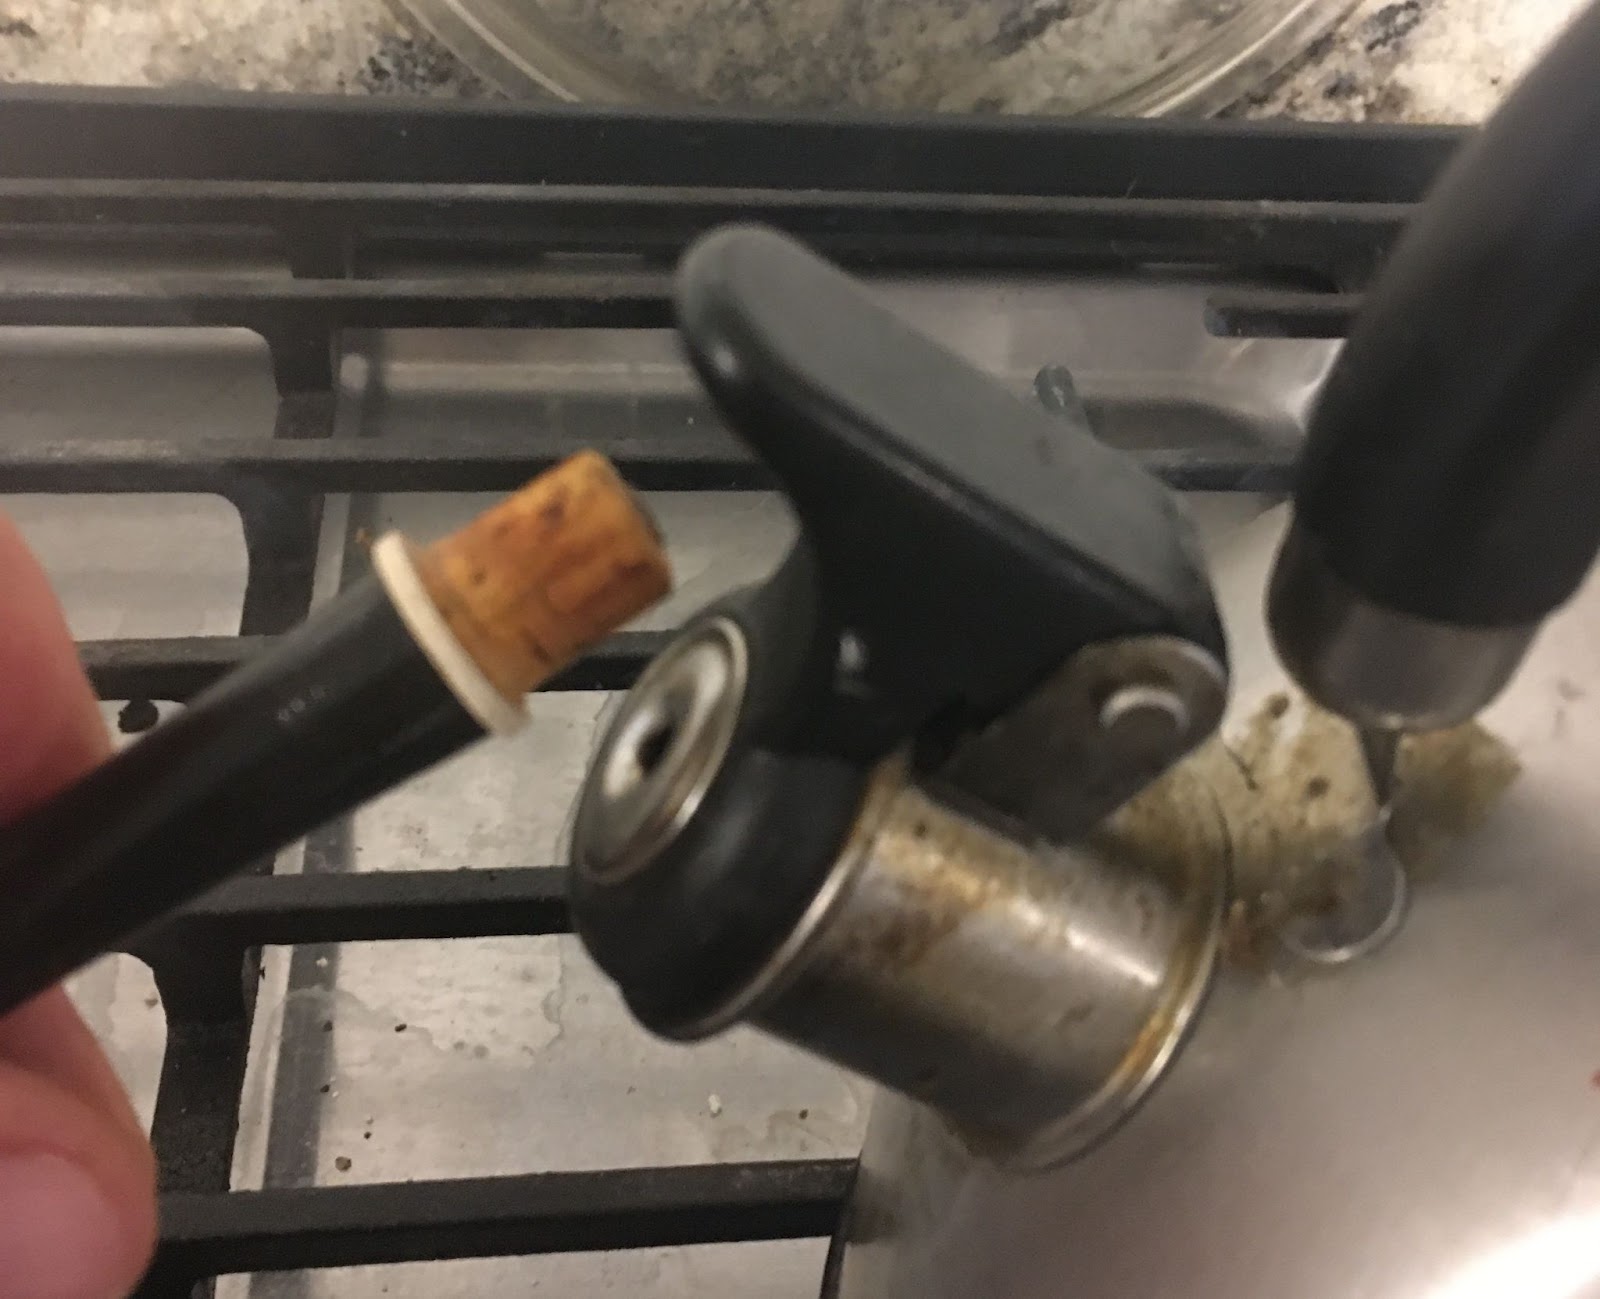


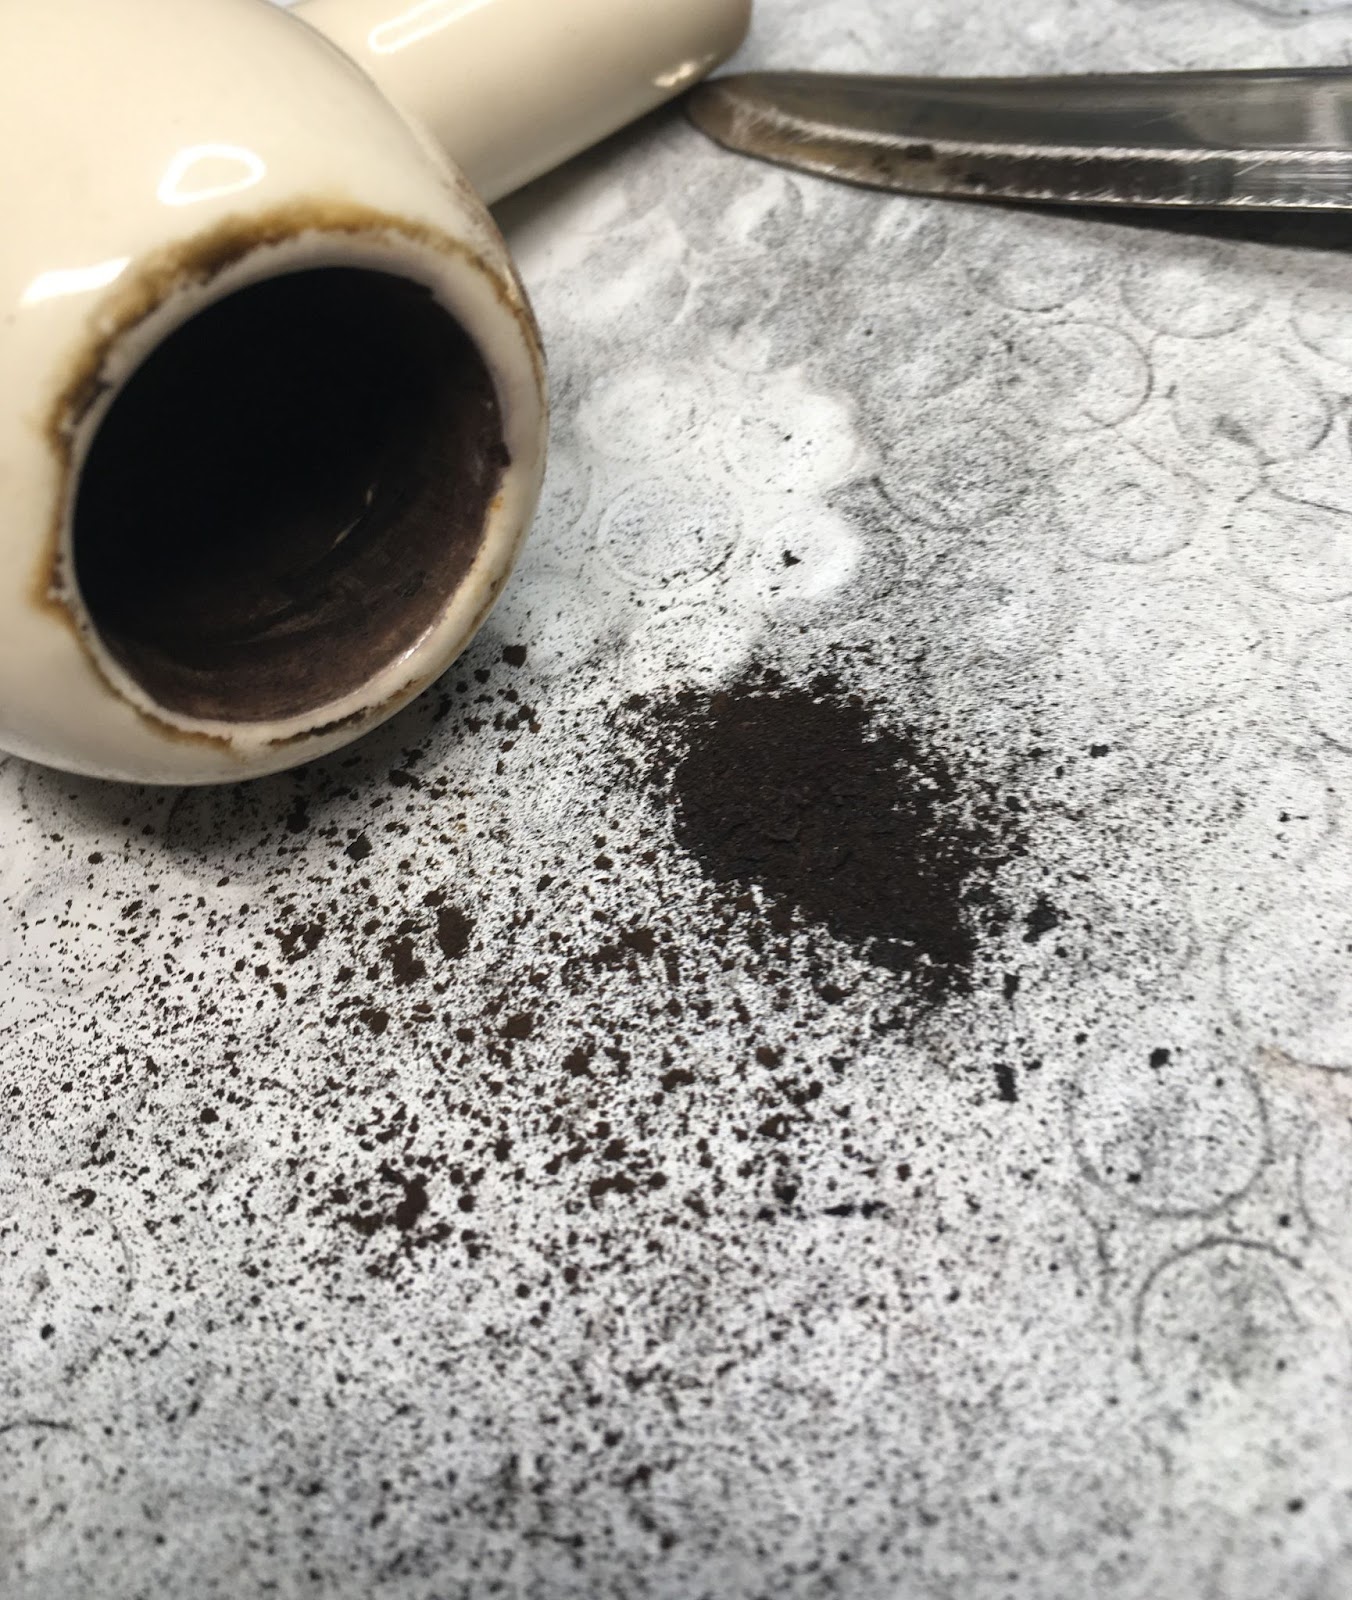


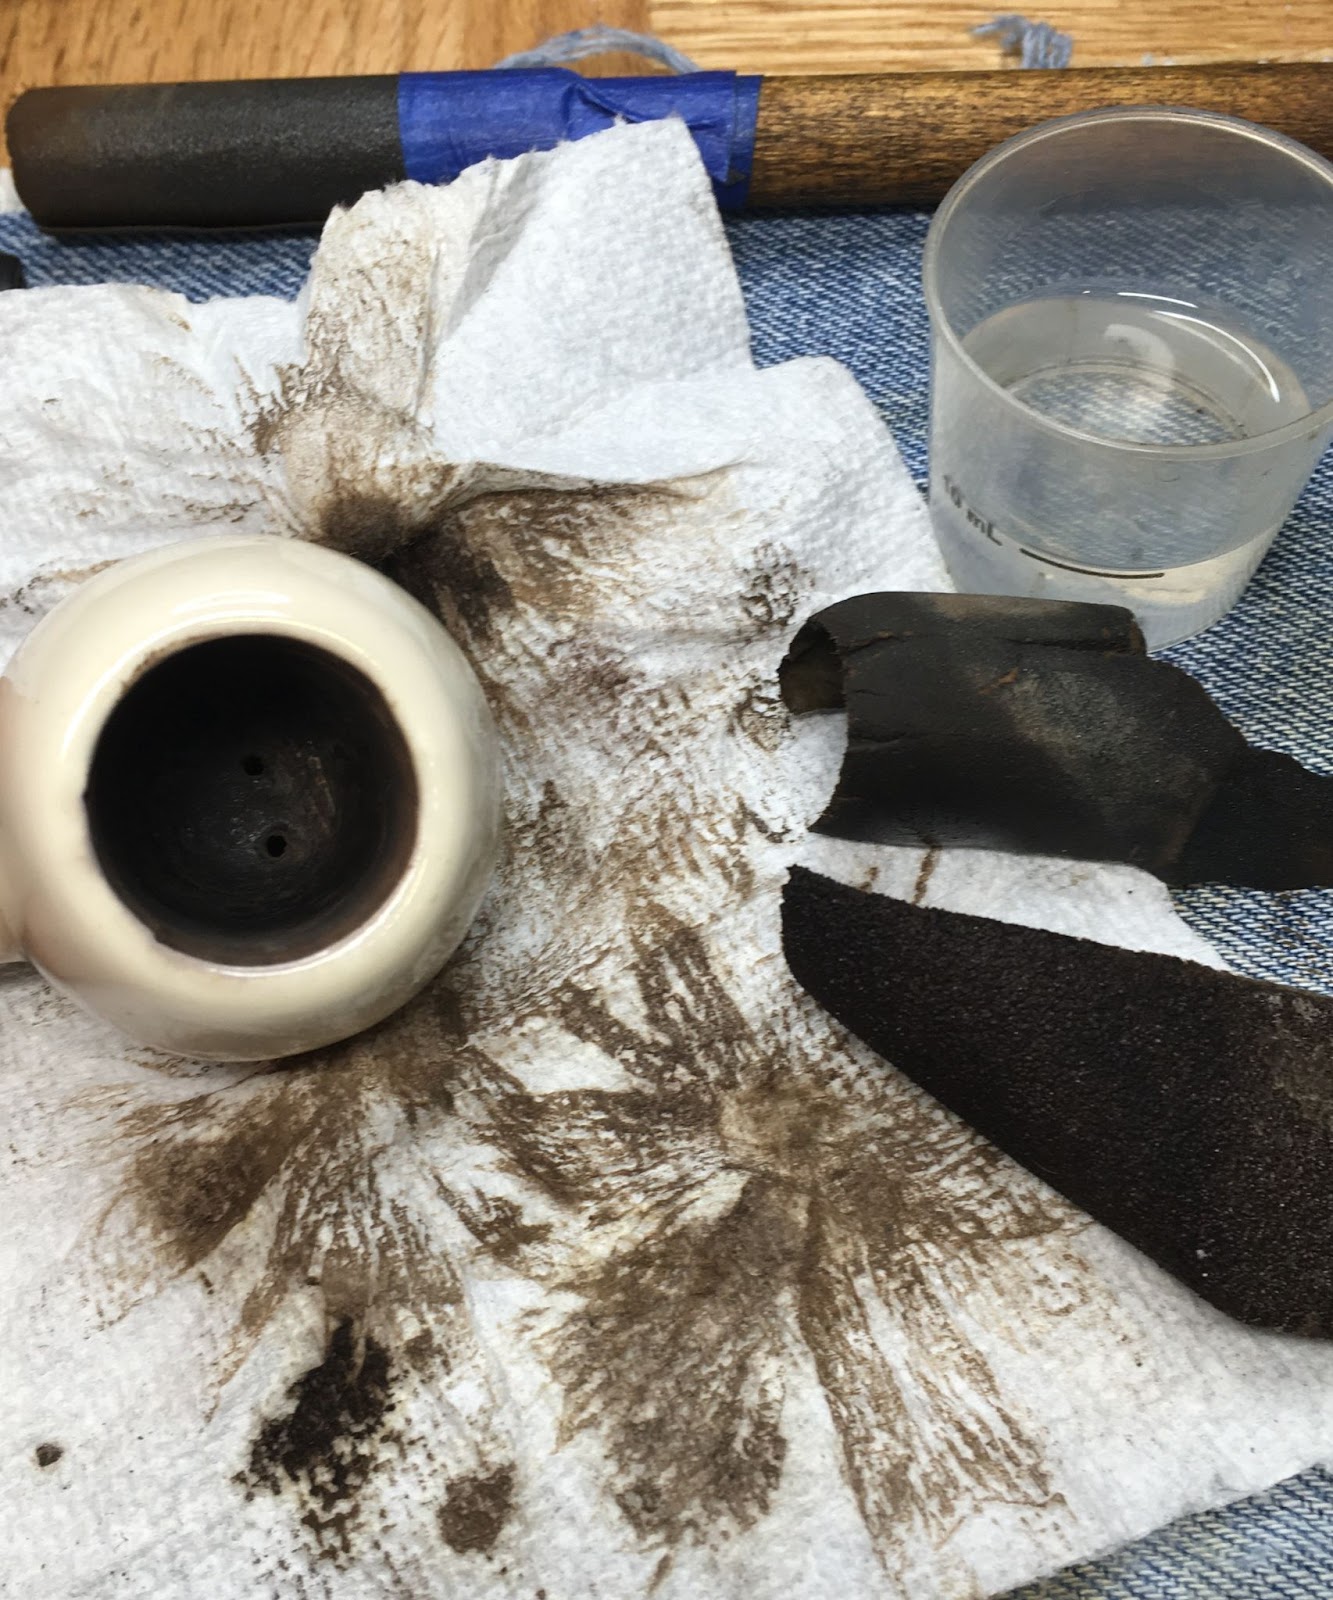


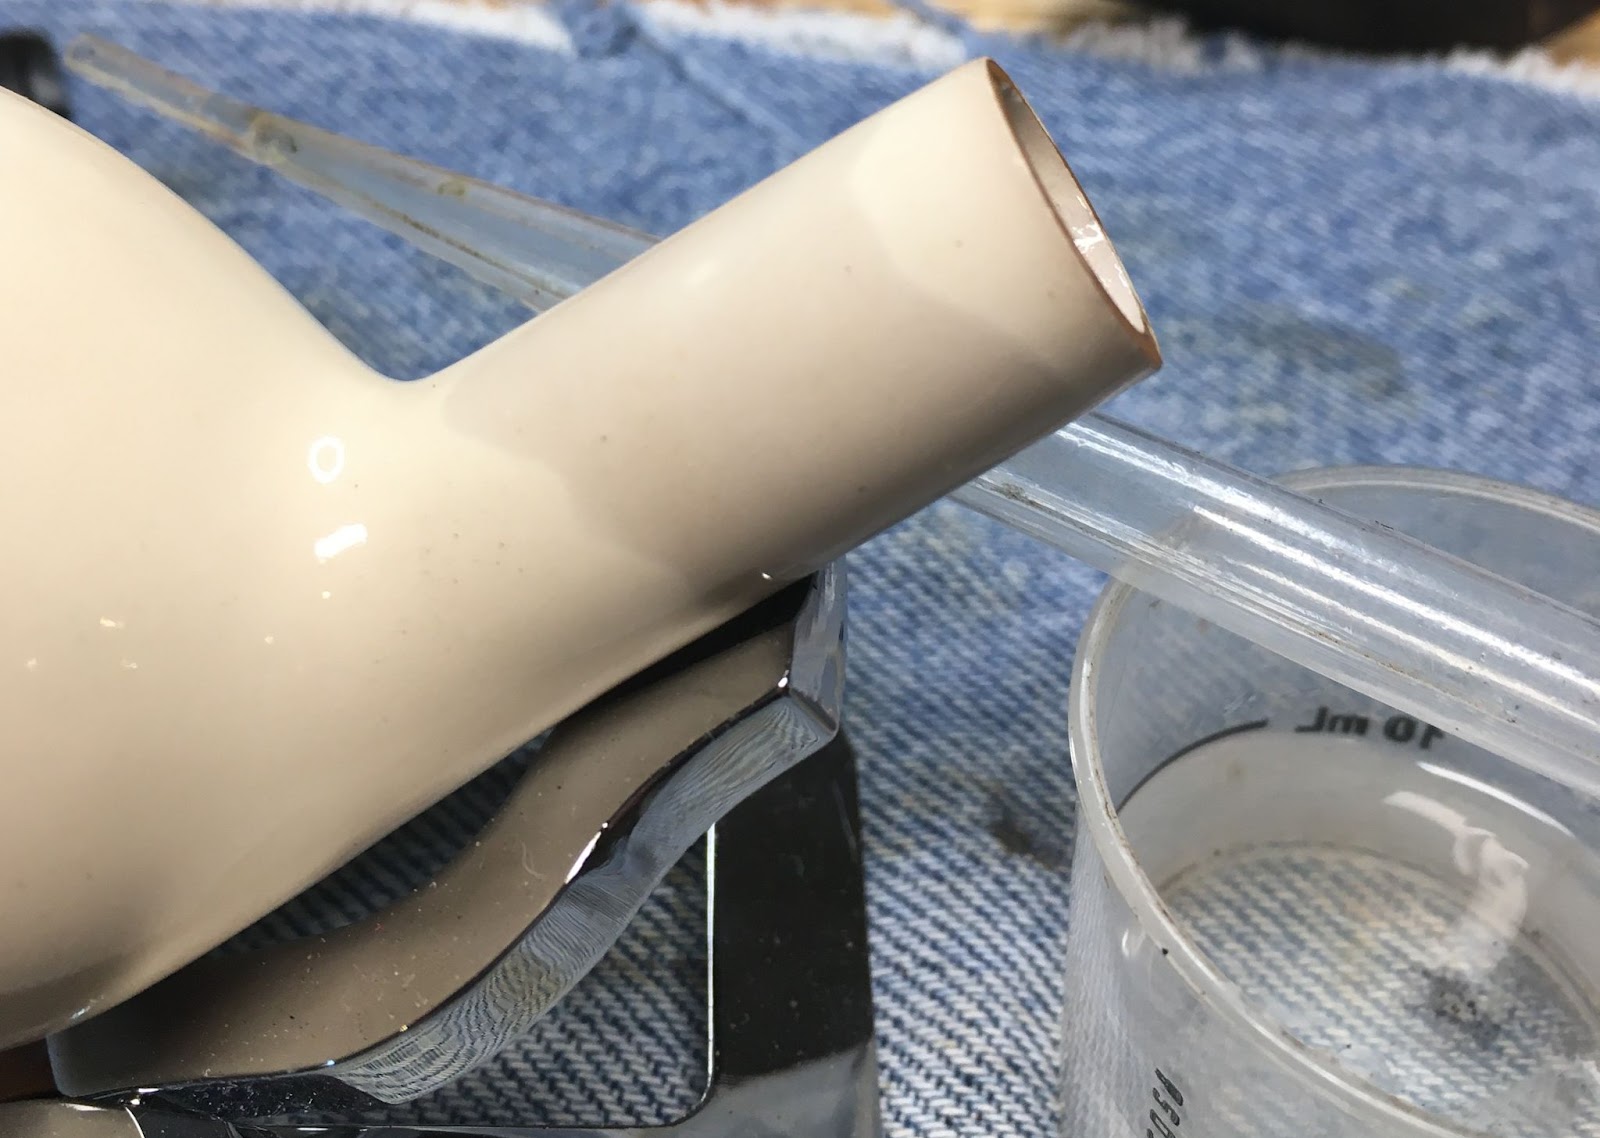

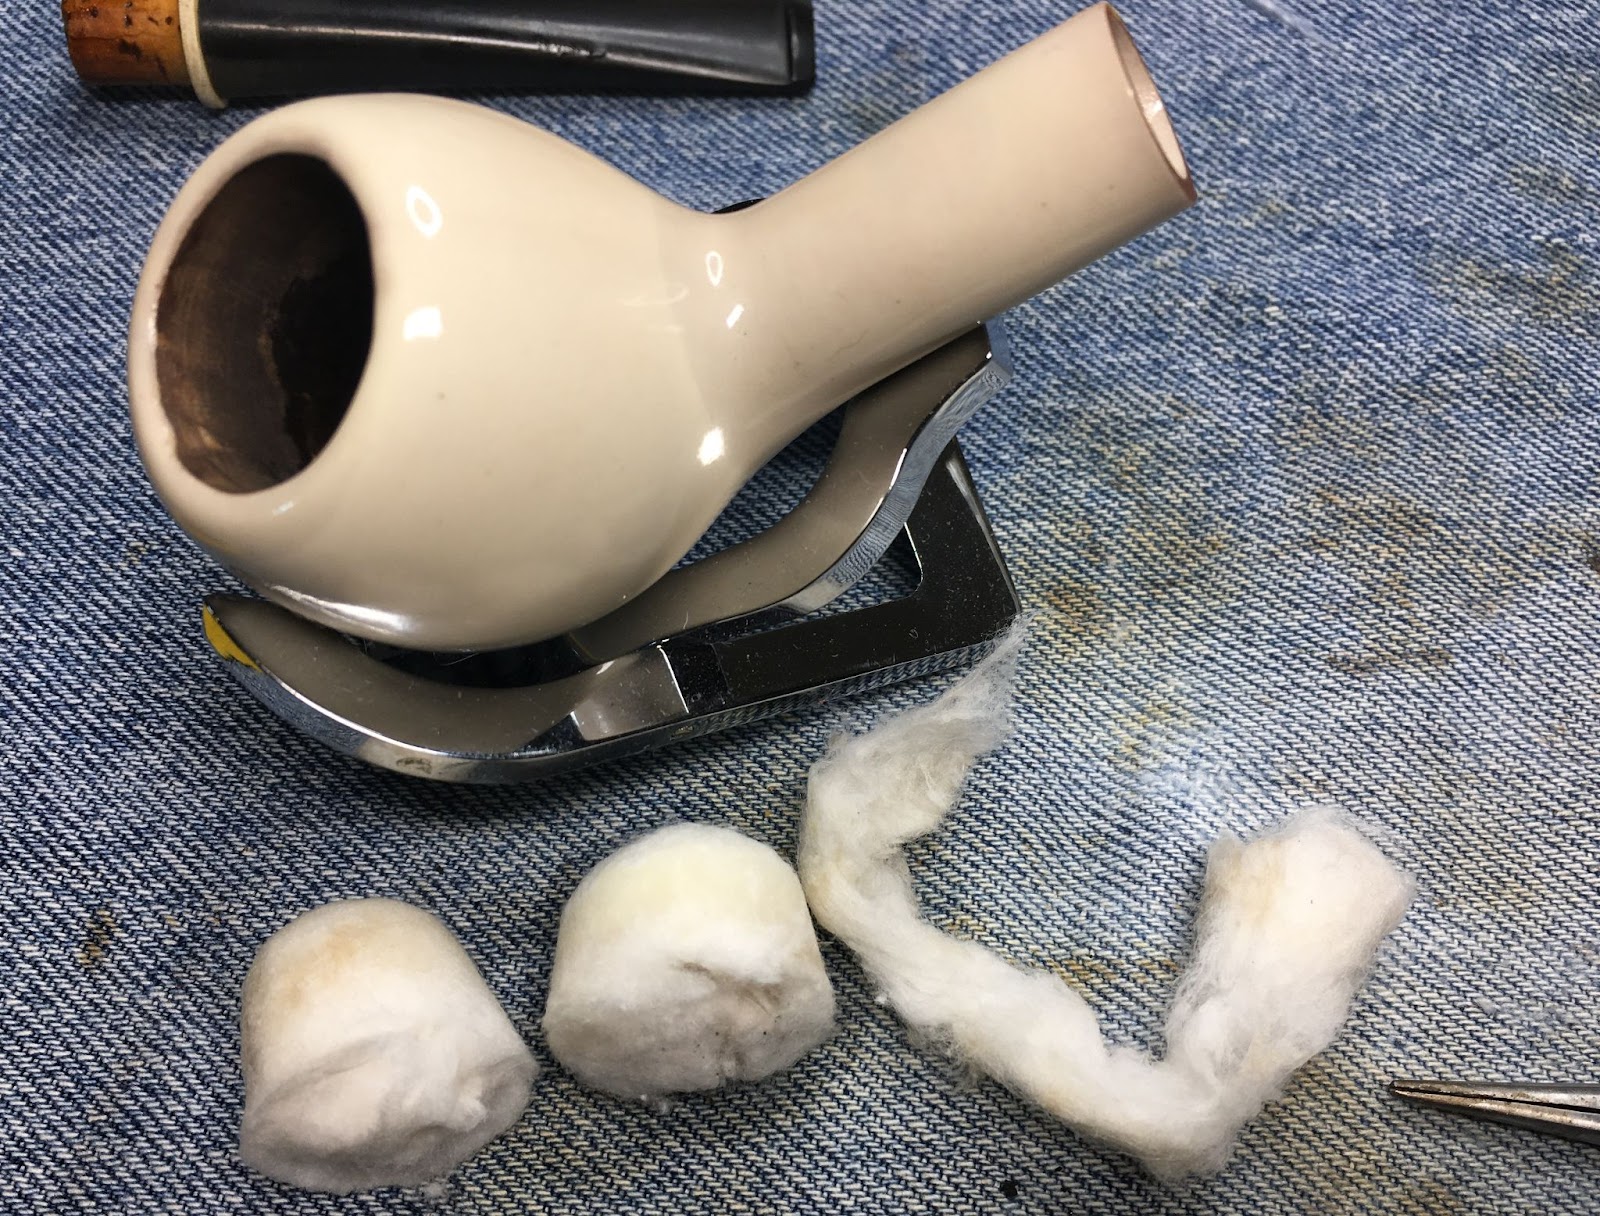

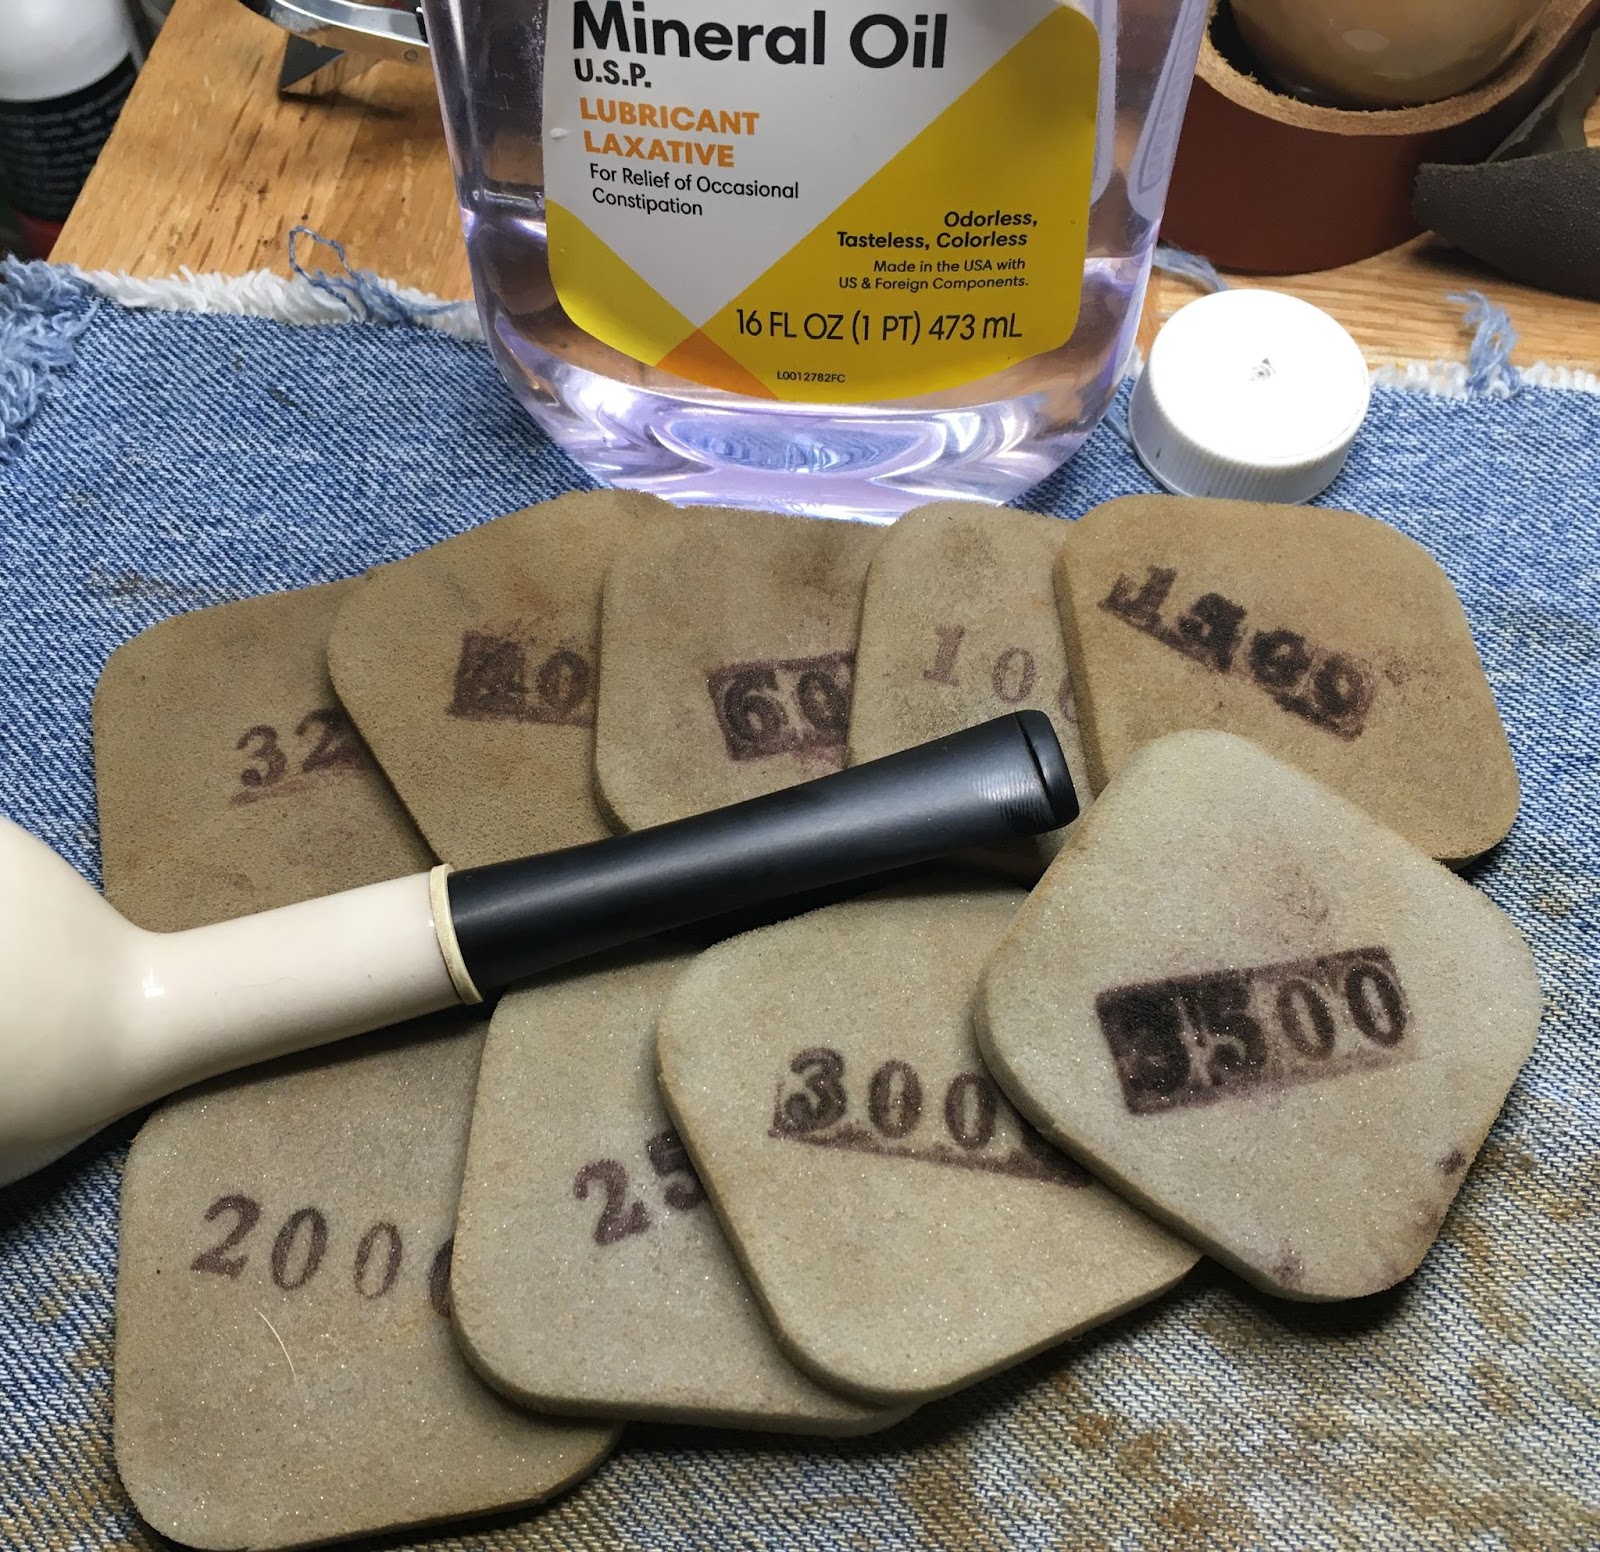


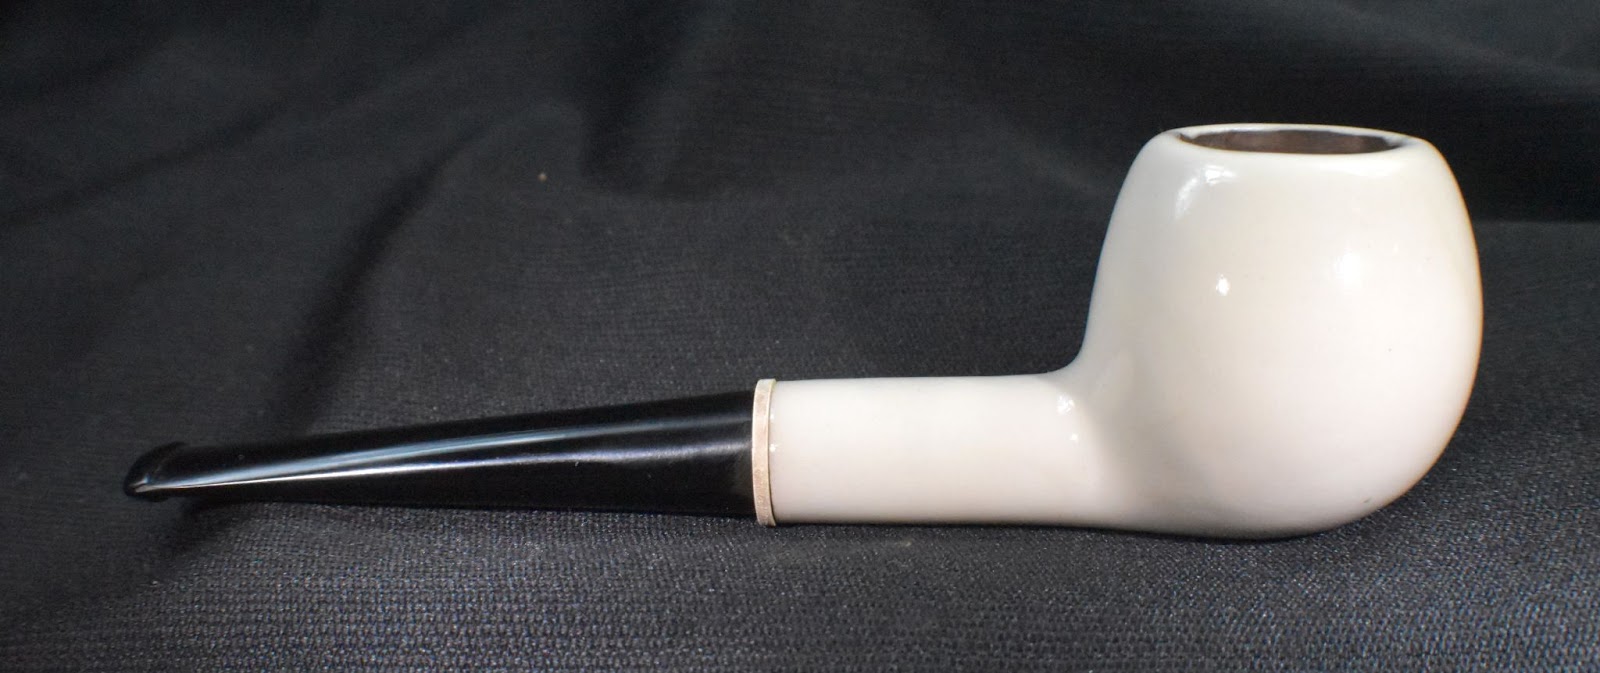


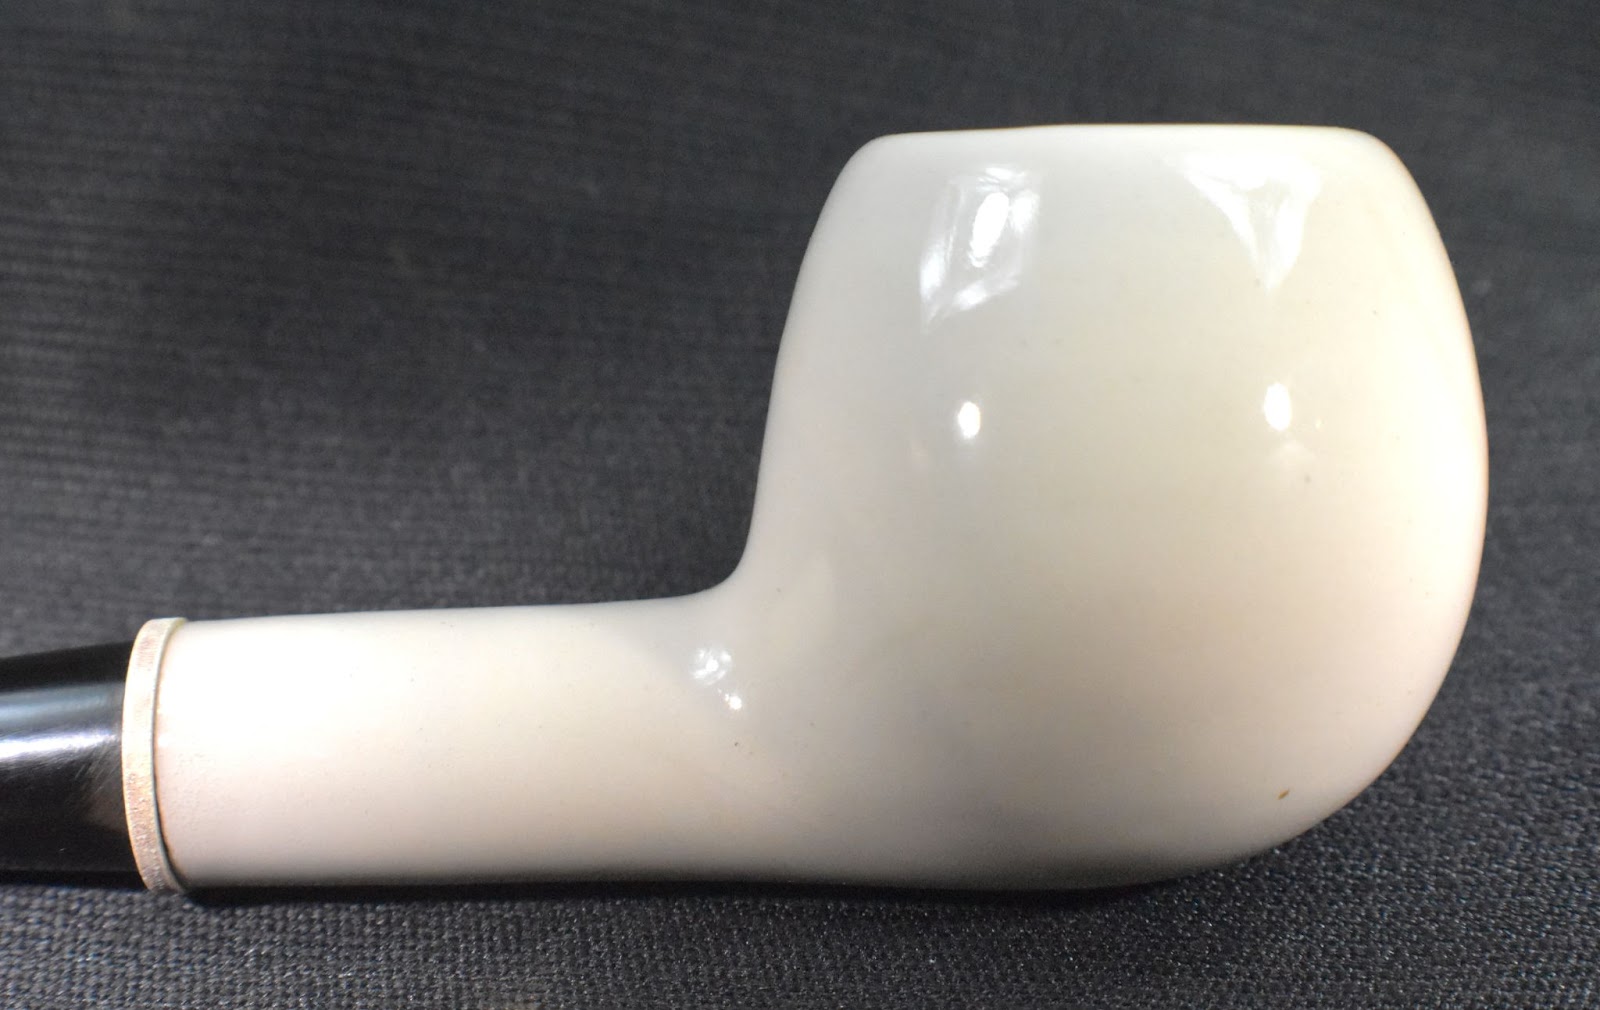


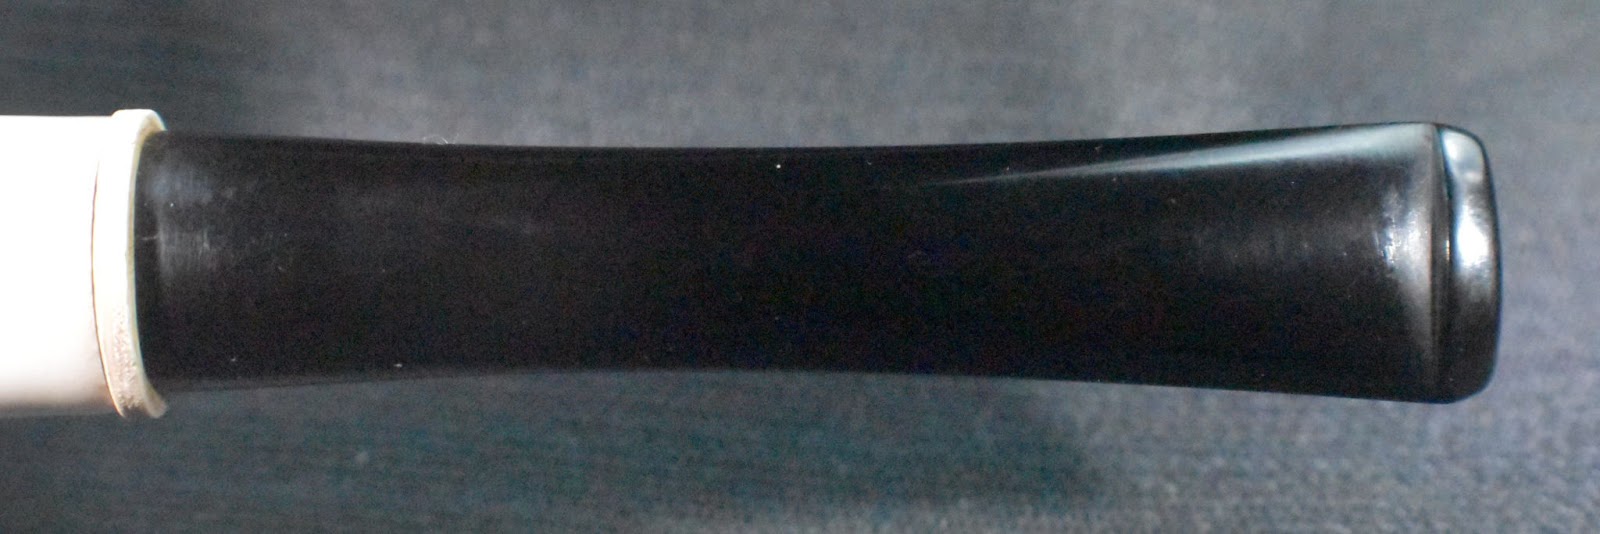
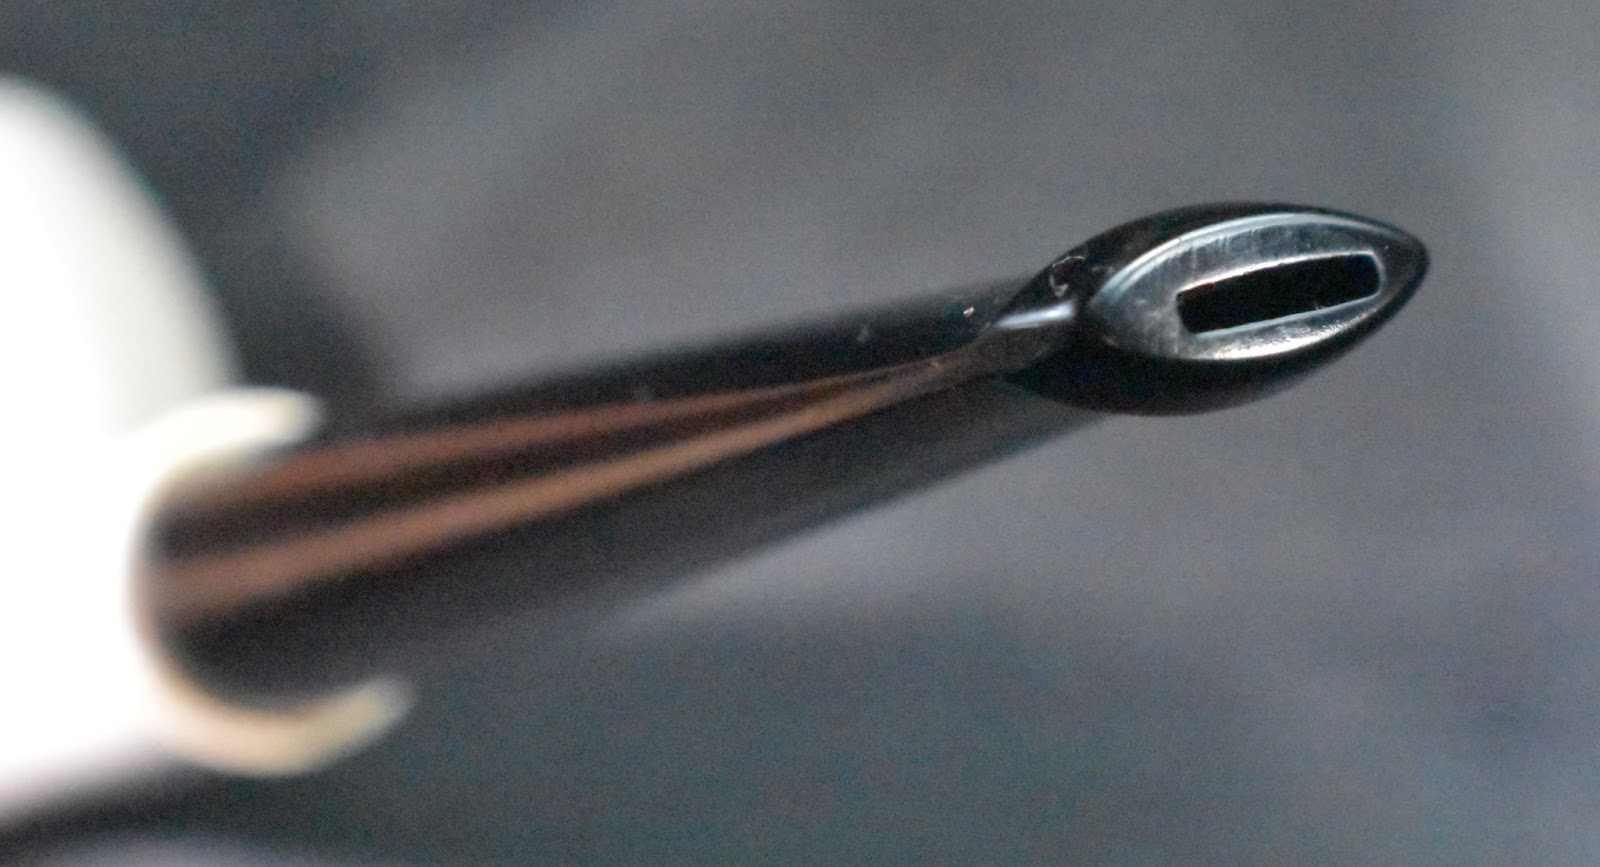


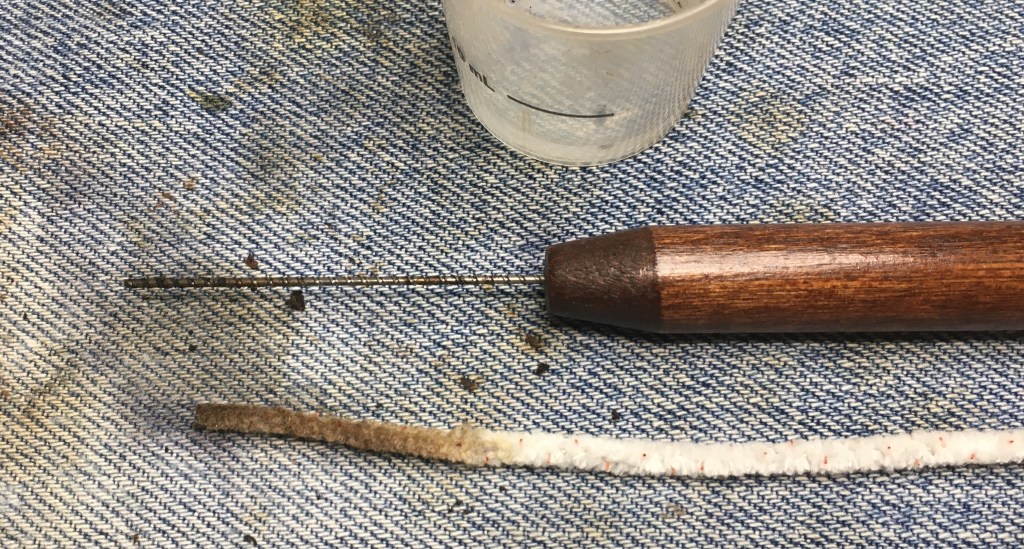


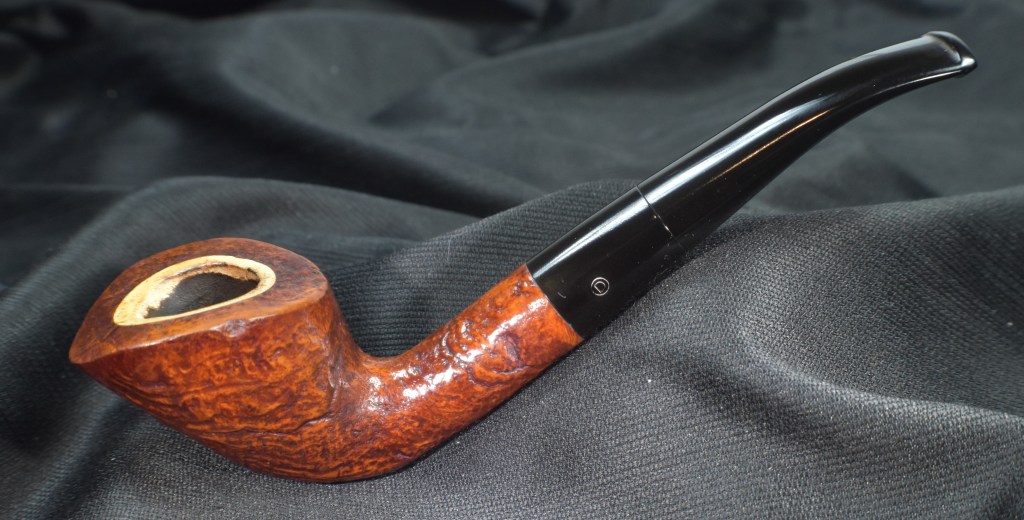


 (
(


