Written and photographed by John M. Young

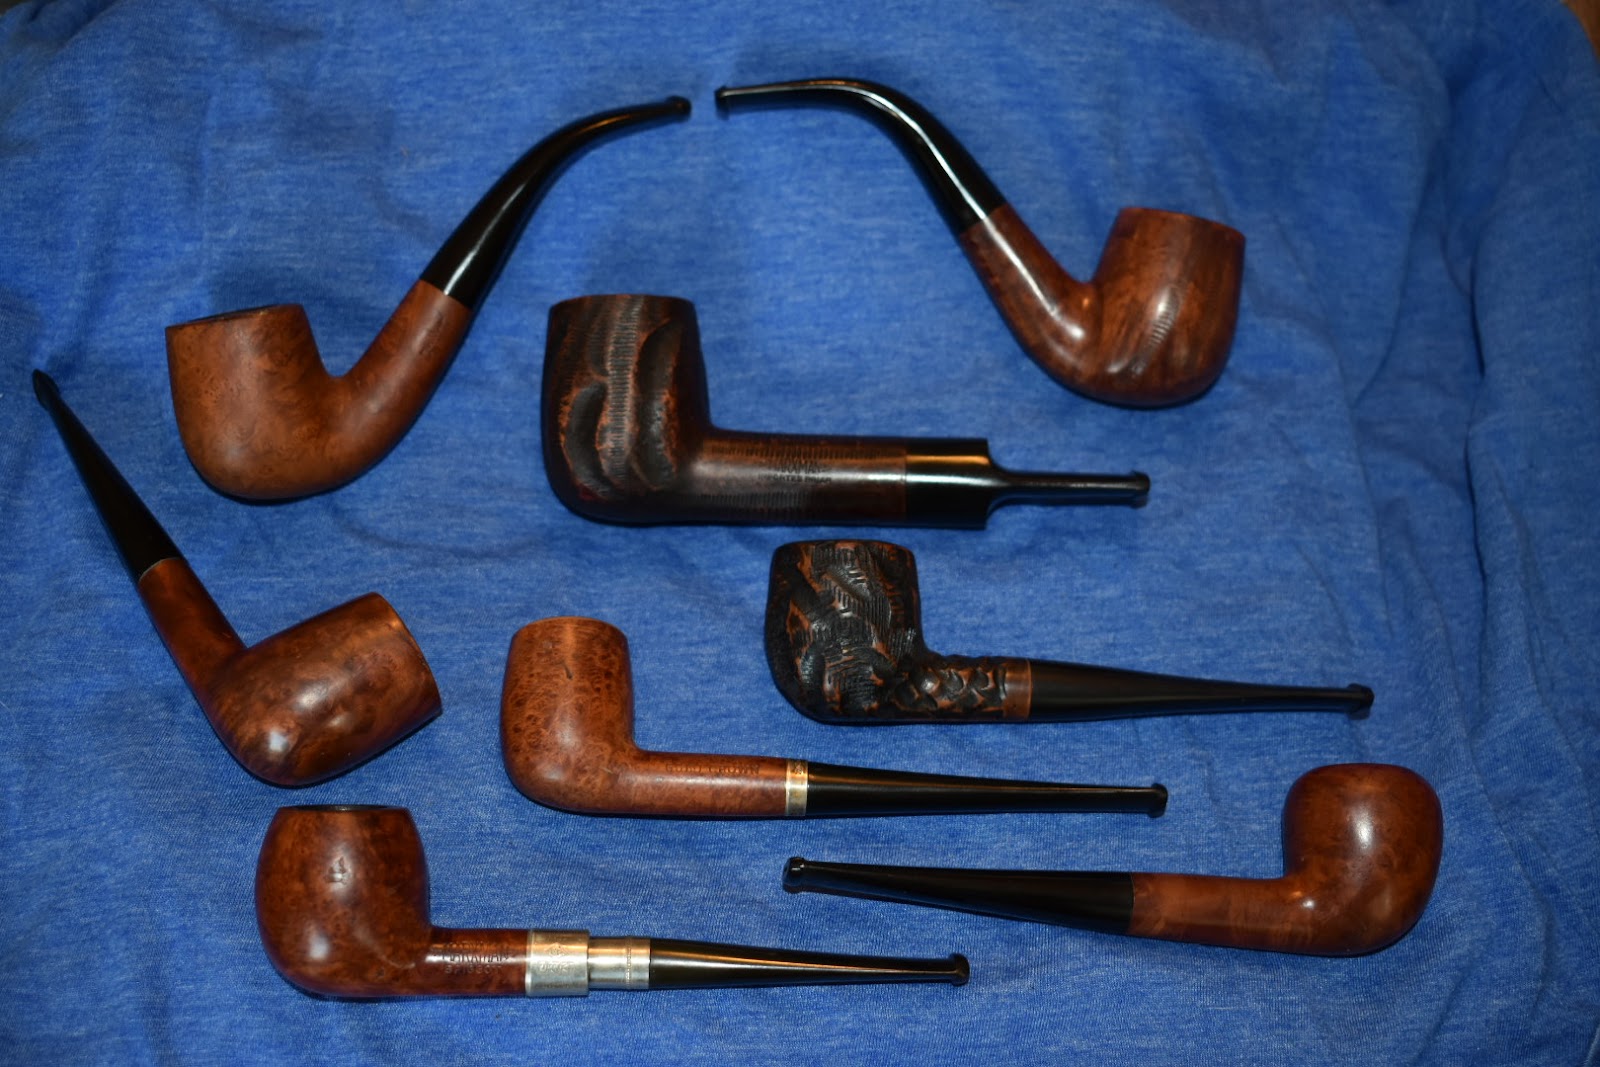
Pretty sneaky, eh? Starting a post with a photo of an unfinished pipe slathered in Restoration Balm. Well, maybe I am just trying to hook you then reel you in through the steps of the restoration then for the grand finale “WOW” you with a beautiful restored pipe. I guess you will just have to see what happens. As you can tell from the title or see from the above photo this restoration is dealing with a medium bent billiard shaped Pipe by Lee. I have had the privilege of restoring two of Lee’s pipes previously. A large bent billiard and a rhodesian both of the two star variety. Here are the two
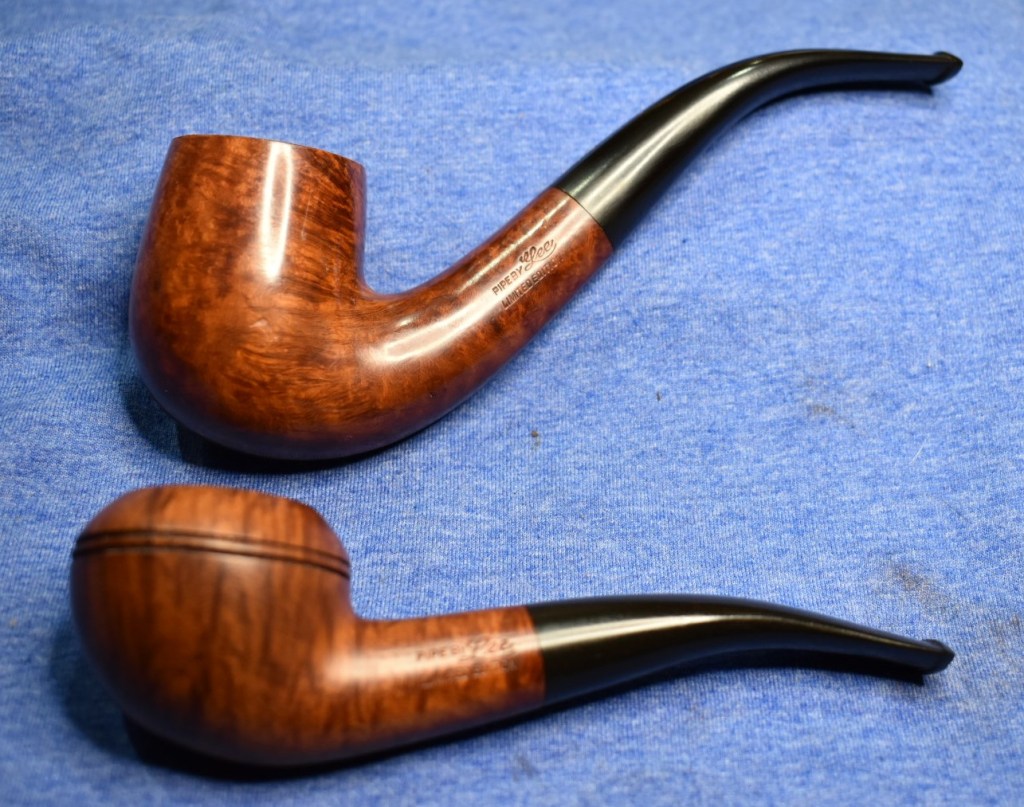
previous subjects. Both are quality briar but not without fills. They are very nice pipes to smoke and I can highly recommend the Pipe by Lee brand if you are looking for a good quality piece of briar for a reasonable price.
Steve Laug wrote a guide back in 2017 about a beautiful, well, I’ll just show you the title and link; “A Pipe by Lee Limited Edition 2 Star Rhodesian worth restoring?” (https://rebornpipes.com/2017/10/06/a-pipe-by-lee-limited-edition-2-star-rhodesian-worth-restoring/?). It is an excellent piece of work with a great deal of time spent on researching the brand: Pipe by Lee. If you are interested in the history of the company it is all well laid out for you in Steve’s article. Myself, I am a proud member of Generation X (AKA Slacker) and will gladly refer you to his article. It is a fascinating read and really addresses the quality of the briar in comparison to the leading pipe makers of the 1940s-1960s. It shows that Lee’s pipes were in the same ballpark as Kaywoodies and even Dunhills of comparable price. Like I said, a very interesting read.
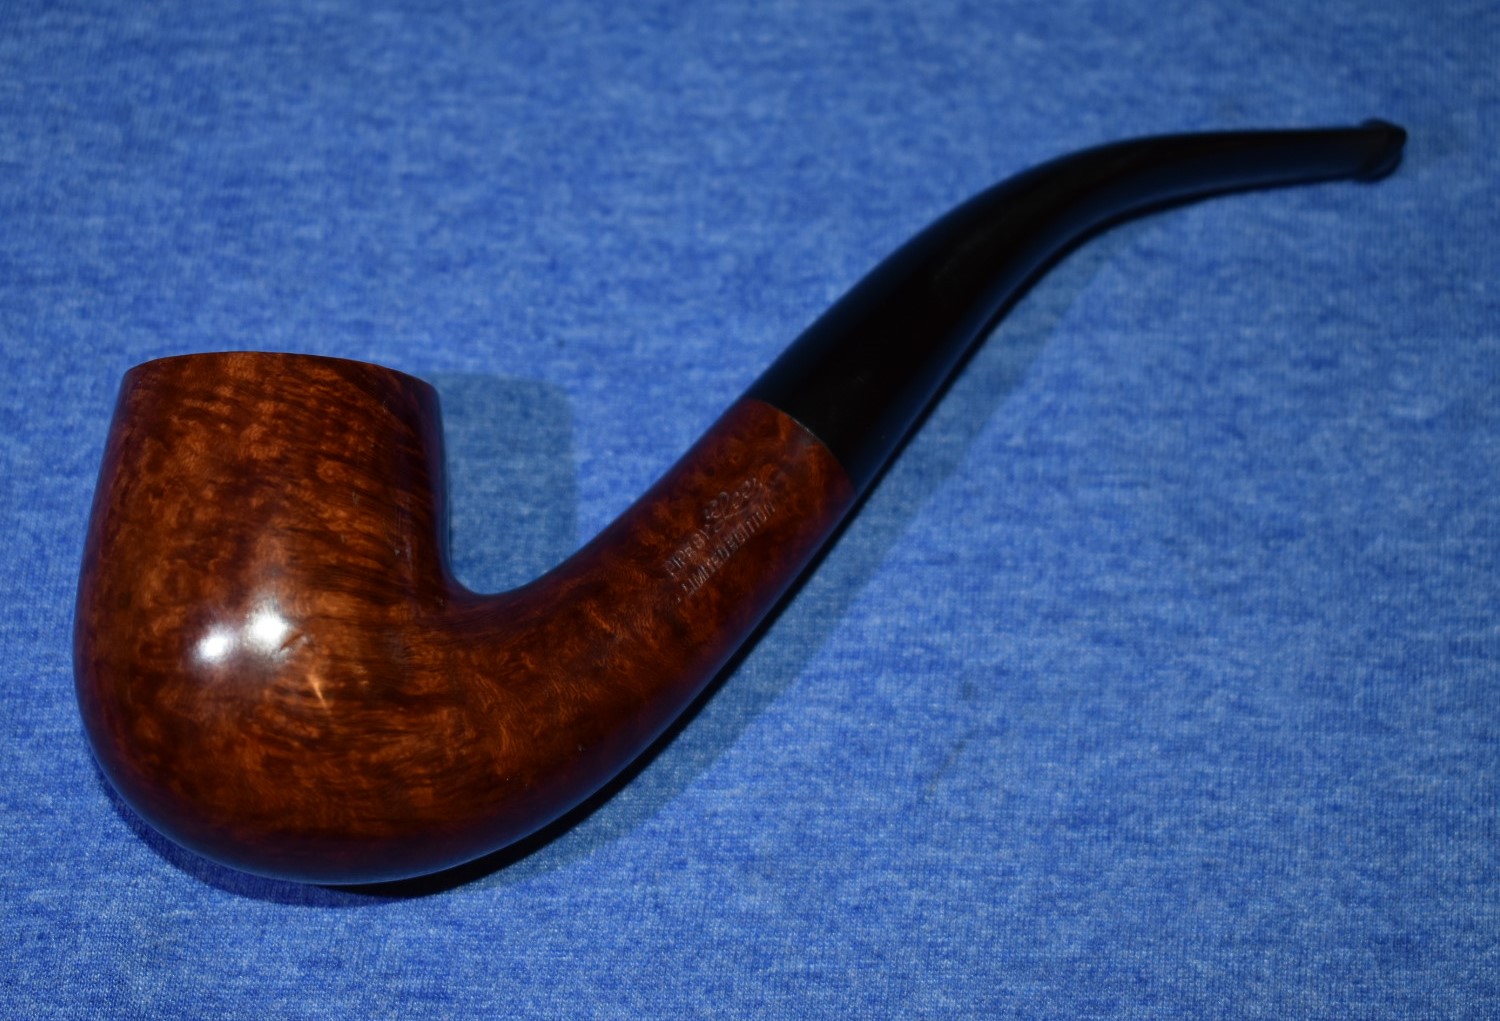
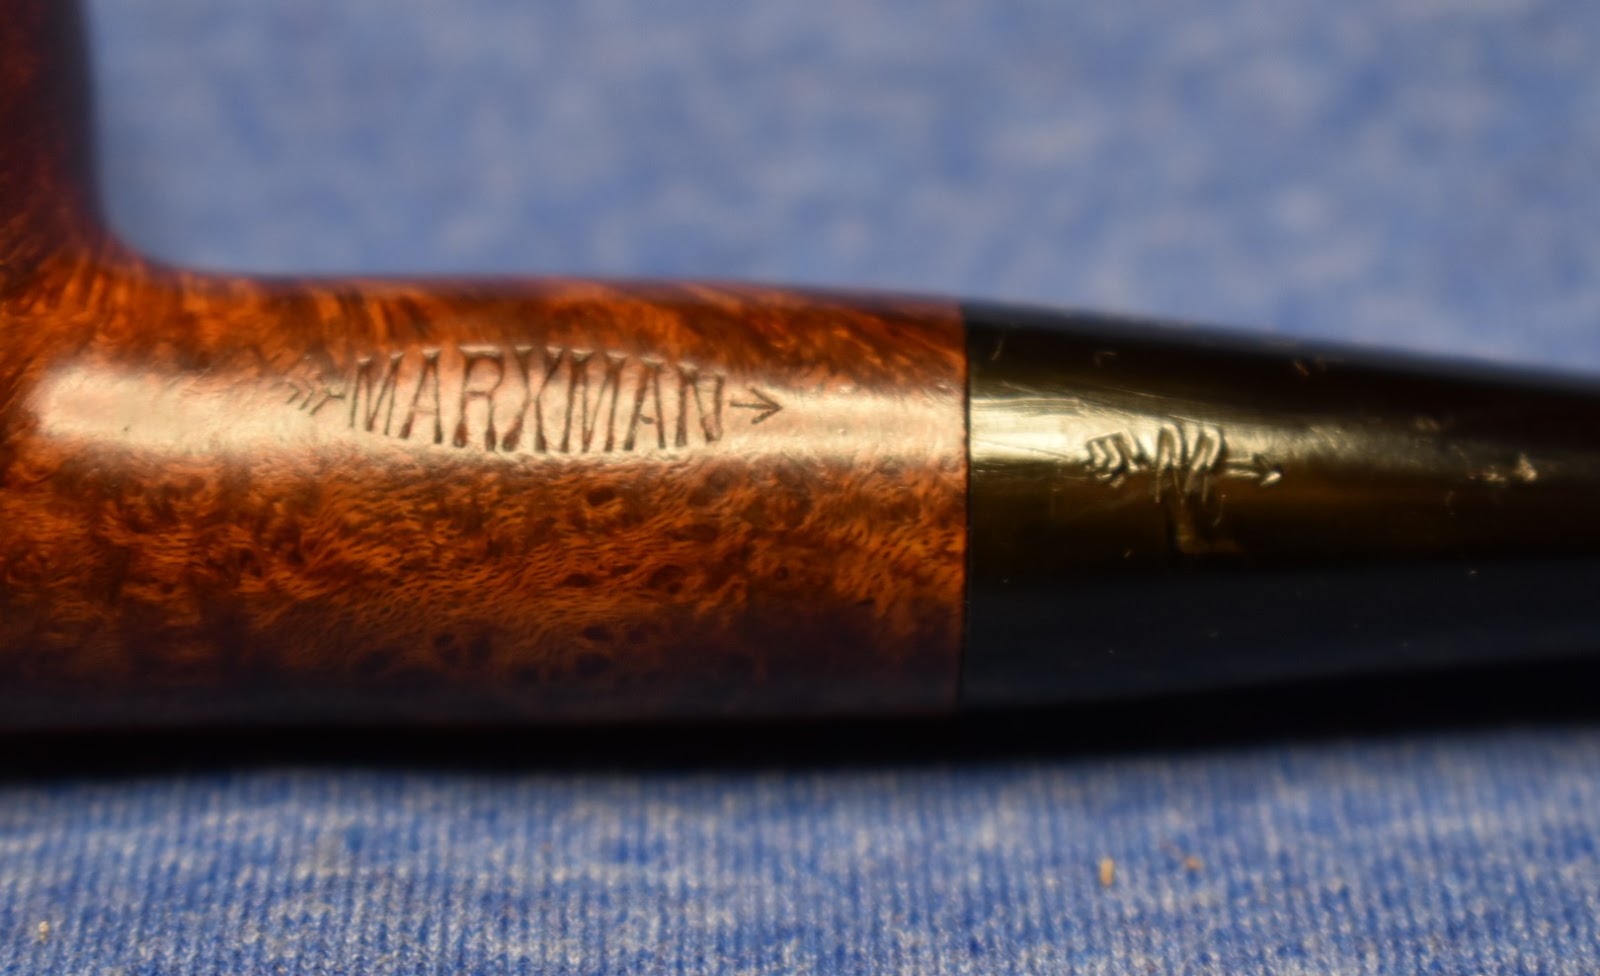
Now, this three star darling that you see above came to me from very close to my home, geographically speaking. I originally saw the Ebay auction for her and sent the seller an offer. I assumed that was what the “make an offer” button was for. This original offer was sent off in August. The offer went unanswered. The auction timed out and ended with no one wanting to adopt the three star of the show. She was relisted. I waited “watching” the auction. When the end day was approaching, I made another offer as I assumed that is what the “make an offer” button was for. This offer also went unanswered. The auction timed out again and again, she was relisted. This pattern continued until I got a message in November from Ebay saying that I only had one offer remaining for this item. I winced. I made another offer as I assumed that is what the “make an offer” button was for and waited for the traditional un-answer. This time the offer was accepted. A few days later the no longer unadoptable Pipe by Lee had a home. Remember I said geographically close? It came from a seller in Omaha NE, less and an hour drive north of me.
Upon her arrival I took some photos documenting my victory. Here they are:
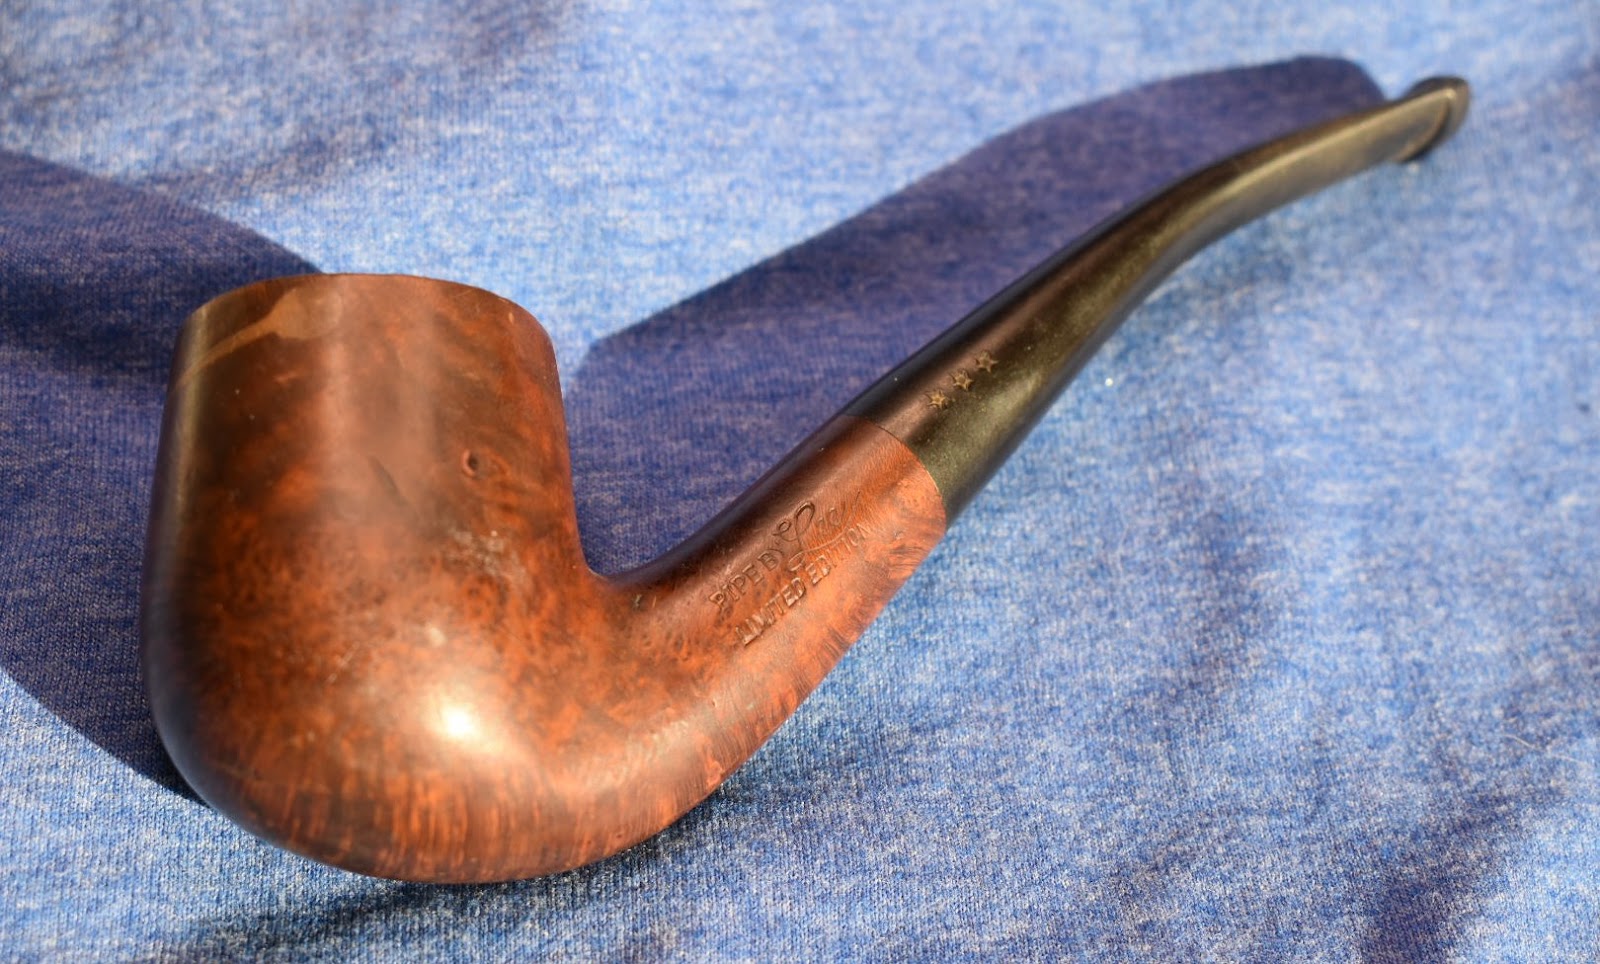

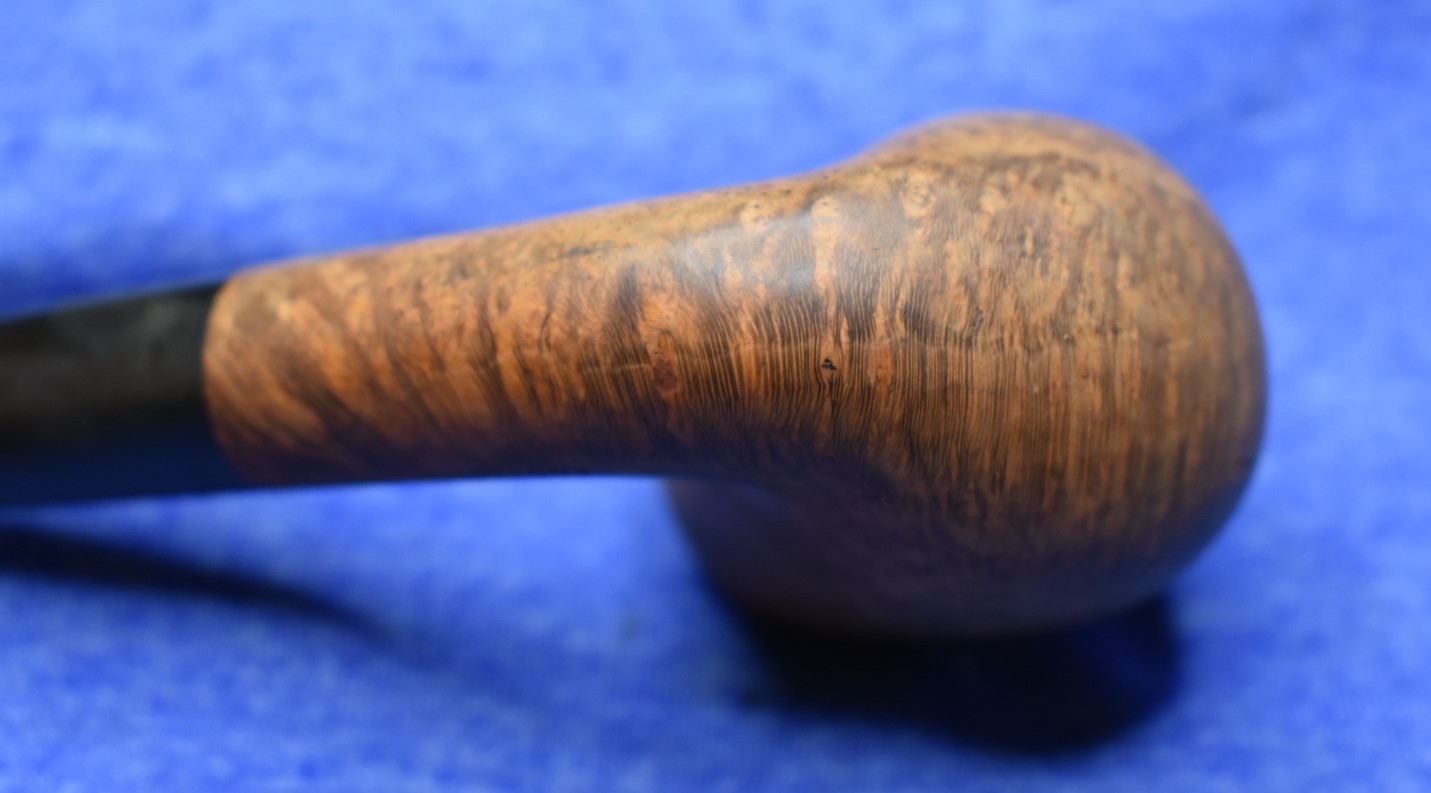
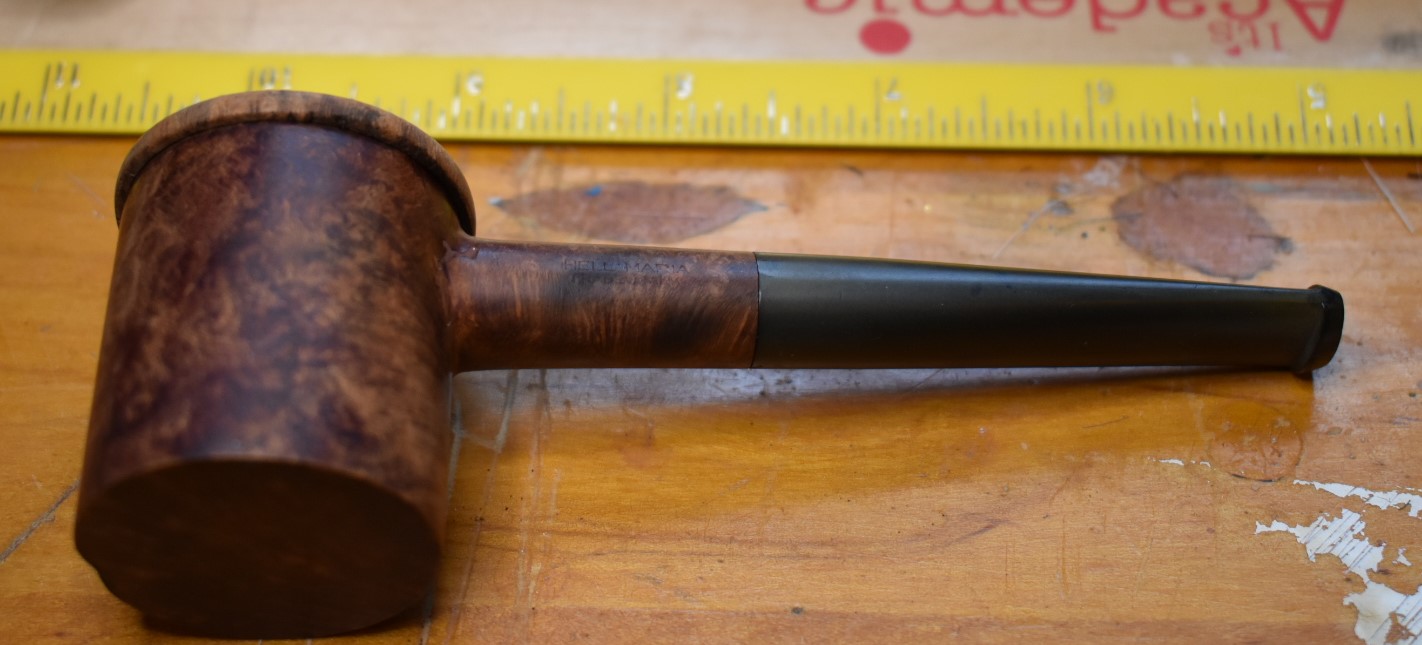
The sun was shining in through the south windows making the light a little harsh but I was excited to finally make her acquaintance. The stem needed to be bent with a more appropriate curve, there were a couple of scratches, a weird stain on the front of the bowl and some lava on the rim but the wood grain looked good and the stem wasn‘t terrible. “This is going to be an easy restore”, I thought.


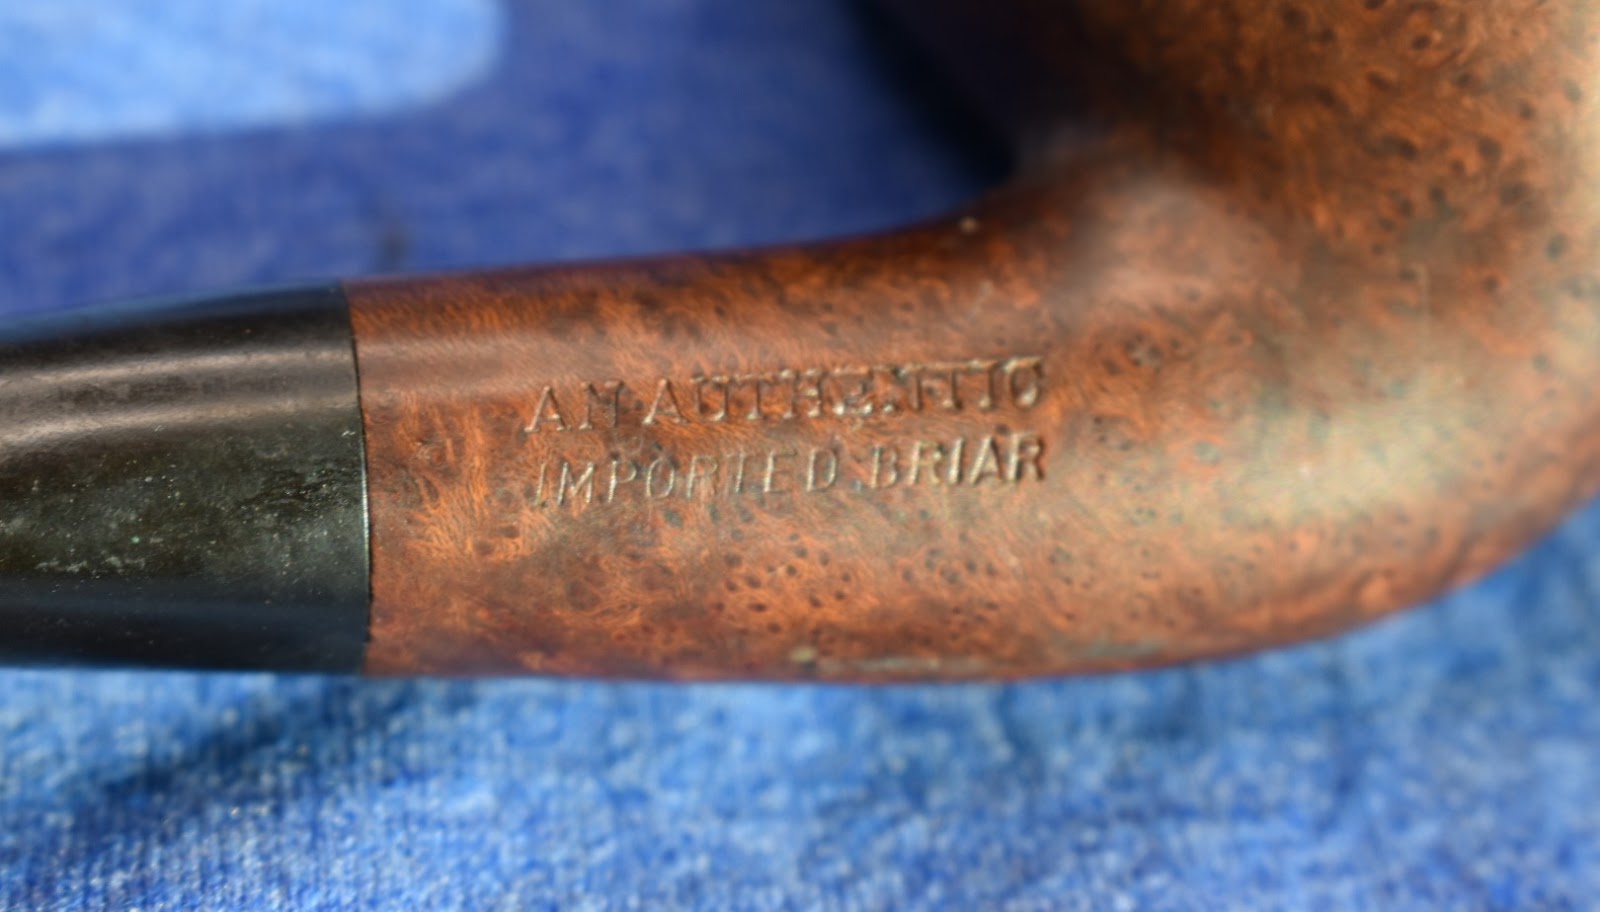


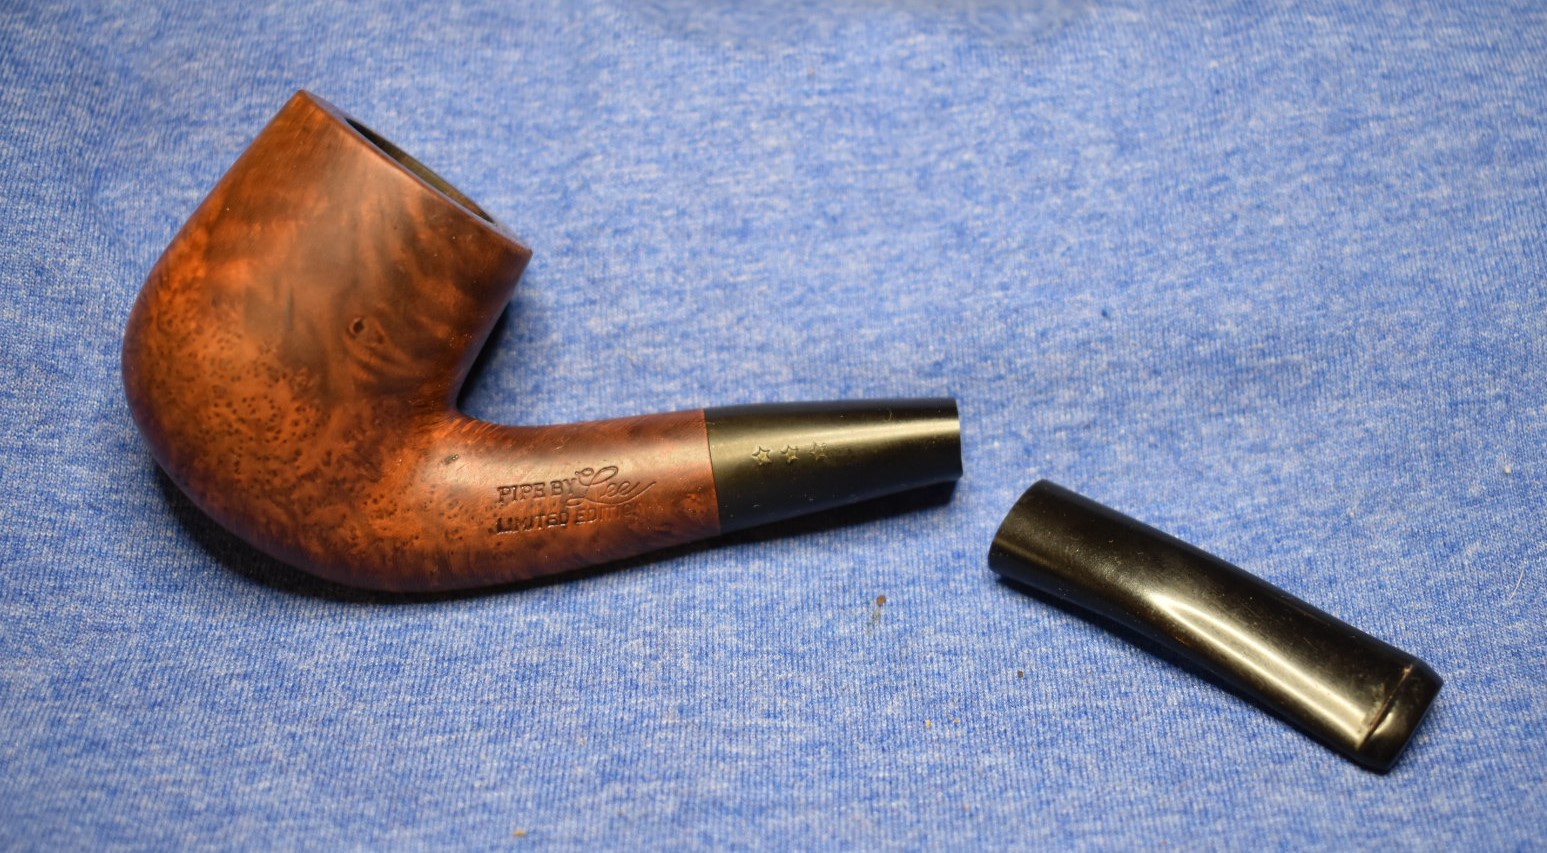
One of the things that I was really interested in examining was the quality difference in the briar between a 2 star and a three star Pipe by Lee. In the history of the brand there were pipes rated from one to five stars. I had never seen anything higher than a three, “how would they compare?” I wondered. Another thing that I noticed is that the stars were different. Both of my 2 star pipes had five pointed brass stars embedded into the tops of

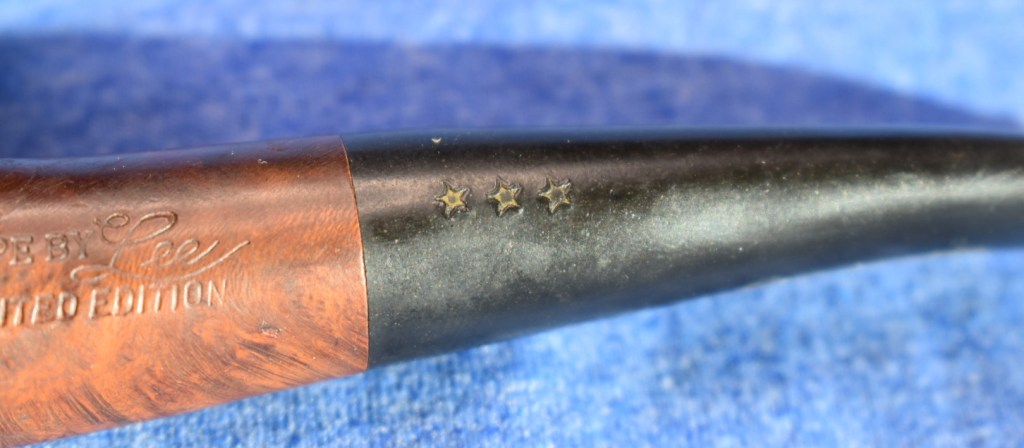
their vulcanite stems. This pipe had what looked like a hot foil pressing of stars onto the side of the stem. That kind of struck me
as a “lower quality” move by Lee. “Well vulcanite is vulcanite, right? What difference could that possibly make to the pipe?”, I thought. The two star bent billiard had the same “not enough” bend when she arrived and a little bit of heat gun and gentle pressure fixed her right up.
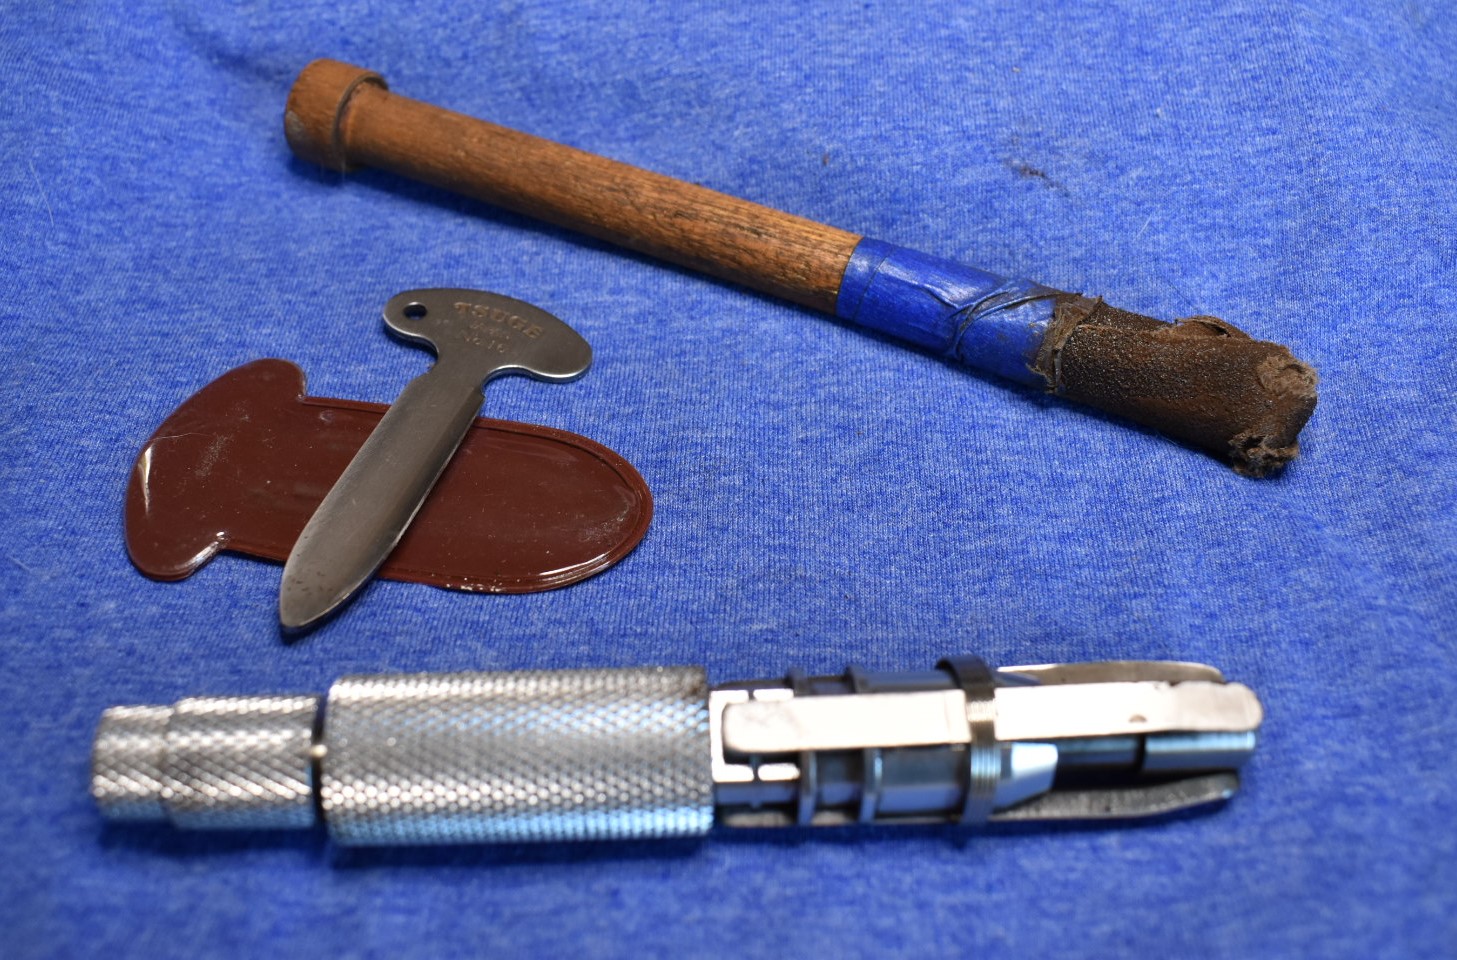
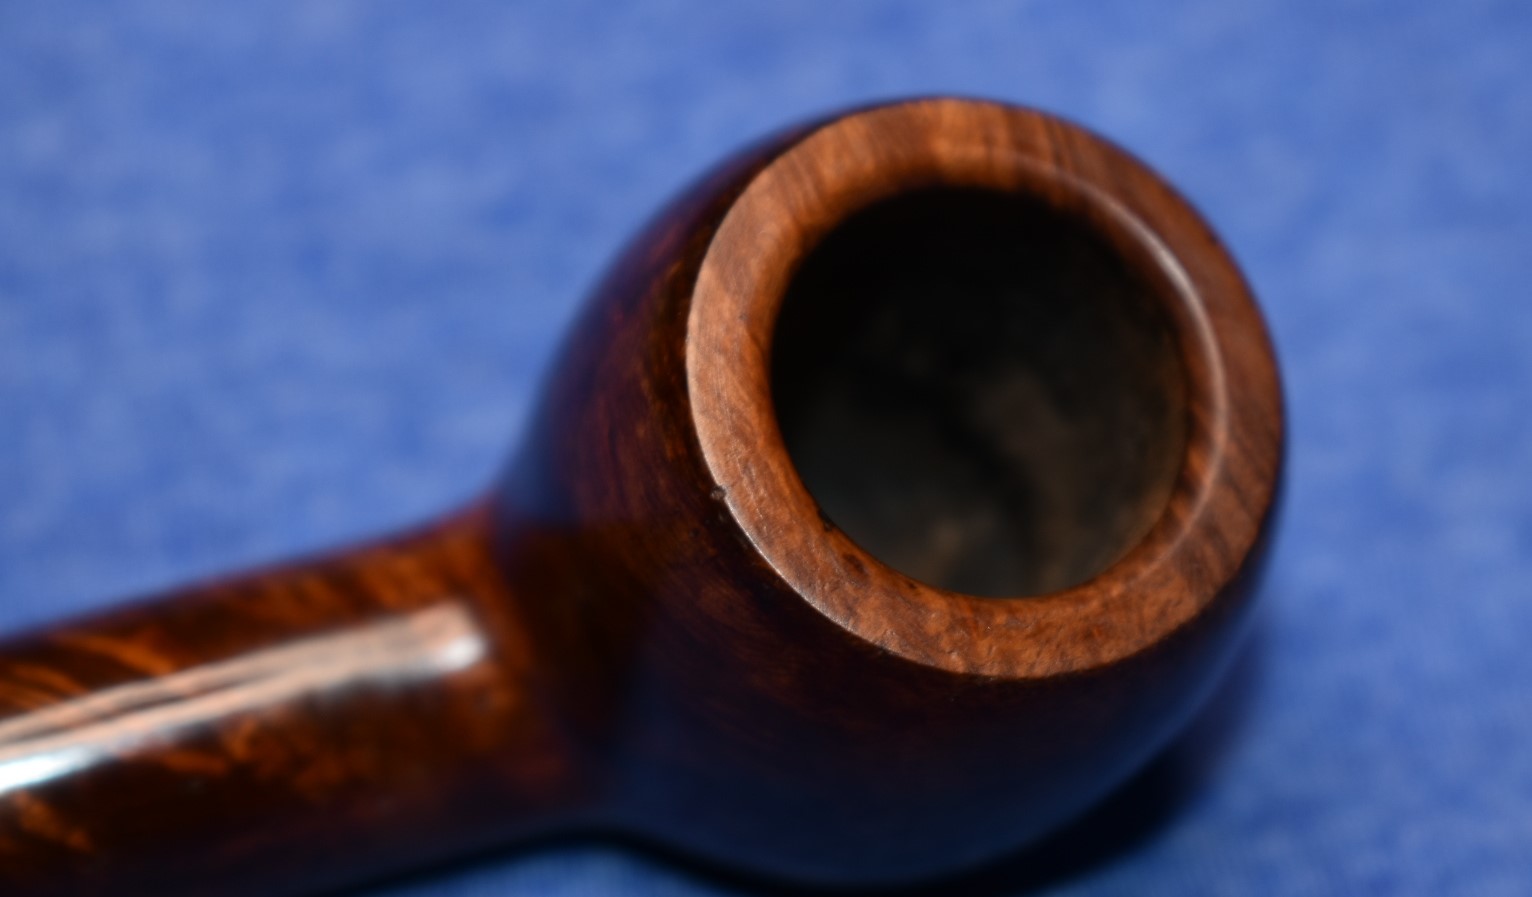
The first step was to get the pipe cleaned up so I could see if there were any larger issues at play. I first used the PipNet reaming tool and Smokingpipes reaming knife to remove the cake from the tobacco chamber. The chamber was quite clean and actually had a bit of tobacco and what looked like pocket lint. Following the reaming, I used a wooden dowel wrapped with 220 sandpaper to sand the interior of the chamber. After the sandpaper I wiped the chamber with a cotton make-up removal pad dampened with 99% ethyl alcohol. This showed me that there was no damage to the briar of the tobacco chamber.

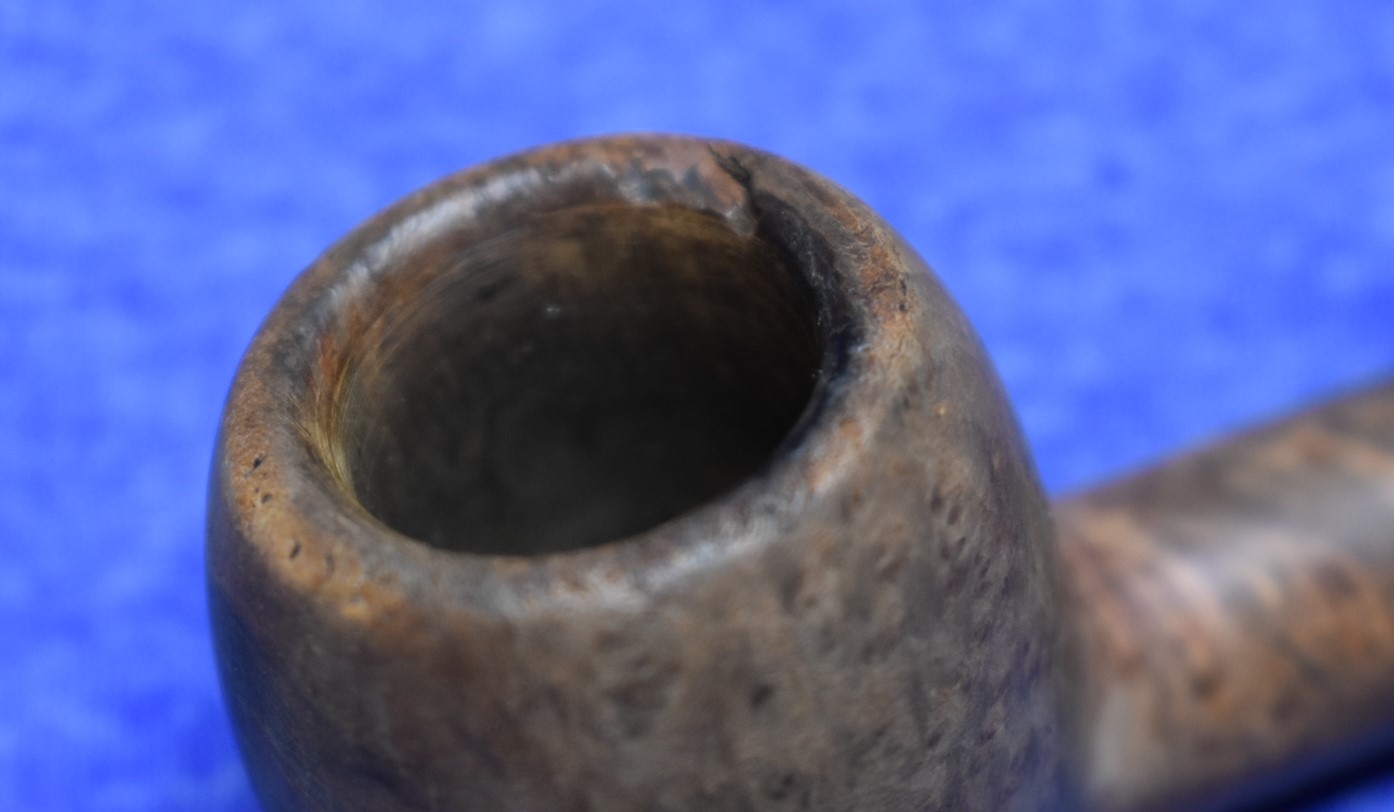
The rim was moistened with a bit of saliva and scaped with the edge of a sharp knife. The knife blade is straight, not curved, and is held perpendicular to the rim. Very little pressure is applied so you can see that only the lava is removed. The edge is wiped on a paper towel frequently to remove the lava from the surface. The below photo shows a scraped rim with only a couple of spots of lava remaining. This will be removed during the next phase of scrubbing. 
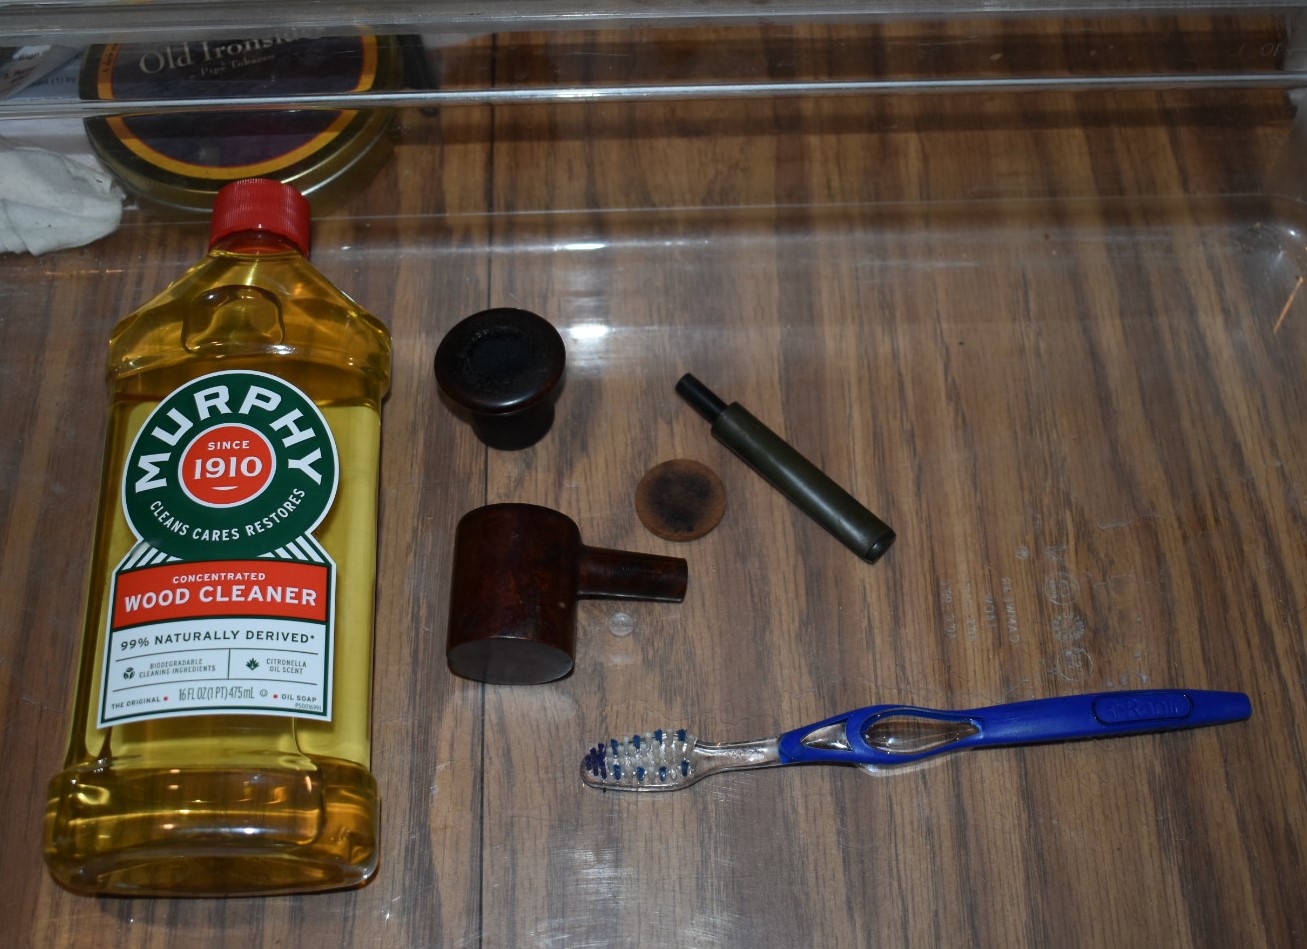
Next the stummel needed to go to the sink for a scrub using Murphy Wood Cleaner and a medium stiffness toothbrush. The Murphy’s is used undiluted and a dollop is poured directly onto the stummel. I then brushed vigorously herding the Murphy’s at first then just scrubbing as the cleaner gets distributed over the surface of the pipe. It is amazing how much dirt and grime are removed from a stummel that appears clean. After the scrub I rinse with warm water. I decided to run a nylon shank shank brush with a little bit of Dawn Dish Soap through the shank. As expected the Dawn foamed up and the foam quickly changed from a white to a foamy chocolate milk color. By now my water was more hot than warm and I rinsed the shank with hot water. This better removes the soap. I applied a bit more Dawn and repeated the shank scrubbing followed by another rinse. I rinsed the brush off separately and used it while rinsing the shank until I was confident that the soap was all rinsed away. Many people shy away from using dish soap for internal pipe cleaning fearing that some soap residue may cling to the surface and affect the flavor of the pipe. I contend that if properly rinsed the internals should be like the surfaces of our plates and flatware, free of soap and any taste associated with it. The stummel exterior was dried thoroughly with a cotton dish towel while the tobacco chamber was dried with a paper towel. I twisted the paper towel and inserted it into the shank to dry it and to see if the paper twist was discolored by smoking residue. I did discolor, indicating that it would need a bit of additional cleaning.
The stummel was returned to the workbench where I poured 5 ml of 99% ethyl alcohol into the chamber while plugging the mortis end of the shank with my finger. I sloshed the alcohol around and allowed it to fill the shank. I allowed the alcohol to slosh around inside the pipe for about a minute. The purpose of the alcohol bath is twofold; 1) If there is remaining residue in the shank the alcohol further softens it and 2) the alcohol, being very hydrophilic, will draw the water from the briar into solution with the alcohol. The alcohol was poured into a medicine cup. The exterior of the stummel next received a wipe down with a clean make-up removal pad dipped in the alcohol. This allowed me to see if there was any finish remaining or lava as the alcohol evaporated. I saw no remaining finish nor lava. I then proceeded to use cotton swabs dipped in fresh alcohol to remove any residues inside the shank. This pipe was fairly clean to start with and the dish soap worked well so, I only had to use 4-5 cotton swabs. Below are photos of the stummel after the scrub and alcohol wipe. I did reinsert the stem for these photos.


Next, I turned my attention to the stem. I rubbed the entire surface of the stem with 0000 steel wool. I planned to give the stem a dip into the Deoxidizing solution and the steel wool rub allows the removal of the outermost oxidized vulcanite prepping it so the solution can work its magic. I placed a pipe cleaner into the tenon end of the stem, dipped the stem into the solution and bent the remaining pipe cleaner over the edge of the Deoxidizing Solution jar; the lid was then placed back on the jar. I figured that since this stem was not too oxidized I would only leave it in the solution for 30 minutes to an hour. Noting the time, I returned to the stummel.
I examined the stummel for scratches and dings that I might be able to fill or repair. There was one scratch/dent on the left side of the stummel that I thought looked especially deep. I thought that I would try to raise this with a bit of steam. I retrieved my old pencil soldering iron and plugged it in, to heat. I then used a piece of denim cloth (old blue jeans rag) and soaked one corner with tap water. When the soldering iron was hot I held the damped cloth to the surface of the stummel and applied the soldering iron to the damp cloth. It steamed quite nicely and I was prepared for great things. I moved the soldering iron over the area for approximately 10 seconds. Upon removing the cloth I saw that I had completely missed the dent. So much for great expectations. Okay, try that again. This time I was much more diligent in properly locating the dent and applying the heat. Checking the location twice, I was on it, this time. I again moved the soldering iron over the dented area for 10 seconds. I couldn’t see much of a difference. I repeated the steaming another 3 times, same results – not much improvement.

I thought, “If I fill that with briar dust and cyanoacrylate (super glue) it is going to be smooth but a dark mark will be there instead of a scratch”. I decided to leave it for now and see how it looked after the sanding. The sanding went smoothly, I started with 400 grit sandpaper dampened with water. I was very careful to avoid the stampings, After sanding I wiped the stummel off with an alcohol dampened make-up pad. Next came the 1500 micro-mesh pad, also moistened with water, followed by another alcohol wipe. This was followed by the 1800 micro-mesh, again dampened and another alcohol wipe. I think you are starting to see a pattern. I continued up through the micro-mesh pads, dry after the 1800, up to the 12000 micro-mesh pad.
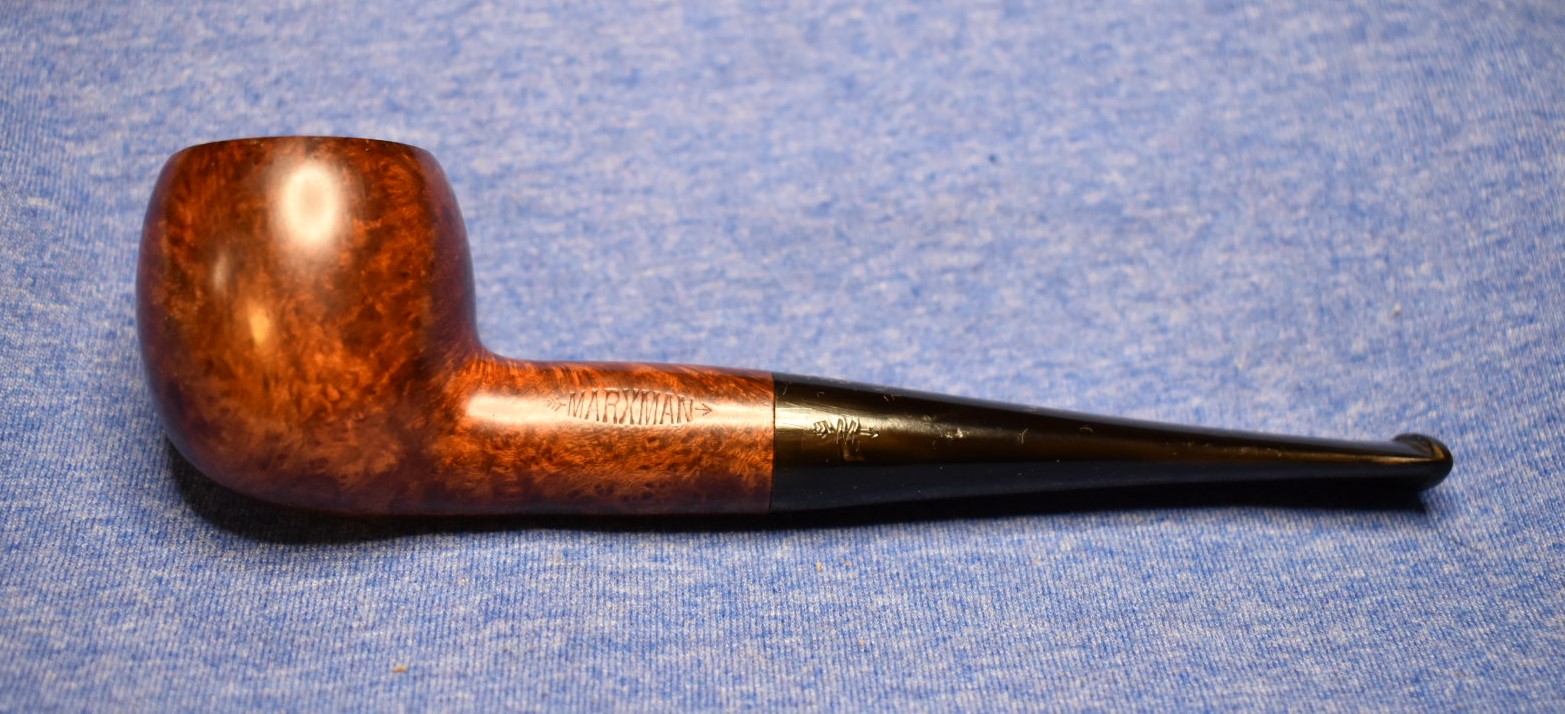
Here is how she was looking at this time:


I decided against filling the flaws. One, because I don’t like fills and two for my own pipe, I’ll know the flaws are there whether they are filled or not. Also I thought they added a bit of character to the pipe, showing her history, and umm – Slacker.
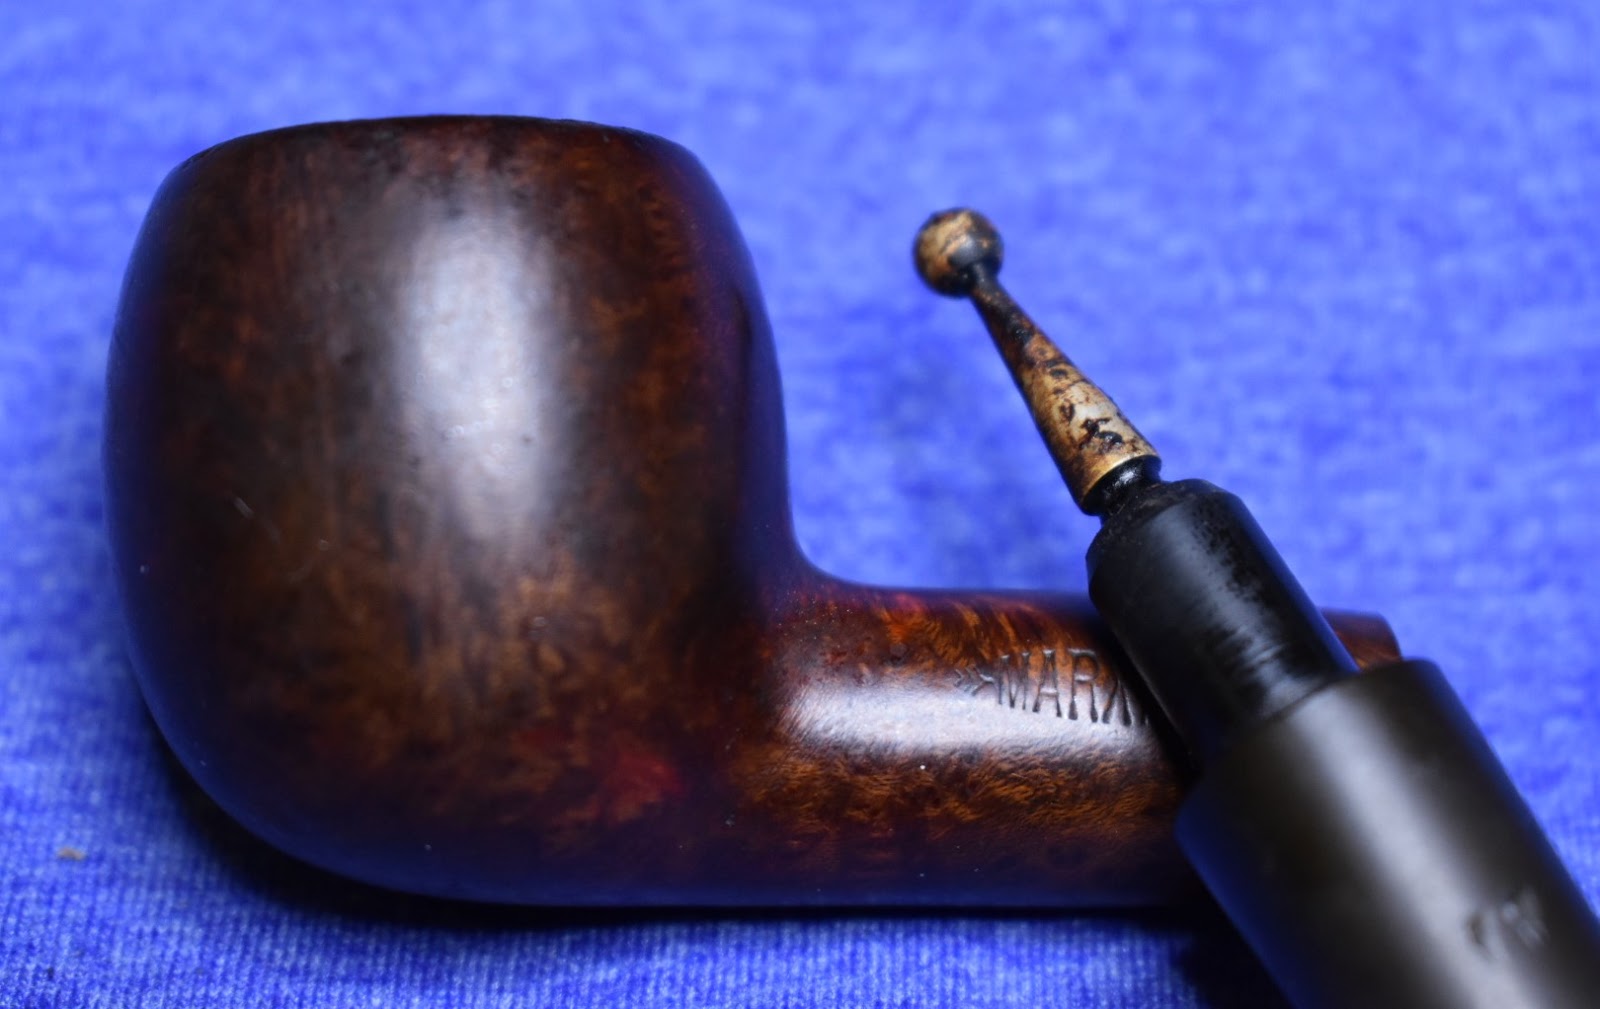
Returning to the stem. Having soaked in the Deoxidizing solution for close to an hour I figured the stem was ready to be beautiful. I removed the stem from the solution and allowed it to dip the excess solution back into the jar. Nitrile gloves are recommended when handling the solution. After the drip I placed the stem onto a coarse shop rag. Using the rag I vigorously rubbed the solution from the sem. It starts out feeling sticky but as it is buffed with the rag, the rag removes the oxidized layer and begins polishing the surface. The interior of the shank also needed to have the solution removed. For this I used a couple of absorbent pipe cleaners run through the stem. I try to work quickly and thoroughly because I want to get a layer of mineral oil onto the fresh vulcanite to keep it from oxidizing anew. The mineral oil is rubbed onto the stem with my fingers while a mineral oil dipped pipe cleaner is run through the draft hole. The photos below show the top and bottom views, respectively, of the stem at this time.


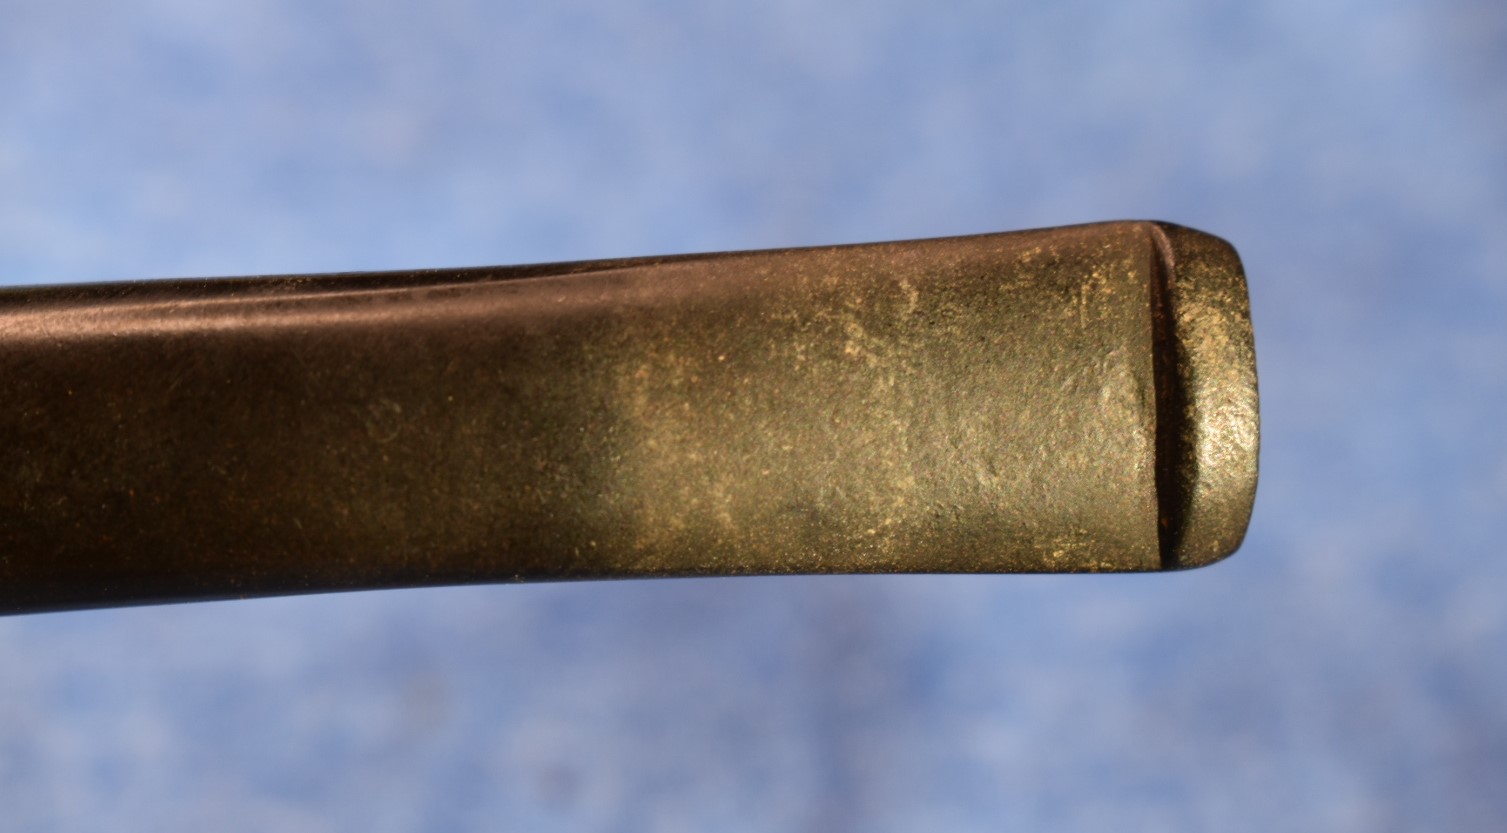
It was at this point I decided to use a little bit of Soft Scrub with Oxy on a make-up pad to se if there was still any oxidation remaining of the stem. While rubbing with the Soft Scrub I noticed something peculiar: The material on the pads had an off color. The color was more of a greenish black. Normally oxidized vulcanite has a golden brown color. I took photos because it struck me as odd.

In this first photo you can see normal oxidation from a vulcanite stem when rubbed with Soft Scrub.

In this photo you see the odd colored oxidation that was removed from the stem of the 3 star stem.
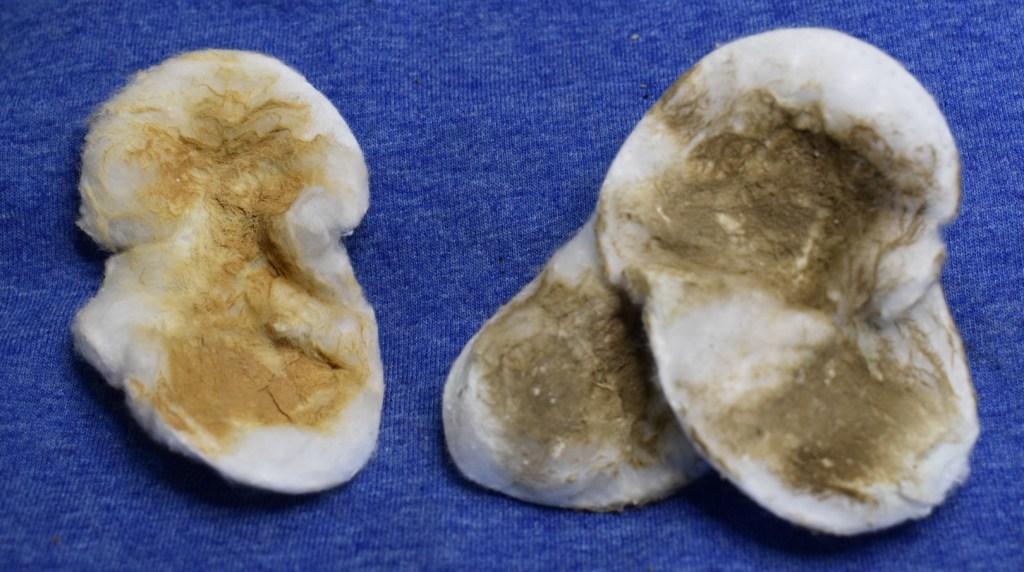
Here they are side by side. There was definitely something different about the vulcanite used in the 3 star stem.
The only areas that needed sanding more than just with the micro-mesh pads were the areas immediately around the button. I used a Bic lighter flame to “paint” over the stem. This is done by continuously moving the flame over the surface of the stem. Kind of like painting it. The heat from the lighter can raise dents in the vulcanite. It helped but did not eliminate the need for sanding. I Started with 400 wet/dry sandpaper for the stem top. While on the bottom I started with a small flat needle file. I gently removed material from the high areas around the dent. Once smoothed then I lightly sanded with 220 wet/dry sandpaper moistened with water. This was followed by 400 wet/dry sandpaper also moistened. Here, I applied a light coat of Obsidian Oil allowed it to penetrate for about one minute and wiped it with a paper towel.
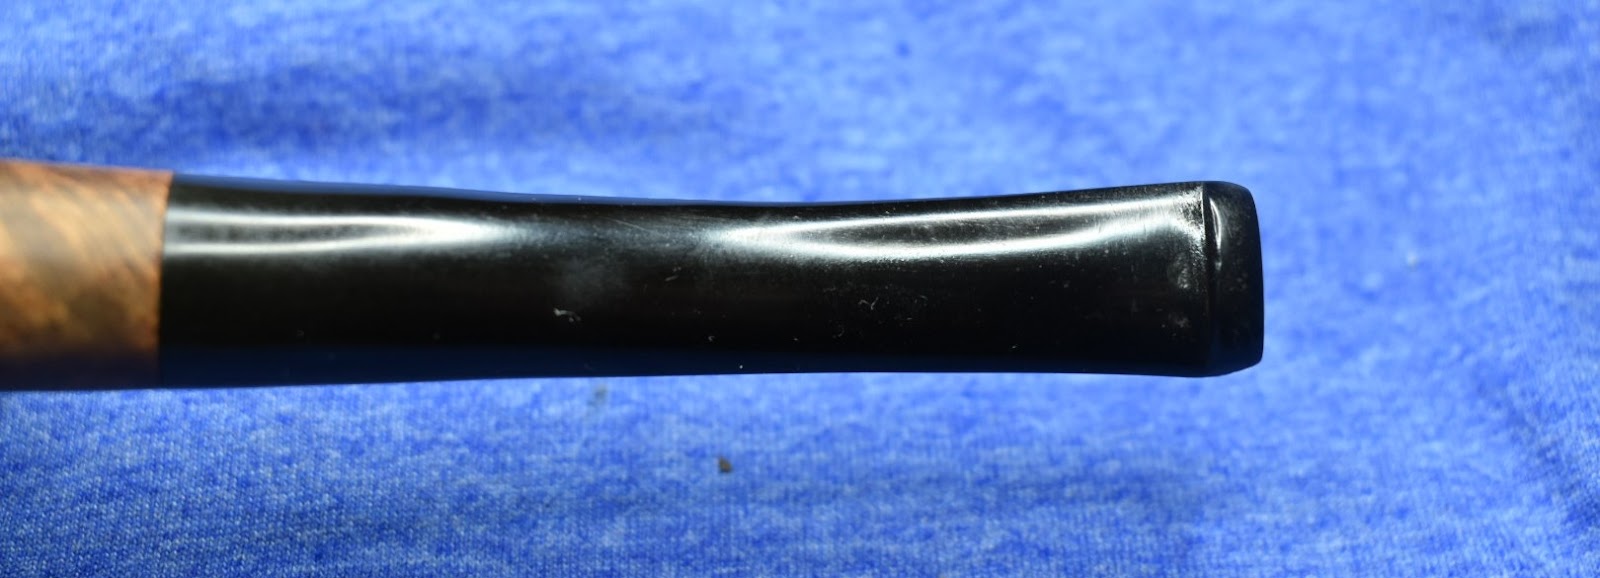
Next was the systematic process of micro-meshing the stem. I again started with the 1500 and 1800 pads used with water and wiped between with fresh Obsidian Oil. After the initial two pads I move through the 2400-12000 micro-mesh pads with Obsidian Oil wipes between each pad. At the end of this succession I use Lbepen Fine Polish and Extra Fine Polish on cotton rags to vigorously polish the stem. Here is how the stem looked after the sanding and polishing:

The end is nigh. The application of the Restoration Balm to the stummel breathes life into the wood grain. I used my finger tip to apply an even coating of the balm to the stummel and allow it to sit for 20 minutes to overnight depending on how late it has gotten.

This brings us to where we began with the first photo. After the Restoration Balm was rubbed from the stummel I wanted to add a bit more of a bend to the stem. I wanted it to match the bend that I had done with the large bent billiard 2 star Pipe by Lee.
 Pipe by Lee 2 start bent billiard before bend
 Pipe by Lee two star bent billiard after bend
Normally when bending a stem I used a heat gun to heat the stem. I continually move the stem back and forth in the heat while rotating it in my fingers. Every few seconds a bit of pressure is applied to see if the stem is warmed and is flexible enough to bend. If not more heat is added. Once the stem bends easily I used a jar as a guide for the curve. When I am happy with the bend I cool the stem in flowing cold water from the faucet.
With the 3 star stem I proceeded to follow the above process. The heating went as planned as did the bend over the jar. I Figured I would just hold the stem on the jar for a few seconds extra to allow the stem to cool and set the bend before I moved it into the cold water stream. That is when I heard and felt a pop. Hmm, I guess this one is not going to match the 2 star bent billiard.
I took this as a sign that I needed a reminder about humility. In the past few days I had been honored to have been mentioned in both Steve Laug’s Rebornpipes and in Mark Irwin’s Peterson Pipe Notes. Thank you universe for the reminder.
Now, as a retired science teacher I am thinking about causes for this break:
- Heavy handedness has to be the number one reason. I have bent many stems. My early attempts were bent and then re-bent to fix mistakes from the first bend. I had never experienced a break. Also, of potential note, when the break occurred I was not applying additional pressure – I was maintaining pressure.
- I do have multiple sclerosis and have numbness in my fingers (24-7, as they say). This could have contributed to the above #1.
- The 3 star stem was made of a different kind of vulcanite (lower quality?)
- The 3 star stem had a flaw that allowed it to break with heating, cooling and pressure.
In the end, I do not think it really matters as to the cause. The important part is how will the break be remedied. This is also not the end. I am thinking about ways to rejoin the above broken stem and I plan on posting about that restoration in the future. Until then, I thank you for reading the ramblings of an old pipe lover, even if this episode has a less than happy ending.
PS: If you have any ideas or suggestions please feel free to leave them in the comments. I will gladly give you credit for them in the upcoming restoration of the restoration.


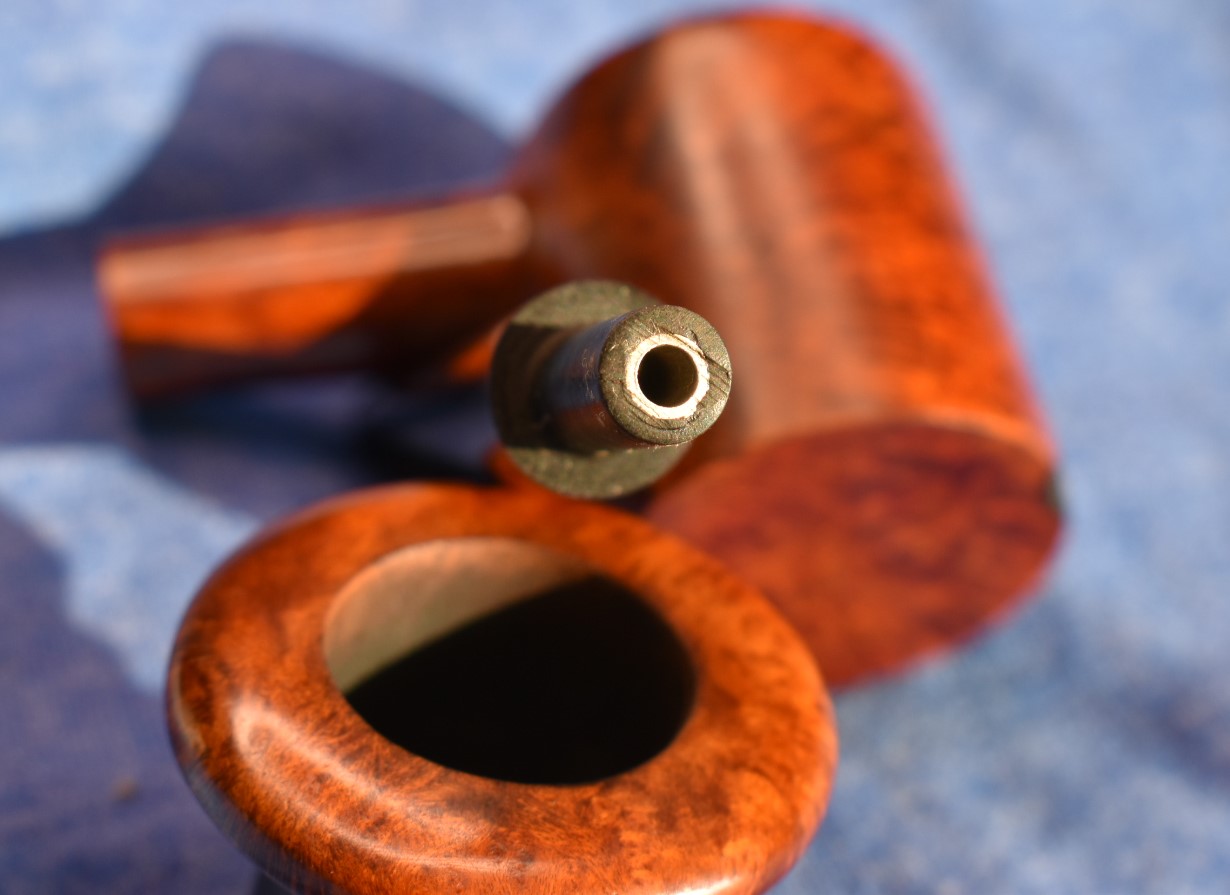


 The following two photos show the hole after the pipe was cleaned and reamed.


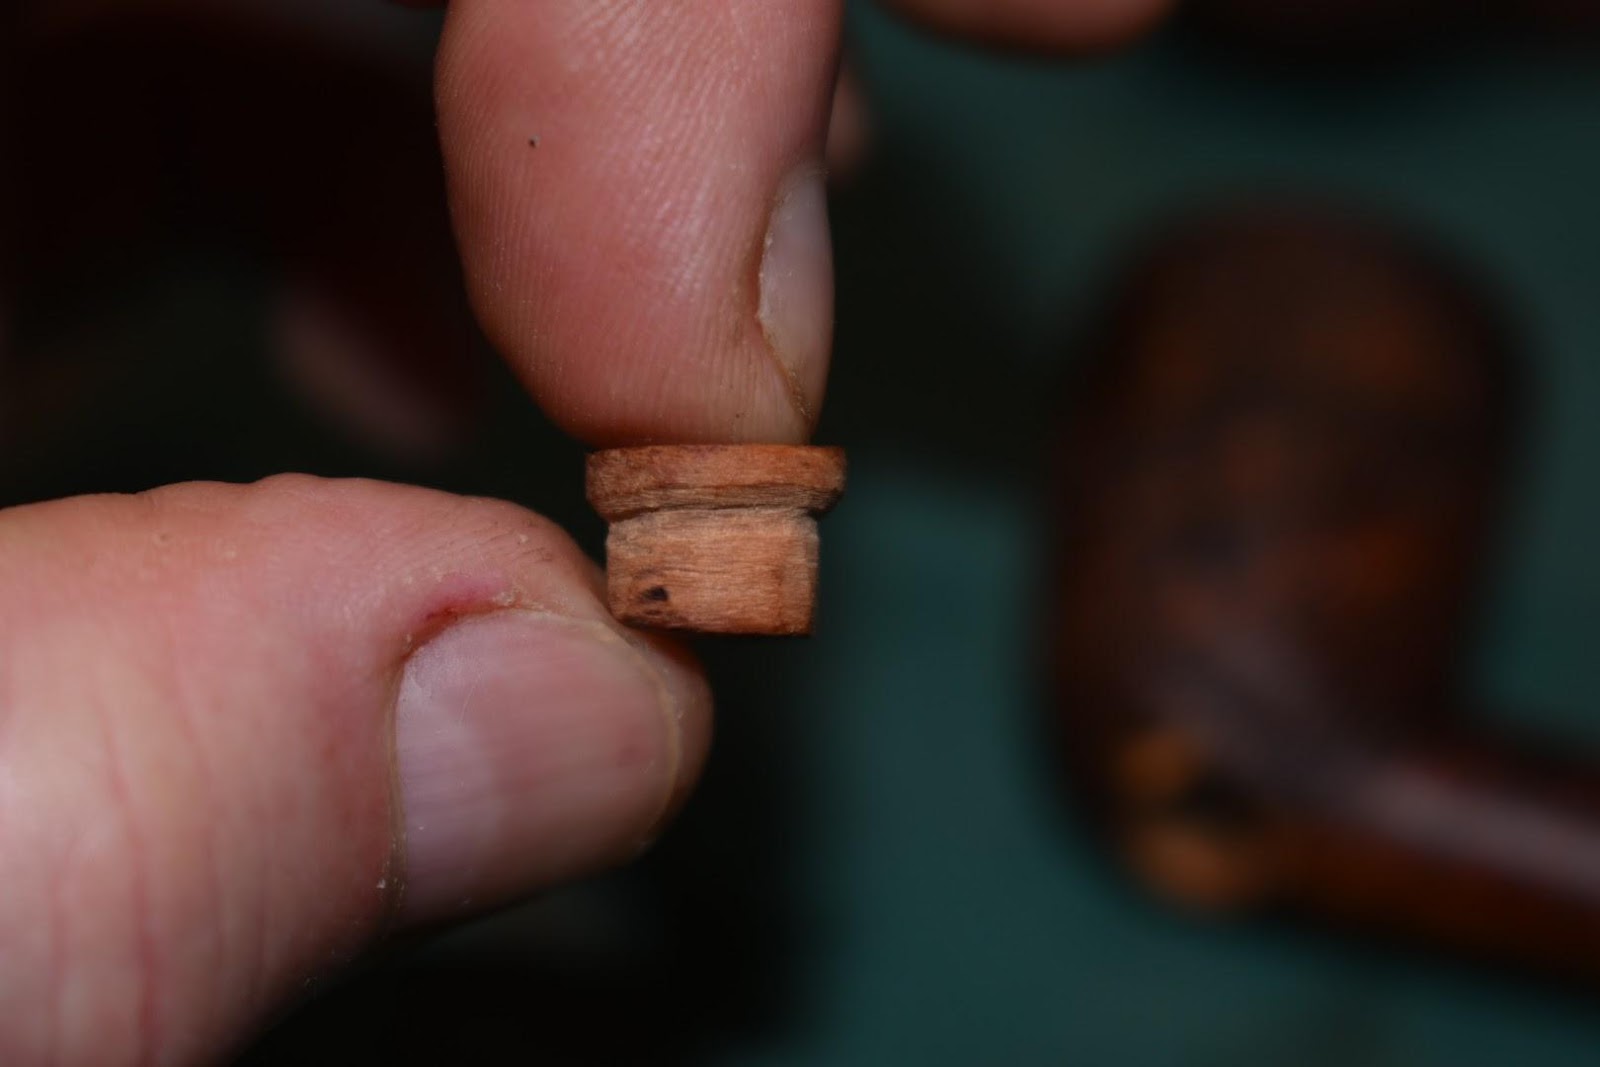

 It turned out that the plug was not quite thick enough to completely fill the hole on the bottom of the pipe. This led me to do some creative fill work.


